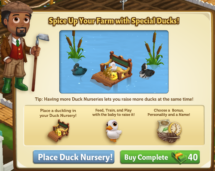
Coins Challenge, Quest Guide!

4 May 2014 FarmMaster 0


Rewards: 150 XP, 2000 Coins and 1 Baby Bottle


Rewards: 150 XP, 3000 Coins and 1 Baby Bottle


Rewards: 160 XP, 3250Coins and 1 Baby Bottle


Rewards: 175 XP, 3750 Coins and 1 Baby Bottle


Rewards: 180 XP, 4000 Coins and 1 Baby Bottle


Rewards: 185 XP, 4250 Coins and 1 Baby Bottle


Rewards: 200 XP, 4750 Coins and 1 Baby Bottle


Rewards: 210 XP, 5500 Coins and 1 Baby Bottle

Animal Care, Quest Guide!

4 May 2014 FarmMaster 0


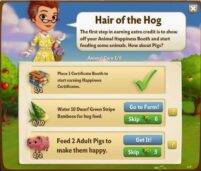
Rewards: 1 Favor, 30 XP, 300 Coins, 1 Happiness Certificate


Rewards: 1 Favor, 35 XP, 350 Coins, 1 Happiness Certificate

Rewards: 1 Favor, 40 XP, 400 Coins, 1 Happiness Certificate


Rewards: 1 Favor, 45 XP, 450 Coins, 1 Happiness Certificate

Rewards: 1 Favor, 50 XP, 500 Coins, 1 Happiness Certificate


Rewards: 1 Favor, 70 XP, 650 Coins, 1 Happiness Certificate

Rewards: 2 Favor, 90 XP, 900 Coins, 1 Happiness Certificate

Rewards: 2 Favor, 120 XP, 1100 Coins, 1 Happiness Certificate

Donkeys Have a Need For Speed, Guide!

30 April 2014 FarmMaster 0

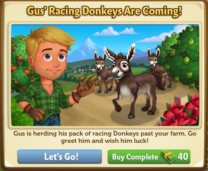
Gus is herding his pack of racing Donkeys past your farm and it seems that one of them has wandered onto your farm. Show that you can take good care of the Donkey and you’ll be able to keep him!

If you are 15 or higher, you will see the following pop-up; click on “Let’s Go!” to get started.

After talking to Gus you will see the Befriend the Donkey Quest Menu. It shows you all of the tasks you have to complete to keep the racing Donkey on your Farm. 

Donkey2
Notes:
  • If you close this menu and want to access it later to view your progress, just click on the Donkey to see the tasks.
  • You can also click on the Donkey Cart once it is built to check on your progress.
  • You can complete the tasks in any order.
Task 1 – Building the Donkey Cart
To build the Donkey Cart, you’ll need to collect the following items:
  • Donkey Nails
  • Donkey Boards
  • Donkey Bowls
Click on the “Post” button to request Donkey Nails in your game feed. Click on the “Ask” buttons to request Donkey Boards and Donkey Bowls from your Neighbors. If you do not wish to wait for your friends, you can skip any of these tasks for Farm Bucks.
Donkey3
Note: You can send a request for materials to your Friends every 18 hours.
Donkey4

Once you have collected the required items, click on the “Start Building!” button at the bottom of the construction menu. In order to build the Donkey Cart you’ll need to hire Friends to help you finish the job!
To get help from Friends click on the “Ask Friends” button to send some crew requests to your Friends. When they accept, you’ll see the spots in the Builder Menu begin to fill. If you do not want to wait for your friends, click the “Hire One” button to purchase crew members with Farm Bucks. Once you have successfully filled all 4 spots, click on the “Finish Building” button.
Task 2 – Collect 2 Donkey Treats
To collect two Donkey Treats you have to help Walter with his Quests! Click on the “Go to Quest!” button to access Walter’s Quests. You have to fulfill the following parts:


Donkey5
Donkey6
After each finished Quest, you will see the following pop-up:
Donkey7
Click on the “Share” button to post a reward feed for your Friends. 
Task 3 – Craft 3 Stuffed Donkey Toys
After completing Walter’s quests you have to craft 3 stuffed Donkey Toys from your Workshop. Click on the “Make It” button to access your workshop.
The requirements for a stuffed Donkey Toy are Donkey Tails and Felt Rolls. Note: Click on the “Post” button to request Donkey Tails in your game feed. Click on “Craft” to craft Felt Rolls out of Wool. You can get Wool by feeding Adult Sheep and Rabbits (Feeding Prized Sheep and Rabbits does not count!)
 Donkey8
If you complete all tasks the Donkey will stay on your farm. You will see the following pop-up once you have complete all tasks: 

Donkey9
Additional Information:
  • You have 21days to complete the Donkey tasks. If you do not complete them, the Donkey will disappear and you will be unable to claim him!
  • If you want to see how much time you have left, hover your cursor over the Donkey or the Donkey Cart.
  • You can only complete the tasks once!
  • After completing the feature you will have the opportunity to purchase Donkeys from the Market for Farm Bucks for a limited period of time.

Big Harvest Just Got Better!

28 April 2014 FarmMaster 0

Early Bird Catches The Worm,Quest Preview!

26 April 2014 FarmMaster 0
*Pre-release information subject to change prior to release on April 29, 2014*
Quest 1:
  1. Place the Early Bird Tree on your Farm
  2. Water 10 Wheat
  3. Water 2 Rubber Trees

Quest 2:
  1. Collect 5 Buckets of Worms (Post to Game Feed)
  2. Feed 3 Adult Goats
  3. Craft 3 Red Yarn in your Workshop
Red Yarn Recipe
Quest 3:
  1. Use 3 Farmhands on your Farm
  2. Complete 10 helpful actions on your Neighbors’ Farms
  3. Craft 2 pairs of Blue Rubber Gloves in your Workshop
Blue Rubber Glove Recipe
Quest 4:
  1. Collect 5 Reptile Terrariums (Post to Game Feed)
  2. Harvest 15 Pumpkins
  3. Craft 2 Pumpkin Soups in your Kitchen


Pumpkin Soup Recipe
Quest 5:
  1. Harvest your Hen House 1 time
  2. Feed 4 Adult Chickens
  3. Craft 4 Crustless Egg White Quiche in your Kitchen
Crustless Egg White Quiche
Quest 6:
  1. Harvest your Goat Shelter 2 times
  2. Harvest 4 Peach Trees
  3. Craft 2 Peach Lemonade in your Kitchen
Peach Lemonade
Quest 7:
  1. Collect 5 Fish Bowls (Post to Game Feed)
  2. Feed 4 Adult Goats
  3. Craft 4 Custards in your Kitchen
Kitchen craft 43 Custard
Quest 8:
  1. Harvest your Sheep Shack 2 times
  2. Feed 4 Adult Sheep
  3. Craft 3 Sheep Salt Blocks in your Kitchen
Sheep Salt Block Recipe
QUEST ITEMS TO BE POSTED TO GAME FEED:

Early Bird Quest Items

Unlock the Exclusive Anise Crop Packet With the Butterfly Feeder!

22 April 2014 FarmMaster 0

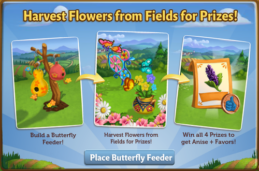
Introducing…the Butterfly Feeder! This colorful new feature will allow you to unlock special rewards for harvesting Flowers from Fields. Once you have collected all four prizes, you will win the Anise Crop Packet and extra Favors!

If you are level 25 or higher, you will see the following pop-up. Click on the “Place Butterfly Feeder” button to get started.
   
Before you can earn the special prizes, you will need to build your Butterfly Feeder. Your first step is collecting Building Materials. You will need the following items to start building your Feeder:
  • Butterfly Bedding
  • Butterfly Posts
  • Butterfly Paper
To collect Butterfly Bedding, click on the “Post” button to post to your Facebook wall; you will get the parts when your friends click on it, or when you click on a similar newsfeed post.
Click on the “Ask” button to send requests for Butterfly Posts and Butterfly Paper to your Neighbors. If you do not wish to wait for your Friends, you can skip any of these tasks for Farm Bucks.
  Butterfly2
Note: You can send a request for materials to your Friends every 18 hours.
Once you have collected the required items, click on the “Start Building” button at the bottom of the construction Menu. 
Now that your Butterfly Feeder is almost complete, you will need to hire Friends to help you finish the job. The Butterfly Feeder requires four additional helpers, so click on the “Ask Friends” button to send some crew requests to your Friends. When they accept, you will see the spots in the Building Menu begin to fill. If you do not wish to wait for your friends, click on the “Hire One” button to purchase crew members with Farm Bucks. Once you have successfully filled all four spots, click on the “Finish Building” button. 


Butterfly3

Using the Butterfly Feeder:
The Butterfly Feeder feature has four stages. Each stage requires a certain amount of Flowers harvested from Fields. When you harvest Flowers from your fields, they will fill your Flower bar. Once your bar is full, you can harvest the Butterfly Feeder.
To see your bar, click on the Butterfly Feeder to open the main menu. Your bar is located on the bottom of this screen. The number at the bottom of the bar indicates how many harvested Flowers you need and your current progress towards this goal.
Butterfly4
As you complete each stage you will unlock a new prize. The stages and respective prizes are as follows:
  • Stage 1: Set of 5 Pinwheels
  • Stage 2: Set of 5 Elaborate Pinwheels
  • Stage 3: Set of 2 Butterfly Planters
  • Stage 4: Set of 2 Elaborate Butterfly Planters
Once you have harvested enough Flowers, you will be able to harvest your Clipboard by clicking on it.
Butterfly5
The more Fields you have on the farm and the more Fertilizer you use, the faster you fill your bar.
If you do not want to wait to fill the Flower bar, you can use Farm Bucks to skip these steps and get the next prize right away! 
Anise Crop Packet:
Once you have earned all four of your Butterfly prizes, you can claim your Anise Crop Packet! The Anise is used in high value recipes in the Crafting Kitchen and Prized Horseradish are worth more points at the County Fair. If you would like a tutorial on the Crafting Kitchen and County Fair, please view our Official Guides: Crafting Kitchen & County Fair.
In addition, you will win 10 Farm Favors! You can use Farm Favors to upgrade your Farm!
Click the “Share and Go To Market” button to purchase your first Packet for Coins.
  Butterfly6
Additional Information:
  • You are limited to one Butterfly Feeder per farm.
  • You have 10 days to earn the four prizes. If you do not collect them all, prizes will disappear and you will be unable to claim them. 
  • You can purchase additional prizes in the General Store for Farm Bucks. 
  • Harvesting from plots does not count towards the Butterfly Feeder. Only harvesting Flowers from Fields will count.
  • If you want to see how much time you have left to claim your Sets, hover your cursor over the Butterfly Feeder.

“Mother’s Day Memories” Quest Guide!

22 April 2014 FarmMaster 0
Mother’s Day Memories Quest


Reward: 1 Favor, 30 XP, 300 Coins


Reward: 1 Favor, 35 XP, 350 Coins

Reward: 1 Favor, 40 XP, 400 Coins

Reward: 1 Favor, 45 XP, 450 Coins

Reward: 1 Favor, 50 XP, 550 Coins

Reward: 1 Favor, 70 XP, 650 Coins

Reward: 2 Favor, 90 XP, 900 Coins

Reward: 2 Favor, 120 XP, 1100 Coins

Build your Early Bird Tree!

18 April 2014 FarmMaster 0
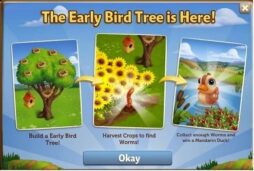
Soon in FarmVille 2 a new construction: “The Early Bird Tree“.
Collect Worms and Win a Mandarin Duck!


Enjoy Farmers!

No Image

FarmVille 2: Country Escape Basic Gameplay Guide

18 April 2014 FarmMaster 0
FV2M-LogoMaster_300x225
Welcome to the FarmVille 2: Country Escape Basic Gameplay Guide. Find everything you need to know about playing FarmVille 2: Country Escape here!
Currency
  • Coins – You will need lots of Coins to purchase items in FarmVille 2: Country Escape. Earning Coins can be done in many ways, such as the Farm Order Board, selling goods to friends, and more!
  • Keys – Keys are a premium currency. You will start off with a bunch of Keys that you can use to help purchase items in the General Store or speed up various parts of the game. You can earn Keys by completing certain quests, and you might even find some in Hope Chests!
  • Stamps – At level 16 you will meet Eagle Eye Eddie. Fill Eddie’s daily orders to earn Stamps, which are needed to purchase Prized Animals. 
currency
Water
Unlike FarmVille 2 on the web, water in Country Escape flows freely! When you run out of water, simply tap the well, pond, or the cove anytime you need water. You can store up to 20 waters, but they don’t take up any inventory space. You can also send water to your web farm, after reaching level 5 in Country Escape! Be on the lookout for the red pickup truck to send goods back and forth to your web farm!
Quests
The Farmer’s Almanac is where you will find your quests. Find the Almanac on the lower left of your game screen. Quests can help you progress through the game, and give great rewards such as XP and Keys!
IMG_0250
Upgrading your Barn
As you progress in the game, you will need more space in your Barn to store your goods. To upgrade your Barn you will need Coins, and other items, such as Nails and Padlocks. Nails and Padlocks can be found while Foraging in Grandma’s Glade, or other areas, such as Pappy’s Pond, the Mine or Pier. Tap on the Upgrade Storage box inside the Barn to see what you need to get more space!
IMG_0313
Farm Order Board
Your Farm Order Board is where you can easily sell your goods to earn Coins and XP. If you have items being asked for on the Farm Order Board you will see a green checkmark. If you don’t like the order being asked for, simply click the X above the order and a new order will appear in a few minutes.
IMG_0326
Farm Hands
Send your Farm Hands to work at Grandma’s Glade, Pappy’s Pond, and other locations around your farm to find the rarest and most valuable goods! Use the Farm House to keep track of your Farm Hands! Your Farm Hands relax and unwind here when you don’t have them busy exploring and working elsewhere on your farm.
IMG_0328
Farm Stand
The Farm Stand lets you sell the goods you make on your farm to any other player in the game, anywhere in the world! You can also use the Farm Stand to buy goods you need quickly from other players. Need one more Blackberry to make a pie? See if there’s one for sale at the Farm Stand!
farmstand
Buying Goods
You can buy goods from friends, members of your Co-Op or anyone playing around the world after level 7! You can find the Buy Goods button inside the Farm Stand, or buy taping your mailbox. To find goods from friends or Co-Op friends, tap on the tab with the people icon. The globe icon will show you players from anywhere in the world that are selling goods. This section will update every few minutes!
buy goods


Neighbor Visits
Once you reach level 6 you will be able to visit your friends’ farms! Tap on the smiley face icon on the lower right of your game screen. Any friend you have on Facebook that is playing FarmVille 2: Country Escape will appear on your neighbor bar. Tap any of your friends to visit their farm. Once you are on their farm, you will have the option to fertilize up to 5 of their crops, trees or animals. 
IMG_0327
Friendship Fertilizer
When visiting neighbors you will use Friendship Fertilizer to give your friend’s crops, trees, and animals a boost! Your friends will get extra goods when harvesting their fertilized crops, trees or animals. 
IMG_0318

Speed Seed

Speed Seed will help you speed up your crops, trees, and animals and make them ready to be harvested instantly. You can ask for Speed Seed from your friends by tapping on the Speed Seed icon on the top left of your game. You can send Speed Seed to your friends every day by tapping your mailbox located behind your Farm House. 
IMG_0259
Expansions and Clearables
Similar to FarmVille 2 on the web, you will be able to expand your farm as you level up and need room. When a plot of land is ready to be purchased, you will see a green checkmark appear on the “for sale” sign. Simply tap the expansion plot and drag the coins onto the spot you want to expand to. Some expansions have items that need to be cleared with shovels. You can obtain shovels from the Toolshed, which can be found in the Workshops tab of the General Store.
expansion
Web Connected Farm
When you reach level 5 in Country Escape, you will be able to send goods to your web (Facebook) FarmVille 2 farm. Your web farm must be at least level 8 to receive goods. Send water, sugar, and more to your farm by filling up the red pickup truck located on your farm’s roadway. Visit your web farm to collect your goods, and send goods back to your Country Escape farm!
IMG_0310
Prize Wheel
When you reach level 7 you will unlock the Prize Wheel. Spin the Prize Wheel every day for awesome prizes! If you want extra spins you can invite friends to the game, which will give you extra spins forever!
IMG_0275
Co-Ops
Reach level 11 to unlock Co-Ops. You will be able to either join an existing Co-Op or create your own! To access Co-Ops, tap on the sign-post behind your Mailbox. You can search for Co-Ops, create a new one, or see who is in your Co-Op if you are already a member of one.  Once you are a member of a Co-Op, you can chat with others, and request Helping Hands to help you explore Farm Scenes.  
IMG_0333
Exploring Farm Scenes
When you reach level 8 you will unlock Grandma’s Glade. Send your Farm Hands to Grandma’s Glade to find rare items, such as Blackberries, Chives and Nails. 
There are many Farm Scenes all around your farm. As you expand and level up, you can unlock more Farm Scenes where your Farm Hands can find different rare items in. 
IMG_0268
IMG_0272
When you reach level 12 you can unlock Pappy’s Pond. A new Farm Hand, Dakota will join your farm to help you catch Bass & Trout from Pappy’s Pond. If you’re in a Co-Op you can request a Helping Hand to help you fish!
IMG_0291

FarmVille 2: Country Escape Getting Started Guide

18 April 2014 FarmMaster 0
Welcome to the FarmVille 2: Country Escape Getting Started Guide. This guide will help you with the basics of the game, and help you with the first 4 levels. 
Click here for the FarmVille 2: Country Escape Basic Gameplay Guide, which will explain more aspects of the game. 
Marie will welcome you to the farm. She is a friend of your Gradparents’ and will help you settle in. 
Marie: Country Escape
First you’ll need to restore the Farm House by dragging the hammer onto the house to build it. Repeat this to restore the Barn, which will serve as your inventory. 
Restore Farm House
Each day you will receive a Hope Chest in front of your Farm House. Open it up to find awesome rewards!  You will find more of these chests scattered around the farm as you expand!
Hope Chest
Water runs freely on your farm, but you will need to collect frequently for your crops and trees. You can get water from wells and the cove. Drag the water onto your crops and trees so they can grow!
waterwell
waterwell2
Your Farm Order Board is where you can easily sell your goods to earn coins and XP. If you have items being asked for on the Farm Order board you will see a green checkmark. If you don’t like the order being asked for, simply click the X above the order and a new order will appear in a few minutes. 
 orderboard


IMG_0248
The Farmer’s Almanac is where you will find your quests. Find the Almanac on the lower left of your game screen. Quests can help you progress through the game, and give you great rewards such as XP and Keys!
almanac
The General Store is located on the lower left of your game screen. You can find Crops, Animals, Workshops, and Decorations for sale in the General Store.
The first Workshop you will place on your farm is the Windmill. Open the General Store to the Workshop tab, find the Windmill, hold it and drag it onto your farm. You will craft Flour and Sugar in the Windmill. TIP: Workshops do not require any building supplies to complete! Simply place the Workshop and a timer will let you know whe it’ll be ready for use.
 windmill
IMG_0256

Ribbit! Earn an Albino Frog with The Tree Frog Catching Kit!

17 April 2014 FarmMaster 0

Hey, did you see something hoppin’ down by the river? It looks like Special Tree Frogs have made their way to FarmVille 2! These helpful frogs will speed up the growth of your trees if you attract them with water plants and catch them with your Tree Frog Catching Kit. You can also earn lovely rewards by feeding the Tree Frogs, including the exclusive Albino Tree Frog!!

Note: The Albino Tree Frog will be available to use on Trees and Groves for 20 uses. After 20 uses, the Albino Tree Frog will expire and become a pet (it will count towards your Animal Max Cap, but will not require food nor will it help on trees).
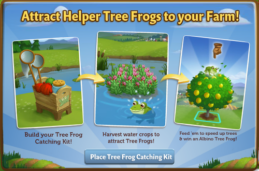
If you are level 11 or higher, you will see the following pop-up. Click on the “Place Tree Frog Catching Kit” button to place the House on your farm.
Building the Tree Frog Catching Kit:
Your first step is building your Tree Frog Catching Kit. You will need the following items to start construction: 
  • Frog Catching Nets
  • Frog Catching Gloves
  • Frog Boxes
To collect Frog Catching Nets, click on the “Post” button to post to your Facebook wall; you will get the parts when your friends click on it, or when you click on a similar newsfeed post.
Click on the “Ask” button to send requests for Frog Catching Gloves and Frog Boxes to your Neighbors. If you do not wish to wait for your friends, you can skip any of these tasks for Farm Bucks.
Frog2

Once you have collected the required items, click on the “Start Building” button at the bottom of the construction menu. 
Now that your Tree Frog Catching Kit is almost complete, you will need some help from your Neighbors to finish the job. The Tree Frog Catching Kit requires four additional helpers, so click on the “Ask Friends” button to send some crew requests to your Friends. When they accept, you will see the spots in the Building Menu begin to fill. If you do not wish to wait for your friends, click on the “Hire One” button to purchase crew members with Farm Bucks. Once you have successfully filled all four spots, click on the “Finish and Share” button.
Frog3
Using the Tree Frog Catching Kit:
Click on the Tree Frog Catching Kit to open the main menu. 
Frog4

This menu shows how many Tree Frogs you have fed and what prizes you are currently eligible to redeem. 

A – How many Flies you need and your current progress towards this goal.
B – The button to use when you want to purchase Water Crops to plant from the General Store.
C – The button to use when you want to craft Flies via the Crafting Workshop. 
D – The total amount of Flies you have crafted. As you feed Tree Frogs, this number decreases.
E – The button to use when you want to purchase Giant Lily Pads from the Blue Jay menu (see “Giant Lily ” section below).
F – The number of Farm Bucks required to purchase a Prize.
Finding Tree Frogs:
Everybody knows that Frogs love damp environments, so plant some Water Crops to attract them and keep an eye out when harvesting!
Tree Frogs will appear on your farm after you harvest any of the following Water Crops: 
  • Cow Lily (Limited Edition)
  • Wasabi Packet
  • Indian Lotus Packet
  • Cranberry
  • White Lily
  • Rice
  • Watercress
  • Cattail
  • Wild Rice
  • Water Chestnut
  • Taro
  • American Lotus
Frog5
Once you find a Tree Frog, it will have a thought bubble to indicate if it’s hungry or ready to use on Trees and Groves:
  Frog6
  • Hungry for Flies (Fly thought bubble): The Tree Frog is hungry for Flies (see the “Crafting Flies” section below).
  • Ready to Help (Tree thought bubble): The Tree Frog is ready to help you tend to Trees and Groves (see the “Using Tree Frogs” section below).
Note: You are limited to a total of 10 Tree Frogs at a time on any given farm.
Giant Lily Pads:
Giant Lily Pads attract more Tree Frogs! You can purchase as many Pads as you wish for Farm Bucks from the Tree Frog Catching Kit menu, but you only need 5 to get the max chance at attracting Tree Frogs when you harvest Water Crops. Simply click the Tree Frog Catching Kit, and then click on the “Giant lily Pads” button.


Frog7


Crafting Flies:
In order to use Tree Frogs (Hungry for Flies), you must craft the Fly Recipes. Note: Once they are fed, (Tree thought bubble), you will be able to use them on Trees and Groves (see “Using Tree Frogs” section below). You can craft your very own Flies via the Crafting Workshop.
From the Tree Frog Catching Kit menu, click on the “Craft” button to open the Workshop. You can choose from three different Recipes:
  • 1 Fly (Fly Paper): The required Ingredients are Rice  and Yellow Swamp Irises (Yellow Swamp Iris is a limited edition Crop that you can purchase for Coins from the General Store). You will receive a total of one Fly.
Frog8

  • 2 Flies (Fly Swatter): The required Ingredients are Heirloom Wood and Fly Swatter Mash. You will receive a total of two Flies.
Frog9

  • 3 Flies (Fly Spray): The required Ingredients are White Lilies  and Empty Spray Bottles. You will receive a total of three Flies.
Frog10
Using Tree Frogs:
Feeding your crafted Flies to a Tree frog will allow you to use it to tend to your Trees and Groves. To feed a hungry Tree Frog (Treat thought bubble), simply click on it.
Frog11
To use the fed Tree Frog (Tree thought bubble), simply click on it, and then drag and drop it over a Tree or Grove. Similar to Farmhands, a thought bubble will indicate that your Tree Frog will help you with one of the following tasks per Tree and/or Grove:
  • Water: If your Tree or Grove is not watered, use your Tree Frog for Water
  • Speed-Grow: If your Tree or Grove is watered, use your Tree Frog for Speed-Grow
  • Ready for Harvest: If your Tree or Grove is ready to be harvested, use your  Tree Frog for bonus output
Frog12

Once you have used your Tree Frog, it will disappear and you will be unable to use that particular Tree Frog a second time.
Note: The Albino Tree Frog speeds up two Groves or Trees at once.
Earning Prizes:

Once you have fed enough Tree Frogs, you can earn some lovely prizes. Click on your Tree Frog Catching Kit to open up your progress menu.

At the bottom of this menu, there are a total of four that can be earned through feeding Tree Frogs:

  • Three Frog Garden Statues
  • Cow Lily Crop Packet (This exclusive Crop Packet can be used as many times as you wish for 7 days)
  • Southern Live Oak Tree
  • Albino Tree Frog. This little one speeds up two Groves or trees at once for 20 uses!
Note: All four of these prizes can be earned as many times as you’d like as long as you have fed enough Tree Frogs.
Once you have fed enough Tree Frogs, you will earn the helpful Albino Tree Frog!
Frog13
Note: You will need to redeem each of the above prizes at least once before you get credit towards the Albino Tree Frog. The Albino Tree Frog will be available to use on Trees and Groves for 20 uses. After that time, the Albino Tree Frog will live on your farm as a pet and you will be unable to use him to speed up Trees and Groves. In addition, it will count towards your Animal max cap. 
Additional Information:
  • You have 21 days to collect the Tree Frog Catching Kit prizes. If you do not collect them all, the prizes will disappear and you will be unable to claim them.
  • You are limited to a total of 10 Tree Frogs on your farm at once and you can only use each Tree Frog once.
  • If you do not wish to use the Tree Frog Catching Kit feature, it can be sold or stored in your Inventory.
  • You can only get credit towards the Tree Frog Catching Kit from feeding Tree Frogs on your own farm. You will not get credit from Neighbor visits.
  • If you want to see how much time you have left to claim Tree Frog Catching Kit prizes, hover your cursor over the Tree Frog Catching Kit.
  • You are limited to one Tree Frog Catching Kit per farm.

The Egg Hunt Table, Official Guide!

9 April 2014 FarmMaster 0


Marie wants to play a fun Springtime game with you! She will hide Springtime Goodies inside Surprise Eggs near Adult Rabbits. Feed your Adult rabbits to find them and open them at the Egg Hunt Table. Collect all of the Goodies and you will receive a baby Blue Silkie Bantam Chicken!
If you are level 12 or higher, you will see the following pop-up. Click on the “Place Egg Hunt Table” button to get started.
Egg1
Building the Egg Hunt Table:

Your first step is collecting construction parts. You will need the following items to start building your Egg hunt Tabe:

  • Bunny Garlands
  • Jelly Bean Jars
  • Decorating Posts
To collect Bunny Garlands, click on the “Post” button to post to your Facebook wall – you will get the parts when your friends click on it, or when you click on a similar newsfeed post. 
Click on the “Ask” button to send requests for Jelly Bean Jars and Decorating Posts to your Neighbors. If you do not wish to wait for your friends, you can skip any of these tasks for Farm Bucks.
Egg2
Note: You can post and send requests for materials to your friends every 18 hours.

Once you have collected the required items, click on the “Start Building” button at the bottom of the construction Menu. 
Now that the Egg Hunt Table  is almost complete, you will need some assistance from your Neighbors to finish the job. The Egg Hunt Table requires three additional helpers, so click on the “Ask Friends” button to send some crew requests to your friends. When they accept, you will see the spots in the Build Menu begin to fill. If you do not wish to wait for your friends, click on the “Hire One” button to purchase crew members with Farm Bucks. Once you have successfully filled all three spots, click on the “Finish & Share” button.

Egg3
Using the Egg Hunt Table:  
The Egg hunt Table requires a certain amount of Adult Rabbits on your farm that are not Prized to be functional. If you lack any requirements (such as not having enough Rabbits), the game will tell you what you are missing. When you feed your Adult Rabbits, they will drop Wool, which can be found in the “Ingredients” section of your Inventory.
Tip: Limited Edition Rabbits produce more Wool when fed!
Collecting Surprise Eggs: 
In order to get the Springtime Goodies, you will need to collect Surprise Eggs and then crack open them. To see your Surprise Egg count, click on the Egg Hunt Table to open the main menu. Your Surprise Egg total is located on the left-hand side of this screen. The number at the bottom of the Surprise Eggs indicates how many you currently have in your Inventory.


Egg4
  
Crafting Surprise Eggs: You can craft your very own Surprise Eggs via the Crafting Kitchen. From the Egg Hunt Table menu, click on the “Craft” button to open the Kitchen. The Recipe for Surprise Eggs  is as follows: 
  • Surprise Egg: The required Ingredients are Eggs and Spring Candy Bags. Note: To get Eggs, feed your Adult Chicken (feeding Prized Chicken does not count).
Egg5
  
Feeding Adult Rabbits: You can find Surprise Eggs by feeding your Adult Rabbits (feeding Prized Rabbits do not count). If you find some, they will appear on your farm in a similar fashion to Prize Goods.
  Egg6
When a Surprise Egg appears on your farm after harvesting, click on it and you will see the following pop-up:
  Egg7
Click on the turquoise “Share” button to post a feed to your wall. Your friends will be able click on this feed to claim some free Surprise Eggs for themselves too! Once you have clicked on the Surprise Eggs, it will be automatically added to your Egg Hunt Table. 
Once you have collected at least one Surprise Egg, you will be able to crack open it by clicking on the blue “Crack Open” button from the Egg Hunt Table menu.
Egg8
As you crack open Surprise Eggs, you will find Springtime Goodies, which will be automatically added to your Egg Hunt Table.
Springtime Goodies:  
To earn the baby Blue Silkie Bantam Chicken, you will need to collect types of Springtime Goodies. To get these Goodies, all you need to do is keep crack opening Surprise Eggs!
There are three types of Goodies you can receive:
  1. Jelly Beans
  2. Marshmallow Chicks
  3. Chocolate Bunnies
These Goodies are not used for crafting. Instead, they are automatically added to your Springtime Goodies collection. To earn the baby Blue Silkie Bantam Chicken, you will need to have Jelly Beans, Marshmallow Chicks and Chocolate Bunnies in your collection. A green check mark will indicate which Goodie you have completed. Once you have collected all three of Springtime Goodies, you can trade them in for the baby Blue Silkie Bantam Chicken !
Tip: The more Adult Rabbits you have on your Farm, the better your chances are of receiving Springtime Goodies.
If you do not want to wait to collect the Springtime Goodies, you can use Farm Bucks to skip these steps and get the new baby Blue Silkie Bantam Chicken right away!
Egg9


Your new baby Blue Silkie Bantam Chicken will need Baby Bottles to reach adulthood, just like your other animals. Once it has matured, it will produce Eggs.
Additional Information:
  • You have 21 days to earn the baby Blue Silkie Bantam Chicken. The timer at the bottom of your Egg Hunt Table menu indicates how long you have to collect the baby Chicken. If you do not collect it, the prize will disappear and you will be unable to claim it.
  • The Egg Hunt Table requires a minimum number of Adult Rabbits on any given farm in order to use it.
  • If you lack any requirements (such as not having enough Rabbits), the game will tell you what you are missing.
  • If you do not wish to use the Egg Hunt Table feature, it can be sold (frame only) or stored in your Inventory.
  • You can collect the baby Blue Silkie Bantam Chicken as many times as you wish (before the feature expires).
  • If you want to see how much time you have left to claim the baby Blue Silkie Bantam Chicken, hover your cursor over the Egg Hunt Table.
  • Limited to one Egg Hunt Table per farm.

Egg Hunt Table Construction!

6 April 2014 FarmMaster 0


Coming this Tuesday in Farmville 2, a new feature the Egg Hunt Table. Build the Egg Hunt Table and feed rabbits for a chance to get surprise egg. The adult rabbits you have the better chance of getting a surprise. You may also craft the surprise egg bat the Workshop. The beside the Spring Goodies Rewards you can also receive a Special Chicken that lays red egg.


Place the Egg Hunt Table in your farm.


Click on it and you can view the materials it will need to build it. Among the items are:
  • Bunny Garlands
  • Jelly Bean Jars
  • Decorating Posts


You will then need to collect these materials by either posting it to you wall and or ask friends for the materials.
Once all the slot are filled you can now have the completed Egg Hunt Table and now you can crack open Surprise Eggs!
The Egg Hunt Table will need adult rabbits. Feeding Adult Rabbits will give you a chance to find Surprise Eggs! You can crack open Surprise Eggs at the Egg Hunt Table to find Springtime Goodies. The final reward is a special Chicken that lays Red Eggs.

Surprise Eggs
You can also craft Surprise Egg and you will need the following items: Egg x8 and Spring Candy Bag x3. (Spring Candy Bags can be asked from friends).

Egg Hunt Table : Rewards


Baby Blue Silkie Bantam Chicken
Blue Silkie Bantam Chicken
Prized Blue Silkie Bantam Chicken


The Rabbit Rescue Station, Official Guide!

3 April 2014 FarmMaster 0

The Rabbit Rescue Station Is Here!

The Rabbit Rescue Station is a fictional part of the storyline in FarmVille 2, and is not actually affiliated with any real-world business or charity.
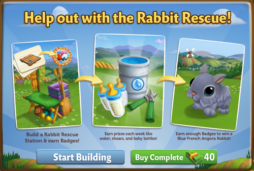
The Rabbit Rescue Station is here! Build a Rabbit Recue Station and earn Badges, which you can redeem for great rewards and the adorable baby Blue French Angora Rabbit. The Rabbit Rescue Station Feature is broken up into three consecutive stages that unlock over time. Click the links below to find out more information about each stage.
Stage 1
Stage 2 – Coming Soon
Stage 3 – Coming Soon
If you are level 12 or higher, you will see the following pop-up. Click on the “Okay” button to get started.
  
  
Before you can start crafting, you will need to build your Rabbit Rescue Station. Your first step is collecting Building Materials. You will need the following items to start building your Booth:
  • Rescue Ropes
  • Gurneys
  • Flower Sashes
To collect Rescue Ropes, click on the “Post” button to post to your Facebook wall – you will get the parts when your Friends click on it, or when you click on a similar newsfeed post.
Click on the “Ask” button to send requests for Gurneys and Flower Sashes to your Neighbors. If you do not wish to wait for your Friends, you can skip any of these tasks for Farm Bucks.
Rabbit2


Note: You can send a request for materials to your Friends every 18 hours.

Once you have collected the required items, click on the “Start Building” button at the bottom of the construction Menu. 

Now that the Rabbit Rescue Station is almost complete, you will need a little help from your Neighbors to finish the job. The Crafting Drive Booth requires four additional helpers, so click on the “Ask Friends” button to send some crew requests to your Friends. When they accept, you will see the spots in the Build Menu begin to fill. If you do not wish to wait for your Friends, click on the “Hire One” button to purchase crew members with Farm Bucks.
Rabbit3


Using the Rabbit Rescue Station:
Click on the Rabbit Rescue Station to open the main menu.
Rabbit4
This menu shows how many Points you have earned in the current week, what rewards you have redeemed and what rewards you are currently working towards. It also shows your cumulative points that go towards earning the baby Blue French Angora Rabbit (Final Reward).
A – The Points Total (cumulative amount of Points you have earned during crafting goods). You earn Points by crafting the Rabbit Rescue Station Recipes. Note: This number keeps counting up, and does not get reset every week (see “the Baby Blue French Angora Rabbit” section below for more details).
B – If you want to ask your Friends for Badges, click on this button and a request will post to your feed. 
C – The button to use when you want to purchase Badges for Farm Bucks.
D – Use these arrow buttons to scroll through the Rabbit Rescue Station Recipes.
E – The button to use when you want to craft the Rabbit Rescue Station Recipes (earn Badges).
F – The Rabbit Rescue Station bar, which tracks your progress towards Milestone Goals and earning the baby Blue French Angora Rabbit. Note: This bar will reset each week when the next Stage becomes available.
How to Get Badges in the Rabbit Rescue Station:
There are multiple ways to get Badges in the Rabbit Rescue Station:
  1. Crafting Recipes:
    1. The first Stage (Week 1) has 3 different Recipes, and then 2/3 new Recipes that are worth higher Points unlock the following Stages (Week 2 & 3).
    2. When new Recipes unlock, you can craft those, as well as the previously unlocked Recipes, which means you can craft up to 5 Recipes in parallel during Week 2, and up to 8 Recipes during Week 3!
    3. Ask your Friends for Donation Badges by posting a feed to your wall (See B. in the “Using the Rabbit Rescue Station” section above).
    4. Use your Farm Helpers! Each Farm Helper will drop a Donation Package after they’ve completed a Neighbor Visit task.
    5. Purchase Badges for Farm Bucks (See C. in the “Using the Rabbit Rescue Station” section above).
Rabbit Rescue Station Recipes:
In order to earn Badges, you must craft the the Rabbit Rescue Station Recipes. From the the Rabbit Rescue Station menu, click on the “Craft Recipe” button to open the Recipe menu.
Stage 1
The two Recipes for the Week 1 are as follows:
  • Energy Treats: The required Ingredients are Wheat and Animal Vitamin. You will receive a total of four Badges per Energy Treat crafted.
Rabbit5
  • Heirloom Animal Rafts: The required Ingredients are Heirloom Wood and Crafting Nails. You will receive a total of three Badges per Heirloom Animal Raft crafted. Note: To get Heirloom Pieces of Wood, harvest your Heirloom Pine Trees and Heirloom White Willow Trees. 


Rabbit6

  • Heirloom Rubber Boots: The required Ingredients are Heirloom Rubber Tree Drops and Fur. You will receive a total of two Badges per Heirloom Rubber Boots crafted. Note: To get Fur, feed your Adult Buffalo and Adult Deer (feeding your Prized Buffalo and Prized Deer do not count).

  Rabbit7
Farmhand Donation Packages:
In addition to Crafting, you can earn Badges from your Farmhands. As you use your Farmhands, they will donate a Package to you for the Rescue Station, which gives you Badges in the Station. These Packages linger on your farm and appear as a small Badge. Once you have found a Package, click on it and you will receive the following message:
Rabbit8


Click on the “Open Rescue Station and Share” button to share some Badges with Friends!
Earning Rewards:
In order to earn the Rabbit Rescue Station rewards, you will need to accrue enough Badges to hit your Milestone Goal. Once you have collected enough Badges for your current Milestone Goal, they will be automatically redeemed for some great rewards. After you redeem each reward, a green check mark will appear to indicate what Milestone Goal has been reached. Click on your Rescue Station to open up your progress menu. 
Stage 1
The Milestone Goals and respective rewards for Week 1 are as follows: 
  • Milestone 1:  +10 Water
  • Milestone 2:  +15 Water
  • Milestone 3:  +20 Water
  • Milestone 4:  1 Deluxe Sprinkler
The Baby Blue French Angora Rabbit:
The final reward for the Crafting Drive Booth is the baby Blue French Angora Rabbit. In order to earn this adorable Rabbit, you will need to earn enough Badges (Badges Total) towards the Crafting Drive Goal. The Crafting Drive Goal is based on the cumulative Badges you get over the 3-week period, and can be redeemed for the baby Blue French Angora Rabbit as soon as the Goal has been reached. Beside of the Baby Blue French Angora Rabbit, you also will earn 10 Farm Favors, which you can use to upgrade your Farm.
Rabbit9
If you do not want to wait to get the baby Blue French Angora Rabbit, you can use Farm Bucks to get enough Points and unlock the Rabbit right away! 
Additional Information:
  • Every week, the Rabbit Rescue Station bar is reset and you will now work towards a new set of rewards. Note: Your Badges Total (number below the baby Blue French Angora Rabbit) will not be reset.
  • You have 21 days to collect the rewards. If you do not collect them all, the rewards will disappear and you will be unable to claim them.
  • If you want to see how much time you have left to claim the Rabbit Rescue Station rewards, click on the
    Station and look at the timer below the “Get a Bunny.”
  • You are limited to one Rabbit Rescue Station per farm.
  • The Rabbit Rescue Station is unmovable.

Big Harvest Official Guide!

26 March 2014 FarmMaster 0
Big Harvest is only available to players who have unlocked Early Access. Unlocking Early Access means you not only get to play before everyone else, but you will also receive a FREE Field, an Exclusive version of the new Market Stall, and two weeks of access to the Pineberry Packet! General Access to Big Harvest will be Available on 3/28. 
Big Harvest Is Here!
Now that you have restored your family farm to its former glory, it’s time to take it to new heights of productivity! Inspired by your accomplishments, Cornelius has decided to start a new business that will supply accomplished farmers like yourself with upgrades that you can use to make your farm more bountiful than ever.

Cornelius believes you are ready to deal directly with the local townsfolk, so he’s giving you a new Order Board that you can use to earn Favors. Trade these Favors into Cornelius and unlock exciting new upgrades that will allow you to increase production and save space. Explore the limits of your farming creativity with the latest release from FarmVille 2, Big Harvest! 

If you are level 25 or higher, you will see the following pop-up. Click on the “Get Started!” button to get started.
Bigharvest1
After clicking the button, Cornelius will drop by to upgrade your Market Stand.
New Market Stand & Order Board
Cornelius’s upgrades will completely change the appearance of your Stand. In addition to aesthetic upgrades, you may notice the new Order Board on the left-hand side of your Market Stand. The Order Board gives you the opportunity to earn Farm Favors and Coins by completing Orders for the local Townsfolk. 
Bigharvest2
Click on the new Market Stand to check out your brand new Order Board Menu. The “Order Board” Tab displays what orders you currently have available to complete and the “Sell Goods” Tab will allow you to sell your Goods as you normally would with the old Market Stand. 
Bigharvest3
Completing Orders will earn you Farm Favors that you can use to upgrade your farm. The number of Favors you receive per Order is indicated by the blue thumb on top of an Order Card. 
As you can see by the green check marks in the image above, Cornelius already helped you out with your first two Orders. Click on the first one to open the following menu:
Bigharvest4
The Order shown above will give you 3,900 Coins and 1 Farm Favor for crafting 3 Apple Pies. Since Corny has already provided the pies, Click on the “Complete” button to submit the order and get the rewards. 
Return to the main Order Board menu and click on the second Order that Cornelius has assisted you with. This order will give you 590 Coins and 1 Favor. Click on the “Complete” button to submit the order. In addition to your prizes, you will see a pop-up congratulating you on beating your weekly goal. 
Bigharvest5
Click on the “Collect” button to claim your 100 Farm Favors. After clicking the button, your Order board will reset. We will cover more information about Weekly Goals later in the guide, but for now, let’s take a closer look at your Order Board Menu. 
Using The Order Board – Main Menu
As shown in the tutorial, you must craft items and/or collect goods for the Townsfolk to complete Orders. The menu below shows all of your available Orders (Order Cards). 
Order Menu
A – The Order requirements. You must complete these tasks to finish the Order. 
B – The number of Coins you will earn for completing the Order. 
C – The number of Favors you will earn for completing the Order.
D – How long you have left to complete your Weekly Goal. 
E – This bar tracks your progress towards your Weekly Goal. As you complete Orders, the bar will fill. Read on for more information about Weekly Goals. 
F – If you don’t like the requirements of an Order, you simply can click on the red “X” button in the top-right corner of an Order Card to replace it with a new Order. Once you click the button, a pop-up will appear. After confirming the dismissal of the order, you have to wait the number of hours listed for another order to appear.
Bigharvest6
G – If you want to speed up the timer for a new order, you can post Fliers to your wall. When you’ve collected enough Fliers, a new order will appear and you can skip the wait.
H – If you don’t feel like waiting or posting Fliers, you can get a new Order immediately by spending Farm Bucks. 
Note: Once you complete an Order, a new Order will appear on your board for you to complete.
Using The Order Board – Order Cards
Click on Order Cards in the Order Board menu to see more details about the Order requirements. 
Order Card
A – The Order requirements. You must complete these tasks to finish the Order. 
B –  If you don’t like the requirements of an Order, you simply can click on the red “Discard” button to replace it with a new Order. Once you click the button, the following pop-up will appear. After confirming the dismissal of the order, you have to wait the number of hours listed for another order to appear.
Bigharvest6


C – Click this button to return to the main Order Board menu. 
D – The number of Coins you will earn for completing the Order. 
E – The number of Favors you will earn for completing the Order. 
F – The number of Farm Bucks required to complete an Order Requirement. This is an optional choice for players who wish to skip the task.
G – Once you have fufilled the Order Requirements, click this button to complete your order and claim your prizes. 
H. This bar tracks your progress towards your Weekly Goal. As you complete Orders, the bar will fill. Read on for more information about Weekly Goals. 
Weekly Goals
Each week you will be asked to complete a certain amount of Orders. If you beat this goal, you will be rewarded with additional Favors, as shown in the image above. The bar on the right-hand side of your Order Board menu indicates how you are progressing towards your weekly goal, and the timer at the bottom of the Order Board menu indicates how long you have left to complete your weekly challenge. Once this timer expires, you will receive new orders and a new weekly goal. If you do not hit your weekly goal by the time the timer expires, you will not receive additional Favors as a prize. 
If you complete all 15 orders before the time runs out, you will get special orders, which brings you more Farm Favors and Coins than usual orders.
Bigharvest11
Farm Favors
After collecting your first Farm Favors, you may be wondering what they are for. Trade Favors into Cornelius to unlock exciting new upgrades that will allow you to increase production and save space. Currently, you can use Favors to upgrade your Groves and Plots, but we have more exciting upgrades planned in the near future. 
Double Favors often appear after completing orders, so keep you eye out for them to get bonus favors and share them with friends! As their name implies, a Double Favor will grant you two Favors instead of just one. They will appear on your farm in a similar fashion to Prize Goods.
If you find a Double Favor, you will see the following pop-up:
Bigharvest12
Upgrading your Farm
To upgrade your farm, click on the new upgrade button. It’s located on the bottom right-hand side of your screen, next to the Inventory button. 
Bigharvest9
The Upgrade Menu shows all of the upgrades that are currently available and the requirements needed to unlock them. 
Note: Not all upgrades are currently accessible. Some upgrades require a certain level or other upgrades to advance. Click on any upgrade to see what requirements you need to fulfill in order to unlock it. 
Upgrade menu
A – The list of upgrades and the level required to unlock them. 
B – Use this bar to scroll though all of the available upgrades. Click on “Upgrade View” button to see what items on your farm are upgradable.
C – A list of the perks an upgrade will provide you. In the image above, you can see that upgrading to a Field will provide more crops, faster mastery and more Prize Crops. 
D – The number of Coins and Favors required to unlock an upgrade. 
E – Use this button to purchase your upgrade once you have completed all of the requirements. 
Fields
Big Harvest is all about allowing you to explore the endless potential of your Farming creativity. In order to really unlock your full farming potential, we recognize that many of you need more space. Our answer to this problem is Fields. Fields will allow you to plant more crops, master your crops faster, get more prized crops, and save space! One Field is the equivalent of 5 plots, but it only takes up the space of 4. 
Before you can use a Field, you have to build one. If you reached Level 25 or above, you can select Level 1 Fields from the Upgrade menu. Once you have selected the field, place the construction frame on your farm.
Note: If you place your construction frame on existing plots, we’ll harvest these plots for you and refund any water, fertilizer and coins you have spent.
Place confirmation
After placing the construction frame on your farm, you have to wait for the Townsfolk to help you finish building it. If you want to see how long you have to wait until the construction is finished, you can click on the construction frame.
Bigharvest14
Note: If you don’t feel like waiting, you can skip ahead with Farm Bucks. 
Once the timer is done, click on the “Finish Now!” button to let the Townsfolk complete the construction.
Before you can use your new Field, you have to put 5 normal plots into the field construction. Click on the “Tools” button in the bottom right-hand side of your screen, and move 5 plots into your field. Now, your new field is ready to be used!
Note: When you unlock Fields for the first time, you can purchase up to 5 of them for your Farm. You have to purchase each of these Fields individually (you will not recieve 5 level 1 Fields in a single purchase). 
The Duck Nursery!

25 March 2014 FarmMaster 0

The Duck Nursery Feature is broken up into three consecutive development stages (quest sets) that you can complete at your own pace.

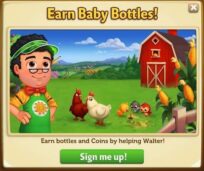
The Duck Nursery is here, which means you can now raise Ducklings! Use this building to develop the personalities of your Ducklings and train them to produce extra resources! If you are level 12 or higher, you will see the following pop up. Clicking on “Place Duck Nursery” will give you the ability to place the Nursery Frame on your Farm.
Before you can start raising your Ducklings, you will need to build your Nursery. Your first step is collecting Building Materials. You will need the following items to start building your Duck Nursery:
  • Chalk Boards
  • Duck Feed
  • Duck Nestings
To Collect Chalk Boards, click on the “post” button to post to your Facebook wall; you will get the parts when your friends click on it, or when you click on a similar newsfeed post. Click on the “Ask” button to send requests for Duck Feed and Duck Nestings to your Neighbors. If you do not wish to wait for your friends, you can skip any of these tasks for Farm Bucks.
Duck2
Once you have collected the required items, click on the “start building” button at the bottom of the construction menu.
Duck3
Now that the Nursery is almost complete, you will need a little help from your Neighbors to finish the job. The Duck Nursery requires four additional helpers, so click on the “Ask Friends” button to send some crew requests to your Friends. When they accept, you will see the spots in the Build Menu begin to fill. If you do not wish to wait for your friends, click the “Hire One” button to purchase helpers with Farm Bucks.
Duck4
Using your Duck Nursery (Development Quests)
Raising a Duckling requires love, affection, and special attention. That’s why the Duck Nursery is here to help you! The Nursery is broken up into three developmental stages (quest sets): Choose a Bonus, Choose a Personality, and Name your Duckling. Each development stage (quest set) has three tasks that have to be completed. As you complete each development stage, you will unlock the next stage. Once your Nursery is up, you will need to place one baby duck inside.
Note: You can raise any baby duck in the Nursery, including ducks available for Coins. Click on the Duck Nursery to open the Quest Menu.
Duck5
Development Quests – Choose a Bonus
The first step is to Choose a Bonus. You can choose between a Fertilizer Bonus, a Feather Bonus and an Appetite Bonus (you will receive two extra Fertilizer or Feathers every time you feed the Adult duck).
Note: You can only choose one Specialty per Duckling.
Duck6
Once you have selected a Bonus, click the green “Confirm” button to turn the page to the next set of development quests. Click on the “Make it” button for the recipe you wish to Craft and you will be sent to your Kitchen and/or Workshop. If you would like a quick tutorial on how to Craft, please visit our Official Guides: Crafting Kitchen and Crafting Workshop
The first development stage is as follows:
Duck7
As you have collected the required items, click on the blue “Use” buttons to watch your avatar train your baby duck! Once you have performed all three of the tasks, click the turquoise “Complete & Share” button.
Duck8
Development Quests – Choose a Personality
The next step is to pick a Personality for your baby duck. You can choose between Posh, Sporty, and Scary. The Personality you pick will determine how your Duckling will behave once it is an adult (i.e. animate).
Note: You can only choose one Personality per Duckling.


 Duck9
Once you have selected a Personality, click the green “Confirm” button to turn the page to the next set of development quests. Click on the “Make it” button for the recipe you wish to Craft and you will be sent to your Kitchen and/or Workshop.
The second development stage is as follows:
Duck10
Once you have collected the required items, click on the blue “Use” buttons to watch your avatar train your baby duck! Once you have performed all three of the tasks, click the turquoise “Complete & Share” button.
Duck11
Development Quests – Name your Duckling
The last step is to name your Duckling. You can use up to 14 characters (with spaces):
Duck12
Once you have typed in a name, click the green “Confirm” button, then the page will turn, and the next page will be your last set of development quests. Click on the “Make it” button for the recipe you wish to Craft and you will be sent to your Kitchen and/or Workshop.
Duck13
As you have collected the required items, click on the blue “Use” buttons to watch your avatar train your baby duck! Once you have performed all three of the tasks, click the turquoise “Complete & Share” button.
Duck14
Congratulations! You have raised your Duckling into an Adult that will produce an extra resource! Click your duck to move and place it on your farm:
Duck15
Crop Packets
For a limited time only, you can earn special Baby Ginger Crop Packets! In order to earn these Packets, you must earn Duck Medallions. As you raise Ducklings, you will earn Duck Medallions. If you unlocked a water plant, you will see a green button “Redeem Prize”. Click on the button to open the menu of the Duck Medallion board:
Duck16
Once you have earned all 4 water plants, you will unlock the Baby Ginger Crop Packet! You will be able to use this Crop for 14 days. Click the turquoise “Share and Go to Market” button to share some rewards with friends!
Duck17
Note: You have limited time to earn the Baby Ginger Crop Packet. If you do not earn enough Duck Medallions within theallotted time, the Crop Packet will disappear and you will be unable to claim it.
Additional Information:
  • You can only use ducklings with the Nursery.
  • You can re-use the Nursery to raise as many ducks as you’d like.
  • If you do not wish to use the Duck Nursery feature, it can be sold (frame only) or stored in your Inventory.
  • You are limited to three Duck Nurseries per Farm. You can purchase up to two more Duck Nurseries from the General Store for Coins and Farm Bucks.