The Silly Little Duckling!

17 September 2013 FarmMaster 0
 
Oh no, the little Duckling following Marie is afraid of water! Lucky for her, farmers have a way with animals. Help Marie teach the little Duckling how to swim and she’ll reward you with the baby Wood Duck!
Silly Little Duckling - FarmVille 2
If you are level 15 or higher, you will see the following pop-up. Click on the green “Sure” button to get started.
  Silly Little Duckling - FarmVille 2
After clicking and talking to Marie, you’ll see the Silly Little Duckling Quest Menu. It shows you all of the tasks you have to complete to get the Silly Little Duckling.
Silly Little Duckling - FarmVille 2
Note: If you close this menu and need to access it later to see your progress, just click on the Silly Little Duckling wandering on your farm or the Duck Habitat.
The Silly Little Duckling Quests:
The Silly Little Duckling Quest tasks require you to build Duck Habitat, collect Duck Training Manuals by completing three Quests for Walter, and craft Fancy Duck Decoys. Click on the “Build It!” button to get started.
Building the Duck Habitat:
To build the Duck Habitat, you will need to collect the following items:
  • Down Feathers
  • Twigs
  • Cattails
To collect Down Feathers, click on the “Post” button to post to your Facebook wall – you will get the parts when your friends click on it, or when you click on a similar newsfeed post.
Click on the “Ask” button to send requests for Twigs and Cattails to your Neighbors. If you do not wish to wait for your friends, you can skip any of these tasks for Farm Bucks.
Silly Little Duckling - FarmVille 2
Note: You can send requests for materials to your Friends every 18 hours.
Once you have collected the required items, click on the “Start Building!” button at the bottom of the construction Menu. 
Silly Little Duckling - FarmVille 2
Now that the Duck Habitat is almost complete, you will need to hire Friends to help you finish the job! The Duck Habitat requires four additional helpers, so click on the “Ask Friends” button to send some crew requests to your Friends. When they accept, you will see the spots in the Builder Menu begin to fill. If you do not want to wait for your friends, click the “Hire One” button to purchase crew members with Farm Bucks. Once you have successfully filled all four spots, click on the “Start Building” button.
Silly Little Duckling - FarmVille 2
Note: When completed, the Duck Habitat can be placed on land and water!
Silly Little Duckling - FarmVille 2
The next step in this quest is to collect Duck Training Manuals by completing three quests for Walter. Click on the blue “Go To Quest” button to complete the first three of Walter’s ‘One Part Inspiration’ Quests (When to Duck, Orange You Glad, and Shades of Orange). If you do not wish to complete any of these quests, you can skip this step for Farm Bucks.
  Silly Little Duckling - FarmVille 2
Silly Little Duckling - FarmVille 2
Click on the turquoise “Share” button to share some of your rewards with Friends!  
  Silly Little Duckling - FarmVille 2
The final step in the quest is to craft Fancy Duck Decoys. To craft Fancy Duck Decoys, you will need the following Ingredients: Basic Duck Decoy (Pieces of Wood & Crafting Beads) and Felt Roll (Wool + Wool). Click on the blue “Make It!” button to head into the Crafting Workshop to get started.
  Silly Little Duckling - FarmVille 2
Silly Little Duckling - FarmVille 2

Note: If you do not wish to complete these tasks, you can skip this step for Farm Bucks.
After completing all of the requirements in the Silly Little Duckling Quests, you will see the following pop-up:
Silly Little Duckling - FarmVille 2
It looks like the Silly Little Duckling has warmed up to you! Click on the “Place & Share” button to post a reward feed for your friends. Make sure to feed your little Duckling Baby Bottles so it will grow into an adult Wood Duck that you can harvest for Brown Feathers! 
Note: Brown Feathers are Ingredients used in exclusive Crafting Workshop Recipes.
Additional Information:
  • You have 14 days to complete the Silly Little Duckling Tasks. If you do not complete them, the Duckling will disappear and you will be unable to claim it!
  • If you want to see how much time you have left to claim the Silly Little Duckling, hover your cursor over the Duck Habitat.
  • If you want to see how much time you have left to claim the Silly Little Duckling, hover your cursor over it.
  • You can only rescue the Silly Little Duckling once.
  • You do need to complete the first three of Walter’s ‘One Part Inspiration’ Quests (When to Duck, Orange You Glad, and Shades of Orange).


The Great Appaloosa River Logjam, Stage 1

11 September 2013 FarmMaster 0
  
The Great Appaloosa River Logjam Feature is broken up into four consecutive stages that unlock over time. Click the links below to find out more information about each stage.

Stage 1 Guide: View
Stage 2 Guide: Coming soon!
Stage 3 Guide: Coming soon!
Stage 4 Guide: Coming soon!
Oh no! A Logjam in the Appaloosa River is blocking the ducks from crossing safely. Luckily, Gus knows a thing or two about clearing Logjams, so that’s where you come in! Assist Gus with his tasks and you can earn great prizes and more importantly, provide safe passage for the rare ducks. Complete all four stages and get the exclusive baby Mandarin Duck!
Note: All of the prizes float on the water when placed in the River!
If you are level 15 or higher, you’ll see the following pop up. Click on the “I Can Help” button to get started.
  The Great Appaloosa River Logjam - FarmVille 2
Before you can start clearing the Logjam, you will need to build your Logging Camp. Your first step is collecting Building Materials. You will need the following items to start building your Logging Camp:
  • Pike Poles
  • Axes
  • Sawdust Struts
To collect Pike Poles, click on the “post” button to post to your Facebook wall; you will get the parts when your friends click on it, or when you click on a similar newsfeed post.
Click on the “Ask” button to send requests for Axes and Sawdust Struts to your Neighbors.
The Great Appaloosa River Logjam - FarmVille 2
Note: If you do not wish to wait for your friends, you can skip any of these tasks for Farm Bucks.
Once you have collected the required items, click on the “Start Building” button at the bottom of the construction menu.
  The Great Appaloosa River Logjam - FarmVille 2
Now that the Camp is almost complete, you will need a little help from your Neighbors to finish the job. The Logging Camp requires 4 additional helpers, so click on the “Ask Friends” button to send some crew requests to your Friends. When they accept, you will see the spots in the Build Menu begin to fill. If you do not wish to wait for your Friends, click the “Hire One” button to purchase crewmembers with Farm Bucks.
The Great Appaloosa River Logjam - FarmVille 2
Completing your Logging Camp (Logjam Quests) 
Once your Camp is up, you may notice that it looks a little unfinished. In order to earn more parts and some cool new prizes, you will need to complete the Logjam Quests. Currently, only the first set of quests is available. The other three stages of this feature will unlock in the coming weeks.
You can access the Quest Menu from clicking on any of the following options: 
  1. The Logging Camp
  2. The Logjam pile
  3. A visiting Neighbor standing next to Logging Camp and Dock (they’re stopping by to help you clear the Logjam!) Note: After clicking on your Neighbor, watch closely so that you don’t miss them swim away in the river!
The Great Appaloosa River Logjam - FarmVille 2
Each Logjam Quest has 4 parts that have to be completed. As you complete a part of a quest line, you will earn a new part for your Camp. If you complete all 4 parts of a Logjam Quest, you will win an exclusive prize for your River!
  The Great Appaloosa River Logjam - FarmVille 2
Logjam Quests – Week 1
As noted above, click on the Logging Camp, the visiting Neighbor (standing by the Camp and Dock), or any of the logs in the Logjam to start working on your first set of Logjam Quests. As you finish parts of your quest, a green check mark will appear to indicate what parts of the quest have been completed. For every quest you complete, you remove a piece of log from the Logjam and in return, you will receive some Pieces of Wood! The four quests for the Week 1 are as follows:
  The Great Appaloosa River Logjam - FarmVille 2
The Great Appaloosa River Logjam - FarmVille 2
Bonus Quests:
Finished the current week of quests early and are looking for something else to do while you wait? If you are level 20 or above, complete a Bonus quest for a chance to earn awesome extra rewards like Baby Bottles! In order to unlock the Bonus Quest, complete each week of quests before the feature expires.
Note: You have 35 days to complete the bonus quests. Bonus quests will only unlock if you complete a week of quests.
The Great Appaloosa River Logjam - FarmVille 2
The set of Bonus quests for the Week 1 is as follows:
  The Great Appaloosa River Logjam - FarmVille 2
Note: You are not required to complete the Bonus quests in order to earn the Great Appaloosa River Logjam prizes (Decorations or the baby Mandarin Duck).
Additional Information:
  • You have 35 days to collect the Great Appaloosa River Logjam prizes and Bonus rewards (optional). If you do not collect them all, the prizes and Bonus rewards (optional) will disappear and you will be unable to claim them.
  • If you want to see how much time you have left to claim the Great Appaloosa River Logjam prizes and the Bonus rewards (optional), hover your cursor over the Camp.
  • You can purchase additional prizes (Decorations and/or the Mandarin Duck) for Farm Bucks once you’ve redeemed them from the Logging Camp menu.
  • If you do not wish to use the Logging Camp, it can be sold (frame only) or stored in your Inventory.
  • You are limited to one Logging Camp per Farm. 

Dive into River Farming!

31 August 2013 FarmMaster 0

Please Note: This feature is not yet available to players. 

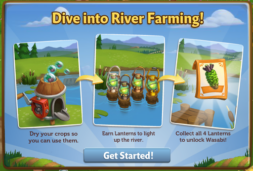
Introducing, the Lantern! Dry your Water Crops to unlock
special River Lanterns from Gus. Get all four Lanterns to unlock an
exclusive Wasabi Crop Packet!

If you are level 15 or higher, you will see the following
pop-up. Click on the “Okay” button to get started.


Using the Lantern:


The Lantern feature has four stages. Each stage requires a
certain amount of Crops dried. When you dry your Water Crops, they will fill
your Lantern bar. Each time you fill the bar, you will win a lantern that you
can place in the water.


To see your bar, click on the Lantern to open
the main menu. Your bar is located on the bottom of this screen. The number at
the bottom of the bar indicates how many Crops you need to dry and your current
progress towards this goal.


   Dive into River Farming - FarmVille 2

As you complete each stage you will unlock a new River
Lantern. The stages and respective Lanterns are as follows:

  • Stage
    1
    : The Iron Light
  • Stage
    2
    : The Timeworn Radiant
  • Stage
    3
    : The Brassy Shiner
  • Stage
    4
    : The Sunbeam

Once you have dried enough Water Crops, you will be able to
harvest your Clipboard by clicking on it.


Dive into River Farming - FarmVille 2

The more Water Crops you dry, the faster you fill your bar.
In addition, drying Water Crop Packets like Lotus counts twice!

If you do not want to wait to fill the Lantern bar, you can
use Farm Bucks to skip these steps and get the next River Lantern right
away! 

Wasabi Crop Packet:

Once you have earned all four of your River
Lanterns, you can claim your Wasabi Crop Packet! The Wasabi is
used in high value recipes in the Crafting Kitchen and Prized Wasabi are worth
more points at the County Fair. 
Click the “Share and Go To Market” button to purchase your
first Seeds for Coins.


Dive into River Farming - FarmVille 2

Additional Information:

  • You
    are limited to one Lantern (feature) per farm.
  • You
    have 21 days to earn the four River Lanterns. 
    If you do not
    collect them all, the River Lanterns will disappear and you will be unable
    to claim them. 
  • After
    the 21 days, you can purchase additional River Lanterns in the General
    Store for Farm Bucks. 
  • Harvesting
    regular Crops do not count towards the Lantern. Only drying
    Water Crops in the Crop Dryer will count.
  • If you
    want to see how much time you have left to claim your River Lanterns,
    hover your cursor over the Lantern (feature) on the dock.

The Romantic Outdoor Dinner!

28 August 2013 FarmMaster 0
Greetings, Farmers!
Walter wants to surprise Barbara with a Romantic Outdoor Dinner and he needs your help! Barbara loves White Truffles, so that’s where you come in. Help Walter build a Dinner Table, collect White Truffles for a romantic meal, and then you’ll earn some awesome prizes! Crafting in the Kitchen or harvesting your Crops will earn you White Truffles, which you can redeem for romantic Decorations and an exclusive Red River Hog!

If you are level 9 or hi­gher, you will see the following pop-up. Click on the “Place Dinner Table” button to place the Table on your farm.
Romantic Outdoor Dinner - FarmVille 2
Building the Dinner Table:
Your first step is building your Dinner Table. You will need the following items to start construction:
  • Truffle Baskets
  • Fancy Tablecloths
  • Fancy Meal Covers
To collect Truffle Baskets, click on the “Post” button to post to your Facebook wall; you will get the parts when your friends click on it, or when you click on a similar newsfeed post.
Click on the “Ask” button to send requests for Fancy Tablecloths and Fancy Meal Covers to your Neighbors. If you do not wish to wait for your friends, you can skip any of these tasks for Farm Bucks.
Romantic Outdoor Dinner - FarmVille 2
Once you have collected the required items, click on the “Start Building” button at the bottom of the construction menu.
Romantic Outdoor Dinner - FarmVille 2
Now that your Table is almost complete, you will need some help from your Neighbors to finish the job. The Dinner Table requires four additional helpers, so click on the “Ask Friends” button to send some crew requests to your Friends. When they accept, you will see the spots in the Building Menu begin to fill. If you do not wish to wait for your friends, click the “Hire One” button to purchase crew members with Farm Bucks. Once you have successfully filled all four spots, click on the “Finish Building” button.
  Romantic Outdoor Dinner - FarmVille 2
Using the Dinner Table:
Click on the Dinner Table to open the main menu. 
  Romantic Outdoor Dinner - FarmVille 2
This menu shows how many White Truffles you have collected and what prizes you are currently eligible to redeem. 

A – The total amount of White Truffles you have collected. As you redeem prizes, this number decreases.
B – The button to use when you want to collect White Truffles by crafting in the Kitchen. 
C – The button to use when you want to redeem a prize. Once you have enough White Truffles, this button will turn turquoise.
D – The number of Farm Bucks required to purchase the prize.
E – If you want to ask your friends for White Truffles, press this button and a feed will be automatically posted to your wall.
Collecting White Truffles:
Harvesting Crops: You can find White Truffles by harvesting your Crops. If you find some, they will appear on your farm in a similar fashion to Prized Crops.
Romantic Outdoor Dinner - FarmVille 2
When a White Truffle appears on your farm after harvesting, click on it and you will see the following pop-up:
  Romantic Outdoor Dinner - FarmVille 2
Click on the turquoise “Share” button to post a feed to your wall. Your friends will be able click on this feed to claim some free White Truffles for themselves too. Once you have clicked on the Truffle, it will automatically be added to your Dinner Table. 
Crafting: You can craft your very own White Truffles via the Crafting Kitchen. From the Dinner Table menu, click on the “Craft” button to open the Kitchen.
Romantic Outdoor Dinner - FarmVille 2
To craft White Truffles, you will need Truffles and Parsley Root. You can get Truffles from feeding Prized Pigs.
To get Parsley Root, you will need to enlist the help of your Neighbors. From the White Truffles recipe, click on the turquoise “ask” button to send requests to your friends for Parsley Root. If you do not wish to wait, you can purchase either of these ingredients for Farm Bucks.
Individual White Truffles can also be purchased with Farm Bucks from the Dinner Table menu.
Redeeming White Truffles for Prizes:
Once you have collected enough White Truffles, they can be redeemed for some lovely prizes. Click on your Dinner Table to open up your progress menu. 

At the bottom of this menu, there are a total of 4 prizes that can be redeemed for White Truffles:
  • Rose Stand (16 White Truffles)
  • Pair of Columns (32 White Truffles)
  • Byer’s White Cape Myrtle Tree (48 White Truffles)
  • Curtained Pergola (64 White Truffles)
All 4 of these prizes can be redeemed as many times as you like, as long as you have enough White Truffles (160 White Truffles total). Once you have collected all 4 of the above prizes, you will earn the adorable baby Red River Hog!
Romantic Outdoor Dinner - FarmVille 2
The Romantic Outdoor Dinner:
Once you’ve clicked on the “Share White Truffles” button, Walter and Barbara will personally drop off your new baby Hog! Click on the “Okay” button, and then watch the two of them head over to the Table to eat the special dinner that you prepared.    
  Romantic Outdoor Dinner - FarmVille 2
After the Outdoor dinner, click the green “Place Hog” button to move your new friend onto your farm!
Note: The baby Red River Hog can be redeemed for White Truffles or Farm Bucks more than once.
Additional Information:
  • If you do not wish to use the Dinner Table feature, it can be deleted or stored in your Inventory.
  • You can only get White Truffles when harvesting crops on your own farm. You will not get White Truffles from Neighbor visits.
  • You have 21 days to collect the Dinner Table prizes. If you do not collect them all, the prizes will disappear and you will be unable to claim them.
  • If you want to see how much time you have left to claim the Dinner Table prizes, hover your cursor over the Table.
  • You are limited to one Dinner Table per farm.

The Squirrel Tree!

14 August 2013 FarmMaster 0


The new Squirrel Tree is here! Harvest berry Crops to attract Squirrels and then feed them Treats to win great rewards. Get all three prizes to unlock an exclusive Black and Brown Eastern Fox Squirrel for a limited time!
Note: The Black and Brown Eastern Fox Squirrel will be available to use on Trees and Groves for 20 days. After that time, the Black and Brown Eastern Fox Squirrel will expire and leave your farm.
If you are level 9 or higher, you will see the following pop-up. Click on the blue “Place Squirrel Tree” button to place the Tree on your farm.
Squirrel Tree - FarmVille 2
Building the Squirrel Tree:
Your first step is building your Squirrel Tree. You will need the following items to start construction:
  • Squirrel Houses
  • Squirrel Bedding
  • Red Paint
To collect Squirrel Houses, click on the “Post” button to post to your Facebook wall; you will get the parts when your friends click on it, or when you click on a similar newsfeed post.
Click on the “Ask” button to send requests for Squirrel Bedding and Red Paint to your Neighbors. If you do not wish to wait for your friends, you can skip any of these tasks for Farm Bucks.
  Squirrel Tree - FarmVille 2
Once you have collected the required items, click on the “Start Building” button at the bottom of the construction menu.
Squirrel Tree - FarmVille 2
Now that your Tree is almost complete, you will need some help from your Neighbors to finish the job. The Squirrel Tree requires four helpers, so click on the “Ask Friends” button to send some crew requests to your Friends. When they accept, you will see the spots in the Building Menu begin to fill. If you do not wish to wait for your friends, click the “Hire One” button to purchase crew members with Farm Bucks. Once you have successfully filled all four spots, click on the “Finish and Share” button.
  Squirrel Tree - FarmVille 2
Using the Squirrel Tree:
Click on the Squirrel Tree to open the main menu. 
  Squirrel Tree - FarmVille 2
This menu shows how many Squirrels you have fed and what prizes you are currently eligible to redeem. 

A – How many Squirrel Feedings you need and your current progress towards this goal. 
B – The button to use when you want to purchase berry Crops for to plant from the General Store.
C – The button to use when you want to craft Treats via the Kitchen. 
D – The total amount of Treats you have crafted. As you feed Squirrels, this number decreases.
E – The button to use when you want to purchase Fences for Coins or Farm Bucks from the Squirrel menu (see “Fences” section below).
F – The number of Farm Bucks required to purchase a Prize.
Finding Help Squirrels:
Everybody knows that berries attract Squirrels, so plant some berry Crops and look for them when harvesting!
Helper Squirrels will appear on your farm after you harvest any of the following berry Crops:
  • Boysenberry (Limited Edition)
  • Strawberry
  • Raspberry
  • Blueberry
  • Blackberry
  Squirrel Tree - FarmVille 2
Once you find a Squirrel, it will have a thought bubble to indicate what it’s ready for:
  Squirrel Tree - FarmVille 2
  • Hungry for Treats (Treat thought bubble): The Squirrel is hungry for Treats (see “Crafting Treats” section below).
  • Ready to Help (Tree thought bubble): The Squirrel is ready to help you tend to Trees and Groves (see “Using Helper Squirrels” section below).
Note: You are limited to a total of 10 Helper Squirrels on any given farm.
Fences:
Fences attract more Squirrels! You can purchase up to a total of 10 Fences for Coins or Farm Bucks from the Squirrel menu. Simply click the Squirrel Tree, and then click the blue “Get Fences” button.
Squirrel Tree - FarmVille 2
Crafting Treats:
In order to use Helper Squirrels (Hungry for Treats), you must craft the Treat Recipes. Note: Once they are fed, (Tree thought bubble), you will be able to use them on Trees and Groves (see “Using Helper Squirrels” section below). You can craft your very own Treats via the Crafting Kitchen. From the Squirrel Tree menu, click on the “Craft” button to open the Kitchen. You can choose from three different Recipes:
  • Bag of 1 Squirrel Treat: The required Ingredients are Strawberries and Corn Meal. You will receive a total of one Treat.
  Squirrel Tree - FarmVille 2
  • 2 Treats: The required Ingredients are Apples and Bag of Sesame Seeds. You will receive a total of two Treats.
Squirrel Tree - FarmVille 2
  • 3 Treats: The required Ingredients are Blueberries and Bag of Chia Seeds. You will receive a total of three Treats.
  Squirrel Tree - FarmVille 2
Using Helper Squirrels:
Feeding your crafted Treats to a Squirrel will allow you to use it to tend to your Trees and Groves. To feed a hungry Squirrel (Treat thought bubble), simply click on it.
Squirrel Tree - FarmVille 2
To use the fed Squirrel (Tree thought bubble), simply click on it, then drag and drop it over a Tree or Grove. Similar to Farmhands, a thought bubble will indicate that your Squirrel will help you with one of the following tasks per Tree and/or Grove:
  • Water: If your Tree or Grove is not watered, use your Squirrel for Water.
  • Speed-Grow: If your Tree or Grove is watered, use your Squirrel for Speed-Grow.
  • Ready for Harvest: If your Tree or Grove is ready to be harvested, use your Squirrel for bonus output.
  Squirrel Tree - FarmVille 2
Once you have used your Helper Squirrel, it will run into your Squirrel Tree and you will be unable to use that particular Squirrel a second time.
Note: The Black and Brown Eastern Fox Squirrel speeds up two Groves at once.
Earning Prizes:

Once you have fed enough Squirrels, you can earn some lovely prizes. Click on your Squirrel Tree to open up your progress menu. 

At the bottom of this menu, there are a total of four that can be earned through feeding Squirrels:

  • White Oak Tree (This exclusive tree produces Acorns, which is a new type of Ingredient used in new crafting Recipes)
  • Loganberry Packet (This exclusive Crop Packet can be used as many times as you wish for 7 days)
  • A second White Oak Tree (This exclusive tree produces Acorns, which is a new type of Ingredient used in new crafting Recipes)
  • The adorable Black and Brown Eastern Fox Squirrel for 20 days. This little one speeds up two Groves at once!
All four of these prizes can be earned as many times as you’d like as long as you have fed enough Squirrels.
  Squirrel Tree - FarmVille 2
Note: You will need to redeem each of the above prizes at least once before you get credit towards the Black and Brown Eastern Fox Squirrel. The Black and Brown Eastern Fox Squirrel will be available to use on Trees and Groves for 20 days. After that time, the Black and Brown Eastern Fox Squirrel will expire and leave your farm.
Additional Information:
  • You have 21 days to collect the Squirrel Tree prizes. If you do not collect them all, the prizes will disappear and you will be unable to claim them.
  • You are limited to a total of 10 Helper Squirrels at any given time and can only use each Squirrel once.
  • If you do not wish to use the Squirrel Tree feature, it can be sold or stored in your Inventory.
  • You can only get credit towards the Squirrel Tree from feeding Squirrels on your own farm. You will not get credit from Neighbor visits.
  • If you want to see how much time you have left to claim the Squirrel Tree prizes, hover your cursor over the Tree.
  • You are limited to one Squirrel Tree per farm.

The Deluxe Shady Trough!

31 July 2013 FarmMaster 0
                         
Do you want more room for Animals on your farm? If so, then the Deluxe Shady Trough is for you! This is an upgrade to the regular Shady Trough and will increase your Animal population cap by 5!
Note: If you do not have the regular Shady Trough, you can purchase one in the General Store for 10,000 Coins. You will receive +10 Animal max capacity once the Shady Trough is fully built. After that time, you will be able to upgrade it and get +5 Animal max capacity (+15 total). 

If you are level 12 or higher, you will see the following pop-up. Click on “Upgrade” to get started.
  Deluxe Shady Trough - FarmVille 2
If you do not wish to upgrade to the Deluxe Shady Trough, simply click the blue “Upgrade” button on the menu popup, then click the red “Cancel” button at the bottom right hand corner of the game screen (see image below). Note: You can upgrade to the Deluxe Shady Trough at a later time by clicking on your Shady Trough, then click the blue “Upgrade” button on the menu popup.
Deluxe Shady Trough - FarmVille 2
Building the Deluxe Shady Trough:

Just like the regular Shady Trough, the upgrade needs to be completed before you can enjoy an increased animal capacity. 


Your first step is collecting Building Materials. You will need the following items to start building your Upgrade:
  • Wood Stain
  • Tin Buckets
  • Utility Hooks
To collect Wood Stain, click on the “Post” button to post to your Facebook wall – you will get the parts when your friends click on it, or when you click on a similar newsfeed post.
Click on the “Ask” button to send requests for Tin Buckets and Utility Hooks to your Neighbors. If you do not wish to wait for your friends, you can skip any of these tasks for Farm Bucks.
Deluxe Shady Trough - FarmVille 2

Note: You can send a request for materials to your Friends every 18 hours.
Once you have collected the required items, click on the “Start Building” button at the bottom of the construction Menu. 

Deluxe Shady Trough - FarmVille 2
Now that the upgrade is almost complete, you will need a little help from your Neighbors to finish the job. The Deluxe Shady Trough requires four additional helpers, so click on the “Ask Friends” button to send some crew requests to your Friends. When they accept, you will see the spots in the Build Menu begin to fill. If you do not wish to wait for your friends, click the “Hire One” button to purchase crew members with Farm Bucks.

Deluxe Shady Trough - FarmVille 2

Your Deluxe Shady Trough is now complete!

  Deluxe Shady Trough - FarmVille 2
Deluxe Shady Trough - FarmVille 2

Additional Information:

  • If you are currently at the maximum animal cap, the Deluxe Shady Trough will increase your total Animal capacity by 5.
  • You are limited to one Shady Trough upgrade per farm.
  • If you sell or delete your Shady Trough, you can purchase a new frame from the General Store for 10,000 Coins.
  • Rotate the Trough to view a different angle!


The Firefly Lantern Official Guide!

17 July 2013 FarmMaster 0
The new Firefly Lantern is here, which will allow you to collect Fireflies and win awesome prizes! Crafting in the Workshop or feeding your Adult & Prized Rabbits will earn you Fireflies, which you can redeem for rewards and a Baby Black Angora Rabbit!
If you are level 10 or higher, you will see the following pop-up. Click on the green “Place Firefly Lantern” button to place the Lantern on your farm.
  Firefly Lantern - FarmVille 2
Building the Firefly Lantern:
Fireflies are coming out of Hibernation, so now’s the time to collect them in a special lantern. Release Fireflies at dusk and they will light up your farm, plus receive a bigger Crop Harvest bonus for 24 hours!
Your first step is building your Firefly Lantern. You will need the following items to start construction:
  • Paper Lanterns
  • Firefly Nets
  • Awls
To collect Paper Lanterns, click on the “Post” button to post to your Facebook wall; you will get the parts when your friends click on it, or when you click on a similar newsfeed post.
Click on the “Ask” button to send requests for Firefly Nets and Awls to your Neighbors. If you do not wish to wait for your friends, you can skip any of these tasks for Farm Bucks.
  Firefly Lantern - FarmVille 2
Once you have collected the required items, click on the “Start Building” button at the bottom of the construction menu.
  Firefly Lantern - FarmVille 2
Now that your Lantern is almost complete, you will need some help from your Neighbors to finish the job. The Firefly Lantern requires four helpers, so click on the “Ask Friends” button to send some crew requests to your Friends. When they accept, you will see the spots in the Building Menu begin to fill. If you do not wish to wait for your friends, click the “Hire One” button to purchase crew members with Farm Bucks. Once you have successfully filled all four spots, click on the “Finish and Share” button.
  Firefly Lantern - FarmVille 2
Using the Firefly Lantern:
Click on the Firefly Lantern to open the main menu. 
  Firefly Lantern - FarmVille 2
This menu shows how many Fireflies you have collected and what prizes you are currently eligible to redeem. 

A – The total amount of Fireflies you have. As you redeem prizes, this number decreases.
B – The button to use when you want to redeem a prize. Once you have enough Fireflies, this button will turn turquoise.
C – The button to use when you want to collect Fireflies by crafting in the Workshop. 
D – The number of Farm Bucks required to purchase Fireflies.
E – If you want to ask your friends for Fireflies, click this button and a feed request will automatically post to your Facebook wall.
Collecting Fireflies:
Feeding Adult & Prized Rabbits: You can find Fireflies by feeding your Adult & Prized Rabbits. If you find some, they will appear on your farm in a similar fashion to Prized Crops.
  Firefly Lantern - FarmVille 2
When Fireflies appears on your farm after feeding, click on it and you will see the following pop-up:
  Firefly Lantern - FarmVille 2
Click on the turquoise “OK” button to post a feed to your Facebook wall. Your friends will be able click on this feed to claim some free Fireflies for themselves too! Once you have clicked on the Firefly, it will automatically be added to your Firefly Lantern. 
Crafting: You can craft your very own Jars of Fireflies via the Crafting Workshop. From the Firefly Lantern menu, click the “Craft” button to open the Workshop.
To craft Jars of Fireflies, you will need the following Ingredients: Jars of 2 Fireflies (Small Glass Jars & Wool Bolt) andJars of 3 Fireflies (Large Glass Jars & Metal Sheet):
Firefly Lantern - FarmVille 2  
Firefly Lantern - FarmVille 2
   
To get Small Glass Jars, you will need to enlist the help of your Neighbors. From the Fireflies recipe, click on the turquoise “Ask” button to send requests to your friends for Jars. To get Large Glass Jars, click on the turquoise “Post” to post a feed to your Facebook wall. If you do not wish to wait, you can purchase any of these ingredients for Farm Bucks.
Individual Fireflies can be purchased with Farm Bucks from the Firefly Lantern menu.
Redeeming Fireflies for Prizes & Dusk:
Once you have collected enough Fireflies, you can redeem them for some beautiful prizes. Click on your Firefly Lantern to open up your progress menu. 

At the bottom of this menu, there are a total of four prizes that you can redeem for Fireflies:

  • Firefly Jar Display (20 Fireflies)
  • Firefly Jar Fence (30 Fireflies)
  • White Willow Tree (45 Fireflies)
  • Brick Patio Firepit (65 Fireflies)
After you redeem a prize, it’s time for the special “Dusk” celebration to begin. Click the turquoise “Share Fireflies” to release your collected Fireflies and get +1 Crop Harvest for 24 hours!
Crop Harvest Bonus: Any Crop harvested during “Dusk” will get an additional bonus Crop!
  Firefly Lantern - FarmVille 2
Tip: Hover over your Firefly Lantern decorations to light them up!
Firefly Lantern - FarmVille 2
All four of these prizes can be redeemed as many times as you like, as long as you have enough Fireflies (160 Fireflies total). Once you have collected all four of the above prizes, you will earn the adorable Baby Black Angora Rabbit!
Firefly Lantern - FarmVille 2
 
Note: The Baby Black Angora Rabbit can be redeemed for Fireflies or Farm Bucks more than once.
Additional Information:
  • You have 21 days to collect the Firefly Lantern prizes. If you do not collect them all, the prizes will disappear and you will be unable to claim them.
  • If you do not wish to use the Firefly Lantern feature, it can be sold or stored in your Inventory.
  • You can only get Fireflies when feeding Adult & Prized Rabbits on your own farm. You will not get Fireflies from Neighbor visits.
  • If you want to see how much time you have left to claim the Firefly Lantern prizes, hover your cursor over the Lantern.
  • You are limited to one Firefly Lantern per farm.

Hot Air Balloon Guide!

10 July 2013 FarmMaster 0

Hot Air Balloon!

Barbara has a wonderful new Hot Air Balloon, but she can’t land it at her B&B! Help her build a Tethering Platform, and she will take you and your friends for a ride! Complete all five of the Hot Air Balloon rides by crafting goods and you will also earn a Mini Hot Air Balloon, The Summer Outfit with cool shades, and other great rewards!
  Hot Air Balloon - Intros
If you are level 10 or higher, you will see the following pop-up. Click on the green “Place Tethering Platform” button to place the Platform on your farm. 

Hot Air Balloon - FarmVille 2

Before you can host a Hot Air Balloon ride, you will need to build your Tethering Platform. Your first step is collecting Building Materials. You will need the following items to start building your Platform:
  • Windsocks
  • Sandbags
  • Propane Tanks
To collect Windsocks, click on the “Post” button to post to your Facebook wall; you will get the parts when your friends click on it, or when you click on a similar newsfeed post.
Click on the “Ask” button to send requests for Sandbags and Propane Tanks to your Neighbors. If you do not wish to wait for your friends, you can skip any of these tasks for Farm Bucks.
  Hot Air Balloon - FarmVille 2
Once you have collected the required items, click on the “Start Building” button at the bottom of the construction Menu. 
Hot Air Balloon - FarmVille 2

Now that your Platform is almost complete, you will need to hire Friends to help you finish the job. The Tethering Platform requires four additional helps, so click on the “Ask Friends” button to send some crew requests to your Friends. When they accept, you will see the spots in the Building Menu begin to fill. If you do not wish to wait for your friends, click the “Hire One” button to purchase crew members with Farm Bucks. Once you have successfully filled all four spots, click on the “Finish Building” button. 
  Hot Air Balloon - FarmVille 2
Hot Air Balloon Rides
The Mini Hot Air Balloon can be earned after a total of five stages. In order to earn it, you will need to take your friends on 5 Hot Air Balloon rides. To prepare for a Hot Air Balloon ride, click on your Tethering Platform.
Hot Air Balloon - FarmVille 2

No Hot Air Balloon ride is complete without snacks, so it’s time to start whipping up some delicious treats, goods, and supplies for your rides! From the Quest menu, click on the “Craft” button for the recipe you wish to Craft and you will be sent to your Kitchen and/or Workshop. 

Note: Hosting a Hot Air Balloon Ride uses up the goods you have crafted.
Stage One:
  • Have Hot Air Balloon Cookie
  • Have Lemonade
  • Have Apple Scones
Hot Air Balloon - FarmVille 2
Stage Two:
  • Have Tomato Soups
  • Have Popcorn
  • Have Hot Air Balloon Cookies
Hot Air Balloon - FarmVille 2
Stage Three:
  • Have Strawberry Lemonades
  • Have Orange Cupcakes
  • Have Popcorns
Hot Air Balloon - FarmVille 2
Stage Four:
  • Have Pumpkin Pies
  • Have Popcorns
  • Have Sparkling Apple Ciders 
Hot Air Balloon - FarmVille 2
Stage Five:
  • Have Cornbread
  • Have Blueberry Tarts
  • Have Sparkling Apple Ciders
  Hot Air Balloon - FarmVille 2
The Hot Air Balloon requires four guests to be present before your ride can begin, so click on the “Ask Friends” button to send some requests to your Friends. When they accept, you will see the spots in the Guest Menu begin to fill.
  Hot Air Balloon - FarmVille 2
If you do not wish to wait for your friends, click the “Hire One” button to purchase guests with Farm Bucks. Once you have successfully filled all four spots, click on the “Take a Ride Now” button to take off!
Hot Air Balloon - FarmVille 2
Once your Hot Air Balloon ride is complete, your guests will run off and you will see the following pop-up. Click on “Share Rewards” button to post a feed icon to your wall that your Friends can click to collect rewards, too!
Hot Air Balloon - Share Rewards


Earning Rewards with the Hot Air Balloon
You will earn rewards each time you host a Hot Air Balloon ride. The more Hot Air Balloon rides you host, the more rewards you will receive at the end of each ride. Below is a list of items you have a chance of earning: 
  • Water
  • Power
  • Fertilizer
  • Speed-Grow
  • Flour
  • Sugar
  • Piece of Glass
  • Potato
  Hot Air Balloon - FarmVille 2

The Hot Air Balloon reward icons at the bottom of the Guest Menu indicate how many rides you have hosted. As you host rides, you will see the Hot Air Balloon reward icons will be replaced by green check marks.

Hot Air Balloon - FarmVille 2
You can host up to a total of five Hot Air Balloon rides per Tethering Platform and once you have finished your final ride, you will earn a Mini Hot Air Balloon & the Summer Outfit! Click the turquoise “Place and Share” button to customize your new decoration.
  Hot Air Balloon - FarmVille 2
Additional Information:
  • Once the Tethering Platform is placed on your Farm, you have 20 days to finish the quests and take your rides with Friends.
  • You can have up to three Tethering Platforms on your farm (including frames).
  • If you delete the first Tethering Platform, you will only be able to have a total of two. The second and third Platforms can be deleted or stored in your Inventory.
  • Once you have hosted your Hot Air Balloon rides, you will be unable to use and/or sell any of the goods.
  • Once you have finished hosting all of your rides, the Tethering Platforms are yours to keep as decorations!
  • You can also buy up to five additional Super Tethering Platforms, which offer a more decorative Farmville 2 Hot Air Balloon ride from Barbara, twice the rewards and come fully built (no need for Parts and Crew). These premium Tethering Platforms are available for Farm Bucks in the General Store.
Hot Air Balloon - FarmVille 2

The Trials of Horse Training Guide, Stage 4

6 July 2013 FarmMaster 0

The Trials of Horse Training Guide, Stage 4

The Trials of Horse Training Feature is broken up into four consecutive stages that unlock over time. Click the links below to find out more information about each stage.

Stage 1 Guide: View
Stage 2 Guide: View
Stage 3 Guide: View
Stage 4 Guide: View

Marie is having difficulties training one of her Horses, and she needs your help. The Horse in question is rare and beautiful, but very hard to please. That’s where you come in! Assist Marie with her tasks and you can earn great prizes and more importantly, the trust of the finicky Horse. Complete all four stages and get the exclusive Akhal-Teke horse!
The Trials of Horse Training, Stage 4 - FarmVille 2


Completing your Training Stall (Stage 4 Decoration Quests)
Once your Stall is up, you may notice that it looks a little bare. In order to earn some beautiful new decorations, you will need to complete the Decoration Quests. 
Click on the Training Stall to open the Quest Menu.
The Trials of Horse Training, Stage 4 - FarmVille 2

Each Decoration Quest has 4 parts that have to be completed. As you complete a part of a quest line, you will earn a decoration for your Stall. If you complete all 4 parts of a Decoration Quest, you will win an exclusive prize for your farm!

The Trials of Horse Training, Stage 4 - FarmVille 2

Decoration Quests – Week 4
Click on any of the Saddles in the Training Stall menu to start working on your fourth set of Decoration Quests. As you finish parts of your quest, a green check mark will appear to indicate what parts of the quest have been completed. The four quests for the Week 4 are as follows:
The Trials of Horse Training, Stage 4 - FarmVille 2

The Trials of Horse Training, Stage 4 - FarmVille 2

The Trials of Horse Training, Stage 4 - FarmVille 2

As mentioned earlier in the guide, once you complete the entire Stage 4 Decoration Quests, you will win a special reward! To redeem your special prize, simply click the turquoise “Place Horse and Share News” button.
The Trials of Horse Training, Stage 4 - FarmVille 2

Additional Information:

  • A new Decoration Quest will unlock each week.
  • You can purchase additional prizes for Farm Bucks once you’ve redeemed them from the Training Stall menu.
  • If you do not wish to use the Trials of Horse Training feature, it can be sold (frame only) or stored in your Inventory.
  • You are limited to one Training Stall per Farm. 


    Marie’s Baby Falabella Horse!

    3 July 2013 FarmMaster 0

    Marie’s Baby Falabella Horse!

    Oh no, Marie just lost a tire off her horse trailer! Lucky for her, farmers know a thing or two about repairing livestock equipment. Help Marie with the repairs and she’ll reward you with the petite Baby Falabella Horse!
    Marie's Baby Falabella Horse - FarmVille 2


    If you are level 9 or higher, you will see the following pop-up. Click on the green “What is it” button to get started.
    Marie's Baby Falabella Horse - FarmVille 2
    After clicking, you will see the Falabella Horse Quest Menu. It shows you all of the tasks you have to complete to get the baby Falabella Horse.
    Marie's Baby Falabella Horse - FarmVille 2
    Note: If you close this menu and need to access it later to see your progress, just click on the baby Falabella Horse wandering on the road, the broken horse trailer, or the tire by the hay bales.
    The Falabella Horse Quests
    The Falabella Horse quest tasks require you to repair Marie’s Horse Trailer, collect Spare Tires by completing three Quests for Cornelius, and craft Embroidered Horse Blankets to keep the baby horse warm. Click on the “Build It!” button to get started.
    Repairing Marie’s Horse Trailer
    To repair Marie’s Horse Trailer, you will need to collect the following items:
    • Hazard Cones
    • Lug Wrenches
    • Grease Gloves
    To collect Hazard Cones, click on the “Post” button to post to your Facebook wall – you will get the parts when your friends click on it, or when you click on a similar newsfeed post.

    Click on the “Ask” button to send requests for Lug Wrenches and Grease Gloves to your Neighbors. If you do not wish to wait for your friends, you can skip any of these tasks for Farm Bucks.
      Marie's Baby Falabella Horse - FarmVille 2
    Note: You can send requests for materials to your Friends every 18 hours.
    Once you have collected the required items, click on the “Start Building!” button at the bottom of the construction Menu. 
    Marie's Baby Falabella Horse - FarmVille 2
    Now that the horse trailer repairs are almost complete, you will need to hire Friends to help you finish the job! The horse trailer requires four additional helpers, so click on the “Ask Friends” button to send some crew requests to your Friends. When they accept, you will see the spots in the Builder Menu begin to fill. If you do not want to wait for your friends, click the “Hire One” button to purchase crew members with Farm Bucks. Once you have successfully filled all four spots, click on the “Start Repairing” button.
    Marie's Baby Falabella Horse - FarmVille 2
    The next step in this quest is to collect Spare Tires by completing three quests for Cornelius! Click on the blue “Go To Quest” button to complete the first three of Cornelius’s ‘Sunny Celebration’ Quests (Corny Fun, Shades of Summer, andTart Treat). If you do not wish to complete any of these quests, you can skip this step for Farm Bucks.
      Marie's Baby Falabella Horse - FarmVille 2
    Marie's Baby Falabella Horse - FarmVille 2
    Baby Falabella Horse - Q3

    Marie's Baby Falabella Horse - FarmVille 2


    Click on the turquoise “Share” button to share some of your rewards with Friends!  
    Marie's Baby Falabella Horse - FarmVille 2
    The final step in the quest is to craft Embroidered Horse Blankets to keep your new friend warm! To craft Embroidered Horse Blankets, you will need the following Ingredients: Blue Horse Blankets (Blueberry Dye & Plain Horse Blanket) and Wool Thread Spindles (Wool & Fine Rabbit Wool). Click on the blue “Make It!” button to head into the Crafting Workshop to get started.
    Marie's Baby Falabella Horse - FarmVille 2
    Note: If you do not wish to complete these tasks, you can skip this step for Farm Bucks.
    After completing all of the requirements in the Falabella Horse Quests, you will see the following pop-up:
    Marie's Baby Falabella Horse - FarmVille 2
    It looks like the baby Falabella Horse has warmed up to you! Click on the “Adopt Horse” button to post a reward feed for your friends. Make sure to feed your little horse Baby Bottles so it will grow into an adult Falabella Horse that you can harvest for Horseshoes!
    Note: Horseshoes are Ingredients used in exclusive Crafting Workshop Recipes.
    Additional Information:
    • You have 14 days to complete the Falabella Horse Tasks. If you do not complete them, the horse will disappear and you will be unable to claim it!
    • If you want to see how much time you have left to claim the Falabella Horse, hover your cursor over it.
    • You can only rescue the Falabella Horse once.
    • You do need to complete the first three of Cornelius’s ‘Sunny Celebration’ Quests (Corny Fun, Shades of Summer, and Tart Treat).
    • Once you have rescued the baby Falabella Horse, the horse trailer and tire will disappear.
    No Image

    The Trials of Horse Training Guide, Stage 3

    2 July 2013 FarmMaster 0

    The Trials of Horse Training Guide, Stage 3

    The Trials of Horse Training Feature is broken up into four consecutive stages that unlock over time. Click the links below to find out more information about each stage.

    Stage 1 Guide: View
    Stage 2 Guide: View
    Stage 3 Guide: View
    Stage 4 Guide: Coming Soon!

    Marie is having difficulties training one of her Horses, and she needs your help. The Horse in question is rare and beautiful, but very hard to please. That’s where you come in! Assist Marie with her tasks and you can earn great prizes and more importantly, the trust of the finicky Horse. Complete all four stages and get the exclusive Akhal-Teke horse!
    FarmVille 2


    Completing your Training Stall (Stage 3 Decoration Quests)
    Once your Stall is up, you may notice that it looks a little bare. In order to earn some beautiful new decorations, you will need to complete the Decoration Quests. Currently, only the first, second, and third set of quests are available. The fourth stage of this feature will unlock in the coming weeks.
    Click on the Training Stall to open the Quest Menu.
    FarmVille 2
    Each Decoration Quest has 4 parts that have to be completed. As you complete a part of a quest line, you will earn a decoration for your Stall. If you complete all 4 parts of a Decoration Quest, you will win an exclusive prize for your farm!

    FarmVille 2

    Decoration Quests – Week 3
    Click on any of the Saddles in the Training Stall menu to start working on your third set of Decoration Quests. As you finish parts of your quest, a green check mark will appear to indicate what parts of the quest have been completed. The four quests for the Week 3 are as follows:
    FarmVille 2
    FarmVille 2
    Trials of Horse Training_Stage 3 Q3
    FarmVille 2
    Helpful Tip: You can feed the same Nursery-graduated Goat twice to complete the third task.

    Trials of Horse Training_Stage 3 - Rewards
    Additional Information:

    • A new Decoration Quest will unlock each week.
    • You can purchase additional prizes for Farm Bucks once you’ve redeemed them from the Training Stall menu.
    • If you do not wish to use the Trials of Horse Training feature, it can be sold (frame only) or stored in your Inventory.
    • You are limited to one Training Stall per Farm. 


      “The Goat Nursery” Guide!

      26 June 2013 FarmMaster 0

      The Goat Nursery

      The Goat Nursery Feature is broken up into three consecutive development stages (quest sets) that you can complete at your own pace.

      The Goat Nursery is here! Use this building to raise your baby goats to develop their personality and train them to produce extra resources!
      If you are level 12 or higher, you will see the following pop up. Clicking on “Place Building” will give you the ability to place the Nursery Frame on your Farm.
      Goat Nursery - FarmVille 2
      Before you can start raising your baby goats, you will need to build your Nursery. Your first step is collecting Building Materials. You will need the following items to start building your Goat Nursery:
      • Toy Goats
      • Goat Bedding
      • Yellow Paints
      To Collect Toy Goats, click on the “post” button to post to your Facebook wall; you will get the parts when your friends click on it, or when you click on a similar newsfeed post.
      Click on the “Ask” button to send requests for Goat Bedding and Yellow Paints to your Neighbors. If you do not wish to wait for your friends, you can skip any of these tasks for Farm Bucks.
        Goat Nursery - FarmVille 2
      Once you have collected the required items, click on the “start building” button at the bottom of the construction menu.
        Goat Nursery - FarmVille 2
      Now that the Nursery is almost complete, you will need a little help from your Neighbors to finish the job. The Goat Nursery requires four additional helpers, so click on the “Ask Friends” button to send some crew requests to your Friends. When they accept, you will see the spots in the Build Menu begin to fill. If you do not wish to wait for your friends, click the “Hire One” button to purchase helpers with Farm Bucks.
        Goat Nursery - FarmVille 2
      Using your Goat Nursery (Development Quests)
      Raising a baby goat requires love, affection, and special attention. That’s why the Goat Nursery is here to help you! The Nursery is broken up into three development stages (quest sets): Name Your Goat, Choose a Specialty, and Choose a Personality. Each development stage (quest set) has three tasks that have to be completed. As you complete each development stage, you will unlock the next stage.

      Once your Nursery is up, you will need to place one baby goat inside. Click on the Goat Nursery to open the Quest Menu.
      Goat Nursery - FarmVille 2
      Development Quests – Name Your Goat
      The first step is to name your baby goat. You can use up to 14 characters (with spaces):
      Goat Nursery - FarmVille 2
      Once you have typed in a name, click the green “Confirm” button, then the page will turn, and the next page will be your first set of development quests. Click on the “Make it” button for the recipe you wish to Craft and you will be sent to your Kitchen and/or Workshop.
      As you finish parts of your quest, a blue “Feed,” “Play,” or “Groom” button will appear to indicate what parts of the quest you have collected. The first development stage is as follows:
      Goat Nursery - FarmVille 2
      Once you have collected the required items, click on the blue “Feed,” “Play,” and “Groom” buttons to watch your avatar train your baby goat! A green check mark will appear for each task you have completed.  Once you have performed all three of the tasks, click the turquoise “Complete & Share” button.
      Goat Nursery - FarmVille 2
      Development Quests – Choose a Specialty
      The next step is to pick a Specialty for your baby goat. You can choose between a Fertilizer Bonus and a Milk Bonus (you will receive one extra Fertilizer or Milk every time you feed the Adult goat). Note: You can only choose one Specialty per baby goat.
      Goat Nursery - FarmVille 2
      Once you have selected a Specialty, click the green “Confirm” button to turn the page to the next set of development quests. Click on the “Make it” button for the recipe you wish to Craft and you will be sent to your Kitchen and/or Workshop.
      The second development stage is as follows:
        Goat Nursery - FarmVille 2
      As you have collected the required items, click on the blue “Feed,” “Play,” and “Groom” buttons to watch your avatar train your baby goat! Once you have performed all three of the tasks, click the turquoise “Complete & Share” button.
      Goat Nursery - FarmVille 2
      Development Quests – Choose a Personality
      The final step is to pick a Personality for your baby goat. You can choose between Grumpy, Sleepy, and Playful. The Personality you pick will determine how your baby goat will behave once it is an adult (e.g. animate). Note: You can only choose one Personality per baby goat.
      Goat Nursery - FarmVille 2
      Once you have selected a Personality, click the green “Confirm” button to turn the page to the final set of development quests. Click on the “Make it” button for the recipe you wish to Craft and you will be sent to your Kitchen and/or Workshop.
      The third and final development stage is as follows:
      Goat Nursery - FarmVille 2
      As you have collected the required items, click on the blue “Feed,” “Play,” and “Groom” buttons to watch your avatar train your baby goat! Once you have performed all three of the tasks, click the turquoise “Complete & Share” button.
      Goat Nursery - FarmVille 2
      Congratulations! You have raised your baby goat into an Adult that will produce an extra resource! Click your goat to move and place it on your farm:
      Goat Nursery - FarmVille 2
      Once you have moved your Adult Goat to the farm, a cooldown timer will indicate how much time remains until you can raise another baby goat. If you wish to see how much time you have left, simply hover over the Nursery.
      Crop Packets
      For a limited time only, you can earn special Orange Sherbet Carnation Crop Packets! In order to earn these Packets, you must raise all three types of Goat Personalities (Grumpy, Sleepy, and Playful). As you raise each type of Personality, a green check mark will appear on the cards to indicate what parts of the mini quest have been completed.
        Goat Nursery - FarmVille 2
      Once you have raised all three types of Personalities, you will unlock the Orange Sherbet Carnation Crop Packet! You will be able to use this Crop for 14 days. Click the turquoise “Share Carnations” button to share some rewards with friends!
      Goat Nursery - FarmVille 2
      Note: You have limited time to earn the Orange Sherbet Carnation Crop Packet. If you do not raise all three types of the Goat Personalities within the allotted time, the Crop Packet will disappear and you will be unable to claim it.
      Additional Information:
      • You can only use baby goats with the Nursery.
      • You can re-use the Nursery to raise as many goats as you’d like.
      • If you do not wish to use the Goat Nursery feature, it can be sold (frame only) or stored in your Inventory.
      • You are limited to three Goat Nurseries per Farm. You can purchase up to two more Goat Nurseries from the General Store for Coins and Farm Bucks.


      The Horseshoe Press Guide!

      21 June 2013 FarmMaster 0
      Introducing, the Horseshoe Press! Marie is completing a special horseshoe collection on her farm and she needs your help. Assist Marie with her collection by recycling old Horseshoes to earn the exclusive Blue Roan Horse!
        Horseshoe Press - FarmVille 2
      If you are level 10 or higher, you will see the following pop-up. Click on “Place your Horseshoe Press” to get started.
        Horseshoe Press - FarmVille 2
      Building the Horseshoe Press

      Your first step is collecting construction parts. You will need the following items to start building your Horseshoe Press:

      • Brass Armbars
      • Granite Bricks
      • Cast Iron Pots
      To collect Brass Armbars, click on the “Post” button to post to your Facebook wall – you will get the parts when your friends click on it, or when you click on a similar newsfeed post.
      Click on the “Ask” button to send requests for Granite Bricks and Cast Iron Pots to your Neighbors. If you do not wish to wait for your friends, you can skip any of these tasks for Farm Bucks.
      You can also purchase any of these items above for Farm Bucks if you do not wish to wait for your friends to respond to your requests or newsfeed posts.
      Horseshoe Press - FarmVille 2
       
      Note: You can post and send requests for materials to your Friends every 18 hours. 

      Once you have collected the required items, click on the “Start Building!” button at the bottom of the construction Menu. 

      Horseshoe Press - FarmVille 2
      Now that the Horseshoe Press is almost complete, you will need some assistance from your Neighbors to finish the job. The Horseshoe Press requires four additional helpers, so click on the “Ask Friends” button to send some crew requests to your Friends. When they accept, you will see the spots in the Build Menu begin to fill. If you do not wish to wait for your friends, click the “Hire One” button to purchase crew members with Farm Bucks.
      Once you have successfully filled all four spots, click on the “Finish & Share” button.
        Horseshoe Press - FarmVille 2
      Using the Horseshoe Press
      You must have at least five Adult Horses on your farm that are not Prized for the Press to be functional. When you feed your Horses, they will drop Horseshoes, which can be found in the “Ingredients” section of your Inventory.
      Tip: Limited Edition Horses produce more Horseshoes when fed!
      To see your Horseshoe count, click on the Horseshoe Press to open the main menu. Your Horseshoe total is located on the left-hand side of this screen. The number at the bottom of the Horseshoe indicates how many you currently have in your Inventory.
      Horseshoe Press - FarmVille 2
      Once you have collected at least five Horseshoes, you will be able to recycle them by clicking on the blue “Recycle” button from the Horseshoe Press menu.
      Special Horseshoes
      To earn the Blue Roan Horse, you will need to collect special types of Special Horseshoes. To get these Special Horseshoes, all you need to do is keep recycling old Horseshoes!
      There are three types of Special Horseshoes you can receive:
      1. Copper (collection requires 6)
      2. Aluminum (collection requires 4)
      3. Titanium (collection requires 2)
      These Horseshoes are not used for Crafting like Sheets of Metal. Instead, they are automatically added to your Horseshoe Collection. To earn the Blue Roan Horse, you will need to have 6 Copper, 4 Aluminum, and 2 Titanium (12 total) Horseshoes in your Collection. Once you have collected these, you can trade them in for the Blue Roan Horse!
      The more Adult Horses you have on your Farm, the better your chances are of receiving Special Horseshoes!
        Horseshoe Press - FarmVille 2
      If you do not want to wait to collect the Special Horseshoes, you can use Farm Bucks to skip these steps and get the new baby Blue Roan Horse right away!
        Horseshoe Press - FarmVille 2
      Your new Blue Roan Horse needs baby bottles to reach adulthood, just like your other animals. Once it has matured, it will produce Horseshoes.
      Additional Information:
      • Minimum of Five Adult Horses (non Prized) on any given farm is required to use the Horseshoe Press.
      • If you do not wish to use the Horseshoe Press feature, it can be sold (frame only) or stored in your Inventory.
      • The timer at the top of your Horseshoe Press Menu indicates how long you have to collect the baby Blue Roan Horse. If you do not collect it, the prize will disappear and you will be unable to claim it.
      • You can collect the baby Blue Roan Horse as many times as you wish during this time.
      • If you want to see how much time you have left to claim the baby Blue Roan Horse, hover your cursor over the Press.
      • Limited to one Horseshoe Press per farm.
      • If you lack any requirements (such as not having enough Horses), the game will tell you what you are missing.
      • Rotate the Press to view a different angle!
      No Image

      The Trials of Horse Training Guide, Stage 2

      21 June 2013 FarmMaster 0
      The Trials of Horse Training Feature is broken up into four consecutive stages that unlock over time. Click the links below to find out more information about each stage.

      Stage 1 Guide: View
      Stage 2 Guide: View
      Stage 3 Guide: Coming Soon!
      Stage 4 Guide: Coming Soon!

      Marie is having difficulties training one of her Horses, and she needs your help. The Horse in question is rare and beautiful, but very hard to please. That’s where you come in! Assist Marie with her tasks and you can earn great prizes and more importantly, the trust of the finicky Horse. Complete all four stages and get the exclusive Akhal-Teke horse!
      FarmVille 2

      Completing your Training Stall (Stage 2 Decoration Quests)
      Once your Stall is up, you may notice that it looks a little bare. In order to earn some beautiful new decorations, you will need to complete the Decoration Quests. Currently, only the first and second set of quests are available. The other two stages of this feature will unlock in the coming weeks. Click on the Training Stall to open the Quest Menu.
      FarmVille 2
      Each Decoration Quest has 4 parts that have to be completed. As you complete a part of a quest line, you will earn a decoration for your Stall. If you complete all 4 parts of a Decoration Quest, you will win an exclusive prize for your farm!

      FarmVille 2

      Decoration Quests – Week 2
      Click on any of the Saddles in the Training Stall menu to start working on your second set of Decoration Quests. As you finish parts of your quest, a green check mark will appear to indicate what parts of the quest have been completed. The four quests for the Week 2 are as follows:
      FarmVille 2
      FarmVille 2
      Helpful Tip: You can get Fur from feeding American Brown Buffaloes or Deer. You can purchase the Buffalo in the General Store for Coins or Farm Bucks. Currently, we do not have a Deer available for purchase.
      FarmVille 2
      FarmVille 2
      Additional Information:
      • A new Decoration Quest will unlock each week.
      • You can purchase additional prizes for Farm Bucks once you’ve redeemed them from the Training Stall menu.
      • If you do not wish to use the Trials of Horse Training feature, it can be sold (frame only) or stored in your Inventory.
      • You are limited to one Training Stall per Farm. 
      No Image

      The Trials of Horse Training Guide!

      12 June 2013 FarmMaster 0
      The Trials of Horse Training Feature is broken up into four consecutive stages that unlock over time. Click the links below to find out more information about each stage.

      Stage 1 Guide: View
      Stage 2 Guide: Coming Soon!
      Stage 3 Guide: Coming Soon!
      Stage 4 Guide: Coming Soon!

      Marie is having difficulties training one of her Horses, and she needs your help. The Horse in question is rare and beautiful, but very hard to please. That’s where you come in! Assist Marie with her tasks and you can earn great prizes and more importantly, the trust of the finicky Horse.
      If you are level 11 or higher, you’ll see the following pop up. Clicking on “Place the Training Stall” will give you the ability to place the Stall Frame on your Farm. If you do not wish to use the Stall or would like the ability to save it for later, click the “Cancel” button and the frame will automatically be sent to your inventory.
      Horse Training MOTD

      Before you can start training the Horse, you will need to build your Stall. Your first step is collecting Building Materials. You will need the following items to start building your Training Stall:
      • Wood Railings
      • Wood Varnish
      • Stackable Stones
      To Collect Wood Railings, click on the “post” button to post to your Facebook wall; you will get the parts when your friends click on it, or when you click on a similar newsfeed post.
      Click on the “Ask” button to send requests for Wood Varnish and Stackable Stones to your Neighbors. If you do not wish to wait for your friends, you can skip any of these tasks for Farm Bucks.
      Once you have collected the required items, click on the “start building” button at the bottom of the construction menu.
      Horse Training Building 1
      Now that the Stall is almost complete, you will need a little help from your Neighbors to finish the job. The Training Stall requires 4 additional builders, so click on the “Ask Friends” button to send some crew requests to your Friends. When they accept, you will see the spots in the Build Menu begin to fill. If you do not wish to wait for your friends, click the “Hire One” button to purchase crew members with Farm Bucks.
      Horse Training Building 2
      Completing your Training Stall (Decoration Quests)
      Once your Stall is up, you may notice that it looks a little bare. In order to earn some beautiful new decorations, you will need to complete the Decoration Quests. Currently, only the first set of quests is available. The other three stages of this feature will unlock in the coming weeks. Click on the Training Stall to open the Quest Menu.
      Horse Training Menu
      Each Decoration Quest has 4 parts that have to be completed. As you complete a part of a quest line, you will earn a decoration for your Stall. If you complete all 4 parts of a Decoration Quest, you will win an exclusive prize for your farm!
      Horse Training Menu 2
      Decoration Quests – Week 1
      Click on any of the Saddles in the Training Stall menu to start working on your first set of Decoration Quests.  As you finish parts of your quest, a green check mark will appear to indicate what parts of the quest have been completed. The four quests for the Week 1 are as follows:
      Horse Training Week 1 Quest 1
      Horse Training Week 1 Quest 2
      Horse Training Week 1 Quest 3
      Horse Training Week 1 Quest 4
      Additional Information:
      • A new Decoration Quest will unlock each week.
      • You can purchase additional prizes for Farm Bucks once you’ve redeemed them from the Training Stall menu.
      • If you do not wish to use the Trials of Horse Training feature, it can be sold (frame only) or stored in your Inventory.
      • You are limited to one Stall Shed per Farm. 

      The Cow Barn Guide!

      6 June 2013 FarmMaster 0

      Greetings,
      Farmers!

      The FarmVille
      2 Studio and the Real California Milk association have teamed up together to
      bring you the storage building that you have been so eager to get. Introducing,
      the Cow Barn! Store your Prized Cows
      in this home and feed them all with a single click. If that isn’t enough,
      Prized Cows in the Barn will also require less Feed and give +25 Feed Capacity!


      Note: The Real California Milk stamp will be visible during the length of
      the promotion. Once the promo has ended, this stamp will disappear. To learn
      more about the Real California Milk association, click
      HERE.


      Cow Barn - FarmVille 2
       

      If you are level
      10 or higher, you will see the following pop-up. Click the green “Place on Farm”
      button to get started.

       
      Cow Barn - FarmVille 2

      Once you have placed the Cow Barn onto your farm, Cornelius will stop by
      with an exclusive baby Real CA Cow!

      Cow Barn - FarmVille 2

      Your new Real CA Cow needs baby bottles to reach adulthood,
      just like your other Animals. Once it has matured, it will produce Milk, which can be used in Crafting Kitchen
      Recipes.

      Note: Your first
      Real CA Cow will not count towards your Animal Maximum Capacity.
      Additional Real CA Cows can be purchased in the General Store; each additional
      Cow will count towards the Animal max cap.

      Building
      the Cow Barn
      :


      Your next step is
      collecting construction parts. You will need the following items to start
      building your Cow Barn:

      • Wrought
        Iron Hinges
      • Dairy
        Fence Pipes
      • Roof
        Shingles

      To collect Wrought
      Iron Hinges, click on the “Post” button to post to your Facebook wall – you
      will get the parts when your friends click on it, or when you click on a
      similar newsfeed post.

      Click on the “Ask” button to send requests for Dairy
      Fence Pipes and Roof Shingles to your Neighbors. If you do not wish to wait for
      your friends, you can skip any of these tasks for Farm Bucks.

       
      Cow Barn - FarmVille 2

      Note: You can send a request for materials
      to your Friends every 18 hours.


      Once you have collected
      the required items, click on the “Start Building!” button at the bottom of the
      construction Menu. 

       
      Cow Barn - FarmVille 2

      Now that the Cow
      Barn is almost complete, you will need a little help from your Neighbors to
      finish the job. The Cow Barn requires four additional mechanics, so click on
      the “Ask Friends” button to send some crew requests to your Friends. When they
      accept, you will see the spots in the Build Menu begin to fill. If you do not
      wish to wait for your friends, click the “Hire One” button to purchase crew
      members with Farm Bucks.

       
      Cow Barn - FarmVille 2

      Using
      the Cow Barn
      :

      Click on the Cow Barn to open the main menu. 

       
      Cow Barn - FarmVille 2

      Inside the Cow
      Barn, you will see placements that you can fill with Prized Cows. Prized Cows
      will take up one spot in your Barn regardless of breed (see below: Prized
      Highland Cow).

      Cow Barn - FarmVille 2

      Adding & Removing Cows:

      To add Prized Cows in the Barn, check the “Auto Fill” box
      and click on the green “Add Prized Cows” button. All of your Prized Cows will
      automatically walk into the Barn!

      To remove a Prized Cow from the Barn, open the main menu and
      click on the red “–“ (minus symbol)
      box on the bottom left hand corner of the placement slot (see below: A).


      The Cows cards have symbols on them to indicate different
      things:


      Cow Barn - FarmVille 2


      A. Minus Symbol: Remove Cow

      B. Feed: How much Feed the Cow will consume.


      C. Swiss Cheese: How much the Cow will produce (see below: Feeding)

      Feeding:

      Prized Cows stored in the Barn will eat less Feed
      they normally do: 4 Feed for each
      Cow, regardless of what type. For example, a Cow that eats 13 Feed outside of the Barn will eat 4 Feed when
      inside the Barn.   

      Swiss Cheese:

      Each time you harvest the Cow Barn you will get Swiss Cheese,
      which can be used in Crafting Kitchen Recipes. Fill your Cow Barn all the way
      to get the most Swiss Cheese when you harvest!

      Note: The Swiss
      Cheese will automatically go into your Inventory.

       
      Cow Barn - FarmVille 2

      Additional
      Information
      :

      • The timer for your Cow Barn will pause when
        placed in Storage, and then resume once placed back on your farm.
      • If you do not wish to use
        the Cow Barn feature, it can be sold (frame only) or stored in your
        Inventory.
      • If you want to see how
        much time you have left to harvest, hover your cursor over the Barn.
      • You are limited to one Cow
        Barn per farm.
      • Rotate the Barn to view a
        different angle!