The Egg Hunt Table, Official Guide!

9 April 2014 FarmMaster 0


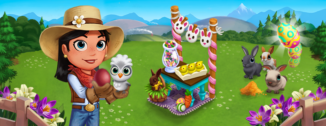
Marie wants to play a fun Springtime game with you! She will hide Springtime Goodies inside Surprise Eggs near Adult Rabbits. Feed your Adult rabbits to find them and open them at the Egg Hunt Table. Collect all of the Goodies and you will receive a baby Blue Silkie Bantam Chicken!
If you are level 12 or higher, you will see the following pop-up. Click on the “Place Egg Hunt Table” button to get started.
Egg1
Building the Egg Hunt Table:

Your first step is collecting construction parts. You will need the following items to start building your Egg hunt Tabe:

  • Bunny Garlands
  • Jelly Bean Jars
  • Decorating Posts
To collect Bunny Garlands, click on the “Post” button to post to your Facebook wall – you will get the parts when your friends click on it, or when you click on a similar newsfeed post. 
Click on the “Ask” button to send requests for Jelly Bean Jars and Decorating Posts to your Neighbors. If you do not wish to wait for your friends, you can skip any of these tasks for Farm Bucks.
Egg2
Note: You can post and send requests for materials to your friends every 18 hours.

Once you have collected the required items, click on the “Start Building” button at the bottom of the construction Menu. 
Now that the Egg Hunt Table  is almost complete, you will need some assistance from your Neighbors to finish the job. The Egg Hunt Table requires three additional helpers, so click on the “Ask Friends” button to send some crew requests to your friends. When they accept, you will see the spots in the Build Menu begin to fill. If you do not wish to wait for your friends, click on the “Hire One” button to purchase crew members with Farm Bucks. Once you have successfully filled all three spots, click on the “Finish & Share” button.

Egg3
Using the Egg Hunt Table:  
The Egg hunt Table requires a certain amount of Adult Rabbits on your farm that are not Prized to be functional. If you lack any requirements (such as not having enough Rabbits), the game will tell you what you are missing. When you feed your Adult Rabbits, they will drop Wool, which can be found in the “Ingredients” section of your Inventory.
Tip: Limited Edition Rabbits produce more Wool when fed!
Collecting Surprise Eggs
In order to get the Springtime Goodies, you will need to collect Surprise Eggs and then crack open them. To see your Surprise Egg count, click on the Egg Hunt Table to open the main menu. Your Surprise Egg total is located on the left-hand side of this screen. The number at the bottom of the Surprise Eggs indicates how many you currently have in your Inventory.


Egg4
  
Crafting Surprise Eggs: You can craft your very own Surprise Eggs via the Crafting Kitchen. From the Egg Hunt Table menu, click on the “Craft” button to open the Kitchen. The Recipe for Surprise Eggs  is as follows: 
  • Surprise Egg: The required Ingredients are Eggs and Spring Candy Bags. Note: To get Eggs, feed your Adult Chicken (feeding Prized Chicken does not count).
Egg5
  
Feeding Adult Rabbits: You can find Surprise Eggs by feeding your Adult Rabbits (feeding Prized Rabbits do not count). If you find some, they will appear on your farm in a similar fashion to Prize Goods.
  Egg6
When a Surprise Egg appears on your farm after harvesting, click on it and you will see the following pop-up:
  Egg7
Click on the turquoise “Share” button to post a feed to your wall. Your friends will be able click on this feed to claim some free Surprise Eggs for themselves too! Once you have clicked on the Surprise Eggs, it will be automatically added to your Egg Hunt Table. 
Once you have collected at least one Surprise Egg, you will be able to crack open it by clicking on the blue “Crack Open” button from the Egg Hunt Table menu.
Egg8
As you crack open Surprise Eggs, you will find Springtime Goodies, which will be automatically added to your Egg Hunt Table.
Springtime Goodies:  
To earn the baby Blue Silkie Bantam Chicken, you will need to collect types of Springtime Goodies. To get these Goodies, all you need to do is keep crack opening Surprise Eggs!
There are three types of Goodies you can receive:
  1. Jelly Beans
  2. Marshmallow Chicks
  3. Chocolate Bunnies
These Goodies are not used for crafting. Instead, they are automatically added to your Springtime Goodies collection. To earn the baby Blue Silkie Bantam Chicken, you will need to have Jelly Beans, Marshmallow Chicks and Chocolate Bunnies in your collection. A green check mark will indicate which Goodie you have completed. Once you have collected all three of Springtime Goodies, you can trade them in for the baby Blue Silkie Bantam Chicken !
Tip: The more Adult Rabbits you have on your Farm, the better your chances are of receiving Springtime Goodies.
If you do not want to wait to collect the Springtime Goodies, you can use Farm Bucks to skip these steps and get the new baby Blue Silkie Bantam Chicken right away!
Egg9


Your new baby Blue Silkie Bantam Chicken will need Baby Bottles to reach adulthood, just like your other animals. Once it has matured, it will produce Eggs.
Additional Information:
  • You have 21 days to earn the baby Blue Silkie Bantam Chicken. The timer at the bottom of your Egg Hunt Table menu indicates how long you have to collect the baby Chicken. If you do not collect it, the prize will disappear and you will be unable to claim it.
  • The Egg Hunt Table requires a minimum number of Adult Rabbits on any given farm in order to use it.
  • If you lack any requirements (such as not having enough Rabbits), the game will tell you what you are missing.
  • If you do not wish to use the Egg Hunt Table feature, it can be sold (frame only) or stored in your Inventory.
  • You can collect the baby Blue Silkie Bantam Chicken as many times as you wish (before the feature expires).
  • If you want to see how much time you have left to claim the baby Blue Silkie Bantam Chicken, hover your cursor over the Egg Hunt Table.
  • Limited to one Egg Hunt Table per farm.

Egg Hunt Table Construction!

6 April 2014 FarmMaster 0


Coming this Tuesday in Farmville 2, a new feature the Egg Hunt Table. Build the Egg Hunt Table and feed rabbits for a chance to get surprise egg. The adult rabbits you have the better chance of getting a surprise. You may also craft the surprise egg bat the Workshop. The beside the Spring Goodies Rewards you can also receive a Special Chicken that lays red egg.


Place the Egg Hunt Table in your farm.


Click on it and you can view the materials it will need to build it. Among the items are:
  • Bunny Garlands
  • Jelly Bean Jars
  • Decorating Posts


You will then need to collect these materials by either posting it to you wall and or ask friends for the materials.
Once all the slot are filled you can now have the completed Egg Hunt Table and now you can crack open Surprise Eggs!
The Egg Hunt Table will need adult rabbits. Feeding Adult Rabbits will give you a chance to find Surprise Eggs! You can crack open Surprise Eggs at the Egg Hunt Table to find Springtime Goodies. The final reward is a special Chicken that lays Red Eggs.

Surprise Eggs
You can also craft Surprise Egg and you will need the following items: Egg x8 and Spring Candy Bag x3. (Spring Candy Bags can be asked from friends).

Egg Hunt Table : Rewards


Baby Blue Silkie Bantam Chicken
Blue Silkie Bantam Chicken
Prized Blue Silkie Bantam Chicken


The Rabbit Rescue Station, Official Guide!

3 April 2014 FarmMaster 0

The Rabbit Rescue Station Is Here!

The Rabbit Rescue Station is a fictional part of the storyline in FarmVille 2, and is not actually affiliated with any real-world business or charity.
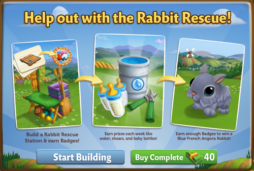
The Rabbit Rescue Station is here! Build a Rabbit Recue Station and earn Badges, which you can redeem for great rewards and the adorable baby Blue French Angora Rabbit. The Rabbit Rescue Station Feature is broken up into three consecutive stages that unlock over time. Click the links below to find out more information about each stage.
Stage 1
Stage 2 – Coming Soon
Stage 3 – Coming Soon
If you are level 12 or higher, you will see the following pop-up. Click on the “Okay” button to get started.
  
  
Before you can start crafting, you will need to build your Rabbit Rescue Station. Your first step is collecting Building Materials. You will need the following items to start building your Booth:
  • Rescue Ropes
  • Gurneys
  • Flower Sashes
To collect Rescue Ropes, click on the “Post” button to post to your Facebook wall – you will get the parts when your Friends click on it, or when you click on a similar newsfeed post.
Click on the “Ask” button to send requests for Gurneys and Flower Sashes to your Neighbors. If you do not wish to wait for your Friends, you can skip any of these tasks for Farm Bucks.
Rabbit2


Note: You can send a request for materials to your Friends every 18 hours.

Once you have collected the required items, click on the “Start Building” button at the bottom of the construction Menu. 

Now that the Rabbit Rescue Station is almost complete, you will need a little help from your Neighbors to finish the job. The Crafting Drive Booth requires four additional helpers, so click on the “Ask Friends” button to send some crew requests to your Friends. When they accept, you will see the spots in the Build Menu begin to fill. If you do not wish to wait for your Friends, click on the “Hire One” button to purchase crew members with Farm Bucks.
Rabbit3


Using the Rabbit Rescue Station:
Click on the Rabbit Rescue Station to open the main menu.
Rabbit4
This menu shows how many Points you have earned in the current week, what rewards you have redeemed and what rewards you are currently working towards. It also shows your cumulative points that go towards earning the baby Blue French Angora Rabbit (Final Reward).
A – The Points Total (cumulative amount of Points you have earned during crafting goods). You earn Points by crafting the Rabbit Rescue Station Recipes. NoteThis number keeps counting up, and does not get reset every week (see “the Baby Blue French Angora Rabbit” section below for more details).
B – If you want to ask your Friends for Badges, click on this button and a request will post to your feed. 
– The button to use when you want to purchase Badges for Farm Bucks.
D – Use these arrow buttons to scroll through the Rabbit Rescue Station Recipes.
E – The button to use when you want to craft the Rabbit Rescue Station Recipes (earn Badges).
F – The Rabbit Rescue Station bar, which tracks your progress towards Milestone Goals and earning the baby Blue French Angora Rabbit. NoteThis bar will reset each week when the next Stage becomes available.
How to Get Badges in the Rabbit Rescue Station:
There are multiple ways to get Badges in the Rabbit Rescue Station:
  1. Crafting Recipes:
    1. The first Stage (Week 1) has 3 different Recipes, and then 2/3 new Recipes that are worth higher Points unlock the following Stages (Week 2 & 3).
    2. When new Recipes unlock, you can craft those, as well as the previously unlocked Recipes, which means you can craft up to 5 Recipes in parallel during Week 2, and up to 8 Recipes during Week 3!
    3. Ask your Friends for Donation Badges by posting a feed to your wall (See B. in the “Using the Rabbit Rescue Station” section above).
    4. Use your Farm Helpers! Each Farm Helper will drop a Donation Package after they’ve completed a Neighbor Visit task.
    5. Purchase Badges for Farm Bucks (See C. in the “Using the Rabbit Rescue Station” section above).
Rabbit Rescue Station Recipes:
In order to earn Badges, you must craft the the Rabbit Rescue Station Recipes. From the the Rabbit Rescue Station menu, click on the “Craft Recipe” button to open the Recipe menu.
Stage 1
The two Recipes for the Week 1 are as follows:
  • Energy Treats: The required Ingredients are Wheat and Animal Vitamin. You will receive a total of four Badges per Energy Treat crafted.
Rabbit5
  • Heirloom Animal Rafts: The required Ingredients are Heirloom Wood and Crafting Nails. You will receive a total of three Badges per Heirloom Animal Raft crafted. Note: To get Heirloom Pieces of Wood, harvest your Heirloom Pine Trees and Heirloom White Willow Trees. 


Rabbit6

  • Heirloom Rubber Boots: The required Ingredients are Heirloom Rubber Tree Drops and Fur. You will receive a total of two Badges per Heirloom Rubber Boots crafted. Note: To get Fur, feed your Adult Buffalo and Adult Deer (feeding your Prized Buffalo and Prized Deer do not count).

  Rabbit7
Farmhand Donation Packages:
In addition to Crafting, you can earn Badges from your Farmhands. As you use your Farmhands, they will donate a Package to you for the Rescue Station, which gives you Badges in the Station. These Packages linger on your farm and appear as a small Badge. Once you have found a Package, click on it and you will receive the following message:
Rabbit8


Click on the “Open Rescue Station and Share” button to share some Badges with Friends!
Earning Rewards:
In order to earn the Rabbit Rescue Station rewards, you will need to accrue enough Badges to hit your Milestone Goal. Once you have collected enough Badges for your current Milestone Goal, they will be automatically redeemed for some great rewards. After you redeem each reward, a green check mark will appear to indicate what Milestone Goal has been reached. Click on your Rescue Station to open up your progress menu. 
Stage 1
The Milestone Goals and respective rewards for Week 1 are as follows: 
  • Milestone 1:  +10 Water
  • Milestone 2:  +15 Water
  • Milestone 3:  +20 Water
  • Milestone 4:  1 Deluxe Sprinkler
The Baby Blue French Angora Rabbit:
The final reward for the Crafting Drive Booth is the baby Blue French Angora Rabbit. In order to earn this adorable Rabbit, you will need to earn enough Badges (Badges Total) towards the Crafting Drive Goal. The Crafting Drive Goal is based on the cumulative Badges you get over the 3-week period, and can be redeemed for the baby Blue French Angora Rabbit as soon as the Goal has been reached. Beside of the Baby Blue French Angora Rabbit, you also will earn 10 Farm Favors, which you can use to upgrade your Farm.
Rabbit9
If you do not want to wait to get the baby Blue French Angora Rabbit, you can use Farm Bucks to get enough Points and unlock the Rabbit right away! 
Additional Information:
  • Every week, the Rabbit Rescue Station bar is reset and you will now work towards a new set of rewards. Note: Your Badges Total (number below the baby Blue French Angora Rabbit) will not be reset.
  • You have 21 days to collect the rewards. If you do not collect them all, the rewards will disappear and you will be unable to claim them.
  • If you want to see how much time you have left to claim the Rabbit Rescue Station rewards, click on the
    Station and look at the timer below the “Get a Bunny.”
  • You are limited to one Rabbit Rescue Station per farm.
  • The Rabbit Rescue Station is unmovable.

Big Harvest Official Guide!

26 March 2014 FarmMaster 0
Big Harvest is only available to players who have unlocked Early Access. Unlocking Early Access means you not only get to play before everyone else, but you will also receive a FREE Field, an Exclusive version of the new Market Stall, and two weeks of access to the Pineberry Packet! General Access to Big Harvest will be Available on 3/28. 
Big Harvest Is Here!
Now that you have restored your family farm to its former glory, it’s time to take it to new heights of productivity! Inspired by your accomplishments, Cornelius has decided to start a new business that will supply accomplished farmers like yourself with upgrades that you can use to make your farm more bountiful than ever.

Cornelius believes you are ready to deal directly with the local townsfolk, so he’s giving you a new Order Board that you can use to earn Favors. Trade these Favors into Cornelius and unlock exciting new upgrades that will allow you to increase production and save space. Explore the limits of your farming creativity with the latest release from FarmVille 2, Big Harvest! 

If you are level 25 or higher, you will see the following pop-up. Click on the “Get Started!” button to get started.
Bigharvest1
After clicking the button, Cornelius will drop by to upgrade your Market Stand.
New Market Stand & Order Board
Cornelius’s upgrades will completely change the appearance of your Stand. In addition to aesthetic upgrades, you may notice the new Order Board on the left-hand side of your Market Stand. The Order Board gives you the opportunity to earn Farm Favors and Coins by completing Orders for the local Townsfolk. 
Bigharvest2
Click on the new Market Stand to check out your brand new Order Board Menu. The “Order Board” Tab displays what orders you currently have available to complete and the “Sell Goods” Tab will allow you to sell your Goods as you normally would with the old Market Stand. 
Bigharvest3
Completing Orders will earn you Farm Favors that you can use to upgrade your farm. The number of Favors you receive per Order is indicated by the blue thumb on top of an Order Card. 
As you can see by the green check marks in the image above, Cornelius already helped you out with your first two Orders. Click on the first one to open the following menu:
Bigharvest4
The Order shown above will give you 3,900 Coins and 1 Farm Favor for crafting 3 Apple Pies. Since Corny has already provided the pies, Click on the “Complete” button to submit the order and get the rewards. 
Return to the main Order Board menu and click on the second Order that Cornelius has assisted you with. This order will give you 590 Coins and 1 Favor. Click on the “Complete” button to submit the order. In addition to your prizes, you will see a pop-up congratulating you on beating your weekly goal. 
Bigharvest5
Click on the “Collect” button to claim your 100 Farm Favors. After clicking the button, your Order board will reset. We will cover more information about Weekly Goals later in the guide, but for now, let’s take a closer look at your Order Board Menu. 
Using The Order Board – Main Menu
As shown in the tutorial, you must craft items and/or collect goods for the Townsfolk to complete Orders. The menu below shows all of your available Orders (Order Cards). 
Order Menu
A – The Order requirements. You must complete these tasks to finish the Order. 
B – The number of Coins you will earn for completing the Order. 
C – The number of Favors you will earn for completing the Order.
D – How long you have left to complete your Weekly Goal. 
E – This bar tracks your progress towards your Weekly Goal. As you complete Orders, the bar will fill. Read on for more information about Weekly Goals. 
F – If you don’t like the requirements of an Order, you simply can click on the red “X” button in the top-right corner of an Order Card to replace it with a new Order. Once you click the button, a pop-up will appear. After confirming the dismissal of the order, you have to wait the number of hours listed for another order to appear.
Bigharvest6
G – If you want to speed up the timer for a new order, you can post Fliers to your wall. When you’ve collected enough Fliers, a new order will appear and you can skip the wait.
H – If you don’t feel like waiting or posting Fliers, you can get a new Order immediately by spending Farm Bucks. 
Note: Once you complete an Order, a new Order will appear on your board for you to complete.
Using The Order Board – Order Cards
Click on Order Cards in the Order Board menu to see more details about the Order requirements. 
Order Card
A – The Order requirements. You must complete these tasks to finish the Order. 
B –  If you don’t like the requirements of an Order, you simply can click on the red “Discard” button to replace it with a new Order. Once you click the button, the following pop-up will appear. After confirming the dismissal of the order, you have to wait the number of hours listed for another order to appear.
Bigharvest6


C – Click this button to return to the main Order Board menu. 
D – The number of Coins you will earn for completing the Order. 
E – The number of Favors you will earn for completing the Order. 
F – The number of Farm Bucks required to complete an Order Requirement. This is an optional choice for players who wish to skip the task.
G – Once you have fufilled the Order Requirements, click this button to complete your order and claim your prizes. 
H. This bar tracks your progress towards your Weekly Goal. As you complete Orders, the bar will fill. Read on for more information about Weekly Goals. 
Weekly Goals
Each week you will be asked to complete a certain amount of Orders. If you beat this goal, you will be rewarded with additional Favors, as shown in the image above. The bar on the right-hand side of your Order Board menu indicates how you are progressing towards your weekly goal, and the timer at the bottom of the Order Board menu indicates how long you have left to complete your weekly challenge. Once this timer expires, you will receive new orders and a new weekly goal. If you do not hit your weekly goal by the time the timer expires, you will not receive additional Favors as a prize. 
If you complete all 15 orders before the time runs out, you will get special orders, which brings you more Farm Favors and Coins than usual orders.
Bigharvest11
Farm Favors
After collecting your first Farm Favors, you may be wondering what they are for. Trade Favors into Cornelius to unlock exciting new upgrades that will allow you to increase production and save space. Currently, you can use Favors to upgrade your Groves and Plots, but we have more exciting upgrades planned in the near future. 
Double Favors often appear after completing orders, so keep you eye out for them to get bonus favors and share them with friends! As their name implies, a Double Favor will grant you two Favors instead of just one. They will appear on your farm in a similar fashion to Prize Goods.
If you find a Double Favor, you will see the following pop-up:
Bigharvest12
Upgrading your Farm
To upgrade your farm, click on the new upgrade button. It’s located on the bottom right-hand side of your screen, next to the Inventory button. 
Bigharvest9
The Upgrade Menu shows all of the upgrades that are currently available and the requirements needed to unlock them. 
Note: Not all upgrades are currently accessible. Some upgrades require a certain level or other upgrades to advance. Click on any upgrade to see what requirements you need to fulfill in order to unlock it. 
Upgrade menu
A – The list of upgrades and the level required to unlock them. 
B – Use this bar to scroll though all of the available upgrades. Click on “Upgrade View” button to see what items on your farm are upgradable.
C – A list of the perks an upgrade will provide you. In the image above, you can see that upgrading to a Field will provide more crops, faster mastery and more Prize Crops. 
D – The number of Coins and Favors required to unlock an upgrade. 
E – Use this button to purchase your upgrade once you have completed all of the requirements. 
Fields
Big Harvest is all about allowing you to explore the endless potential of your Farming creativity. In order to really unlock your full farming potential, we recognize that many of you need more space. Our answer to this problem is Fields. Fields will allow you to plant more crops, master your crops faster, get more prized crops, and save space! One Field is the equivalent of 5 plots, but it only takes up the space of 4. 
Before you can use a Field, you have to build one. If you reached Level 25 or above, you can select Level 1 Fields from the Upgrade menu. Once you have selected the field, place the construction frame on your farm.
Note: If you place your construction frame on existing plots, we’ll harvest these plots for you and refund any water, fertilizer and coins you have spent.
Place confirmation
After placing the construction frame on your farm, you have to wait for the Townsfolk to help you finish building it. If you want to see how long you have to wait until the construction is finished, you can click on the construction frame.
Bigharvest14
Note: If you don’t feel like waiting, you can skip ahead with Farm Bucks. 
Once the timer is done, click on the “Finish Now!” button to let the Townsfolk complete the construction.
Before you can use your new Field, you have to put 5 normal plots into the field construction. Click on the “Tools” button in the bottom right-hand side of your screen, and move 5 plots into your field. Now, your new field is ready to be used!
Note: When you unlock Fields for the first time, you can purchase up to 5 of them for your Farm. You have to purchase each of these Fields individually (you will not recieve 5 level 1 Fields in a single purchase). 
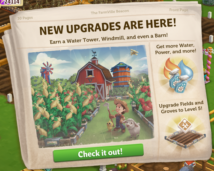
The Duck Nursery!

25 March 2014 FarmMaster 0

The Duck Nursery Feature is broken up into three consecutive development stages (quest sets) that you can complete at your own pace.

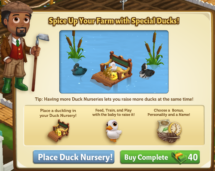
The Duck Nursery is here, which means you can now raise Ducklings! Use this building to develop the personalities of your Ducklings and train them to produce extra resources! If you are level 12 or higher, you will see the following pop up. Clicking on “Place Duck Nursery” will give you the ability to place the Nursery Frame on your Farm.
Before you can start raising your Ducklings, you will need to build your Nursery. Your first step is collecting Building Materials. You will need the following items to start building your Duck Nursery:
  • Chalk Boards
  • Duck Feed
  • Duck Nestings
To Collect Chalk Boards, click on the “post” button to post to your Facebook wall; you will get the parts when your friends click on it, or when you click on a similar newsfeed post. Click on the “Ask” button to send requests for Duck Feed and Duck Nestings to your Neighbors. If you do not wish to wait for your friends, you can skip any of these tasks for Farm Bucks.
Duck2
Once you have collected the required items, click on the “start building” button at the bottom of the construction menu.
Duck3
Now that the Nursery is almost complete, you will need a little help from your Neighbors to finish the job. The Duck Nursery requires four additional helpers, so click on the “Ask Friends” button to send some crew requests to your Friends. When they accept, you will see the spots in the Build Menu begin to fill. If you do not wish to wait for your friends, click the “Hire One” button to purchase helpers with Farm Bucks.
Duck4
Using your Duck Nursery (Development Quests)
Raising a Duckling requires love, affection, and special attention. That’s why the Duck Nursery is here to help you! The Nursery is broken up into three developmental stages (quest sets): Choose a Bonus, Choose a Personality, and Name your Duckling. Each development stage (quest set) has three tasks that have to be completed. As you complete each development stage, you will unlock the next stage. Once your Nursery is up, you will need to place one baby duck inside.
Note: You can raise any baby duck in the Nursery, including ducks available for Coins. Click on the Duck Nursery to open the Quest Menu.
Duck5
Development Quests – Choose a Bonus
The first step is to Choose a Bonus. You can choose between a Fertilizer Bonus, a Feather Bonus and an Appetite Bonus (you will receive two extra Fertilizer or Feathers every time you feed the Adult duck).
Note: You can only choose one Specialty per Duckling.
Duck6
Once you have selected a Bonus, click the green “Confirm” button to turn the page to the next set of development quests. Click on the “Make it” button for the recipe you wish to Craft and you will be sent to your Kitchen and/or Workshop. If you would like a quick tutorial on how to Craft, please visit our Official Guides: Crafting Kitchen and Crafting Workshop
The first development stage is as follows:
Duck7
As you have collected the required items, click on the blue “Use” buttons to watch your avatar train your baby duck! Once you have performed all three of the tasks, click the turquoise “Complete & Share” button.
Duck8
Development Quests – Choose a Personality
The next step is to pick a Personality for your baby duck. You can choose between Posh, Sporty, and Scary. The Personality you pick will determine how your Duckling will behave once it is an adult (i.e. animate).
Note: You can only choose one Personality per Duckling.


 Duck9
Once you have selected a Personality, click the green “Confirm” button to turn the page to the next set of development quests. Click on the “Make it” button for the recipe you wish to Craft and you will be sent to your Kitchen and/or Workshop.
The second development stage is as follows:
Duck10
Once you have collected the required items, click on the blue “Use” buttons to watch your avatar train your baby duck! Once you have performed all three of the tasks, click the turquoise “Complete & Share” button.
Duck11
Development Quests – Name your Duckling
The last step is to name your Duckling. You can use up to 14 characters (with spaces):
Duck12
Once you have typed in a name, click the green “Confirm” button, then the page will turn, and the next page will be your last set of development quests. Click on the “Make it” button for the recipe you wish to Craft and you will be sent to your Kitchen and/or Workshop.
Duck13
As you have collected the required items, click on the blue “Use” buttons to watch your avatar train your baby duck! Once you have performed all three of the tasks, click the turquoise “Complete & Share” button.
Duck14
Congratulations! You have raised your Duckling into an Adult that will produce an extra resource! Click your duck to move and place it on your farm:
Duck15
Crop Packets
For a limited time only, you can earn special Baby Ginger Crop Packets! In order to earn these Packets, you must earn Duck Medallions. As you raise Ducklings, you will earn Duck Medallions. If you unlocked a water plant, you will see a green button “Redeem Prize”. Click on the button to open the menu of the Duck Medallion board:
Duck16
Once you have earned all 4 water plants, you will unlock the Baby Ginger Crop Packet! You will be able to use this Crop for 14 days. Click the turquoise “Share and Go to Market” button to share some rewards with friends!
Duck17
Note: You have limited time to earn the Baby Ginger Crop Packet. If you do not earn enough Duck Medallions within theallotted time, the Crop Packet will disappear and you will be unable to claim it.
Additional Information:
  • You can only use ducklings with the Nursery.
  • You can re-use the Nursery to raise as many ducks as you’d like.
  • If you do not wish to use the Duck Nursery feature, it can be sold (frame only) or stored in your Inventory.
  • You are limited to three Duck Nurseries per Farm. You can purchase up to two more Duck Nurseries from the General Store for Coins and Farm Bucks.

“Spring Fling” Quest Guide!

19 March 2014 FarmMaster 0
Walter needs help on this week Farmville 2 Spring Fling, the latest Farmville 2 Quests for the month of March 2014. 
He is planning to ask Barbara out on this weeks pig race and he needs some suggestion on how to approach this kind of situation. 
There will be a total of 8 stage on this mission. We will also gonna build the Starting Gate on this quest. We listed here the information you will need regarding this release which is expected to go live this Tuesday.
“Kiln Me Softly”: Quest 1-8
Quest Tasks:
  1. Feed 4 Adult Pig
  2. Harvest 1 Pig Pen
  3. Make 5 Pottery Slips
Crafting Pottery Slip:
“Thunder Pork”: Quest 2-8
Quest Tasks:
  1. Colelct 5 Pig Racing
  2. Make 4 Split Pea Soup
  3. Have 1 Completed Pig Racing Started Gate
Crafting Split Pea Soup:

Pig Racing Starting Gate Base:
Pig Racing Starting Gate Materials Needed:
Pig Racing Staring Gate Completed:
“Visualize Whirled Peas”: Quest 3-8
Quest Tasks:
  1. Harvest 20 Green Peas
  2. Make 5 Springtime Pea Salads
  3. Make 4 Cheese Quiche
Crafting Springtime Pea Salad:
Crafting Cheese Quiche:
“Gifts from the Heart”: Quest 4-8
Quest Tasks:
  1. Tend Pig Pen 2 times
  2. Make 3 Sheep Salt & Pepper Shakers
  3. Make 1 Piggy Cookie Jar
Crafting Sheep Salt & Pepper Shakers:
Crafting Piggy Cookie Jar:
“Setting the Mood”: Quest 5-8
Quest Tasks:  
  1. Collect 5 Pig Gamboling SFX Records
  2. Make 2 Key Chains
  3. Make 4 Cow Creamers


Crafting Key Chain:
Crafting Cow Creamer:
“Hot Date”: Quest 6-8
Quest Tasks:
  1. Receive 20 Pieces of Wood
  2. Make 3 Hand Mirrors
  3. Make 2 Green Peacots

Getting Woods:
Crafting Hand Mirror:
Crafting Green Peacoat:
“The Truffle Kerfuffle”: Quest 7-8
Quest Tasks:
  1. Collect 5 Checkered Racing Flags
  2. Make 4 Truffle Oils
  3. Make 4 Rustic Truffle Oil Bread

Crafting Truffle Oil:
Crafting Rustic Truffle Oil Bread:
“Walter’s Masterpiece”: Quest 8-8
Quest Tasks:
  1. Make 5 Leather Jewerly Boxes
  2. Make 3 “Peace in a Pod” Necklace
  3. Have 1 Hungarian Grey Cow by completing the Pig Race

Crafting Leather Jewerly Box:
Crafting “Peas in a Pod” Necklace:
The Pig Racing:
You will receive the Baby Hungarian Grey Cow after completing 5 Races!

Happy Farm!
No Image

Big Harvest Sneak Peek – The Order Board!

17 March 2014 FarmMaster 0

Big Harvest introduces an exciting new game mechanic: Favors. In previous posts, we’ve mentioned that you earn Favors by helping the local Townsfolk, but we know many of you have been itching for more information. Today, we are excited to answer some of your questions with a sneak peek at one of the great new features you can expect to see when Big Harvest releases on 3/28…The Order Board!

Cornelius has decided that he wants to start a new business that will supply accomplished farmers with the upgrades they need to take their farms to the next level. That means it’s time to do away with the Village Grocer sign and replace it with the new and improved Order Board (and Market Stand)! The Order Board will connect farmers directly with the Townsfolk, allowing you to fulfill their requests which will earn you Coins and Favors. Trade these Favors into Cornelius to unlock exciting new upgrades for your Farm. 
We had another opportunity to sit down with Alex, Big Harvest’s Senior Producer, to discuss the creative process behind The Order Board. 
The Creation of The Order Board
“We went through many, many concept iterations for the new Order Board and Market Stand before we arrived at our final version. We actually started with the idea of not changing the original Market Stand and instead adding a separate object that would host the new Order Board, but we soon realized that they should be joined together. Conceptually they were just too similar and we loved the idea of upgrading the look of the Market Stand for everyone.”
Below are some early Order Board explorations. Concept images like this are an important part of the creative process, as they help the team identify what direction they want to take a feature. 
Concept 1
“Our next challenge was to figure out how to incorporate the Order Board into a new and improved Market Stand. We also needed to address how to communicate progress on the new Stand. We really wanted to make it so the player would not have to open up the Order Board menu to see their progress for the week, but instead could just glace at their Market Stand to get a sense of where they were at. We explored different ideas around meters, flags, and scales before we arrived at the chalk board.”
Some early ideations of the new Order Board and Market Stand.


“Finally, we wanted to make a special edition version of the new Market Stand that is only available to players who unlock Early Access to Big Harvest. Luckily, we already explored the idea of adding stained glass to the farm, so we incorporated that look to the new Stand.”
The Special Edition Market Stand (only available if you unlock Early Access on 3/21)
Concept 3
What do you think of the new Order Board? Are you excited for the release of Big Harvest? How do you feel about the new Market Stand? Leave us a comment with your feedback and you’ll be automatically entered into the running to win a FREE Hampshire Pig on 3/17!

Pig Racing Starting Gate Guide!

16 March 2014 FarmMaster 0

Coming this Tuesday! Farmville 2 Pig Racing Starting Gate, a new feature for the month of March 2014 and it will be released as part of a quest and this one looks promising. 


We will be building a Starting Gate and then we gonna race pig. The race it self is fun to watch because it will actually show the race. If you choose the right pig you’ll win the 100,000 coins prize. 


There will be five races to complete and from the look of this feature you’ll only need 5 pigs.


Place the Pig Racing Starting Gate:

Collect the necessary parts and start building:

A completed Pig Starting Gate:

Click on the Pig Starting Gate and you will have the following options:


As we can see from the picture we will need 5 Pigs, Feed 10 Pigs and 6 friends to start the race. Then after completing all we can now start the race.


Pick the Pig who you think will win and start the race:


Once the race commence it will have cool view of the race:


If you pick the correct pig, you will the grand prize of 100,000 coins:

You’ll also receive a Racing Flag beside the prize:


Big Harvest Sneak Peek – Fields!

16 March 2014 FarmMaster 0

We know everyone is anxious for more information about our upcoming release, Big Harvest. Today, we are excited to show you a sneak peek of one of the great new features you can expect to see when Big Harvest releases on 3/28…Fields!

Big Harvest is all about allowing you to explore the limitations of your Farming creativity. In order to really unlock your full farming potential, we recognize that many of you need more space. Our answer to this problem is Fields. Fields will allow you to plant more crops, master your crops faster, get more prized crops, and save space!
This week, we had the opportunity to sit down with Alex, Big Harvest’s Senior Producer, to discuss the creative process behind Fields. 
The Creation of Fields
“Originally, Fields were inspired by the desire to make farms even more bountiful. We wanted to make “Super Plots” that were the same size as a regular plot, only better. Unfortunately, we strugged with how to differentiate a Super Plot from a regular plot, until we were inspired to try making them larger. Once we did this, we realized that the crops in a Field should also look more impressive, since Fields produce more than regular plots. Naming them Fields was the next natural step after that.”
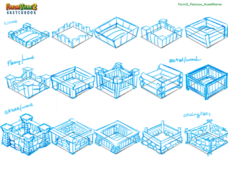
Below are various early concepts for Fields when they were the size of one plot. 
Below is a screenshot of  some initial tests that were done when determining the appearance of Fields.
 Field Concept 2
“Big Harvest is all about upgrades, so naturally, you will be able to upgrade your Fields. Once we had decided how our Fields would function, we spent a lot of time exploring different borders to put on Fields to communicate their levels.”
Below are various early concepts for Field borders. 
Field Concept 3


“We really wanted to convey a sense of progress from Field 1 to 2 to 3, etc., and felt that we were making good progress towards that goal. Unfortunately, when we put the new Field art in the game, we realized we had a problem; with both having wooden borders, Level 2 Fields didn’t feel aspiration-ally better than Level 1 fields. So it was literally back to the drawing board until someone on the team visited a real farm and spotted a rope border around a field. Once we saw that, we realized that we finally had our perfect Level one Field.”
 The final version of Big Harvest’s new Fields. 
Field Concept 4
What do you think of the new Fields? Are you excited for the release of Big Harvest? What other upgrades would you like to see? Leave us a comment with your feedback and you’ll be automatically entered into the running to win a FREE Hampshire Pig on 3/17!

The Floral Cart Is Here,Quest Guide!

12 March 2014 FarmMaster 0

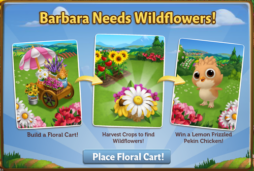
Spring is here, which means Barbara needs Wildflowers to decorate her Inn before all of the tourists arrive! Collect Wildflowers by harvesting crops and you can earn some fantastic prizes, including the Lemon Frizzled Pekin Chicken! 

If you are level 12 or higher, you will see the following pop-up. Click on the “Place Floral Cart!” button to get started.
Building the Floral Cart:
Your first step is building your Floral Cart.
Note: You no longer have to invite friends over to your farm to complete the building! You will notice a builder which will finish your Floral Cart in a certain amount of time. By posting and asking for parts, you will finish the Floral Cart faster. 
Wildflowers1_1
You will need the following items to fasten the construction:
  • Floral Pots
  • Floral Metal Sheets
  • Floral Wood Boards
  • Floral Saws
To collect Floral Pots and Floral Metal Sheets, click on the “Post” button to post to your Facebook wall; you will get the parts when your Friends click on it, or when you click on a similar newsfeed post. 
Click on the “Ask” button to send requests for Floral Wood Boards and Floral Saws to your Neighbors. If you do not wish to wait for your Friends, you can skip any of these tasks for Farm Bucks.
Wildflowers2
  
Note: You can post and send requests for materials to your Friends every 18 hours.
Once you have collected all required items, the building is ready for you to use.
  Wildflowers3
Using the Floral Cart
Click on the Floral Cart to open the main menu. 
Wildflowers4
This menu shows how many Wildflowers you have collected and what prizes you are currently eligible to redeem. 

A – The total amount of Wildflowers  you have collected. As you redeem prizes, this number decreases.
B – If you want to send requests to your Friends for Wildflower Seed Packets, which are used for crafting 2 Wildflowers, press this button. Note: You can have a maximum of 12 Wildflower Seed Packets at any given time.
C – If you want to ask your Friends for Wildflower Seed Jars, which are used for crafting 3 Wildflowers, press this button and a feed will be automatically posted to your wall. Note: You can have a maximum of 12 Wildflower Seed Jars at any given time.
D – If you want to purchase Ice Cubes for Farm Bucks.
E – The button to use when you want to collect Wildflowers by crafting in the Workshop. 
F – The button to use when you want to redeem a prize. Once you have enough Wildflowers, this button will turn turquoise.
G – The number of Farm Bucks required to purchase the prize.
Collecting Wildflowers
You can find more likely Wildflowers by harvesting the following crops:
  • Hibiscus Packet
  • Honeysuckle Packet
  • Sunflower
  • White Lily
  • Lavender
  • Agave
  • Pink Rose
  • Tea Plant
You can also find Wildflowers by harvesting other crops. They will appear on your farm in a similar fashion to Prize Goods.
Wildflowers5
When a Wildflower appears on your farm after harvesting, click on it and you will see the following pop-up:
Wildflowers6


Click on the turquoise “Share” button to post a feed to your wall. Your Friends will be able click on this feed to claim some free Wildflowers for themselves too! Once you have clicked on the Wild Flower, it will be automatically added to your Floral Cart. 
Crafting: You can craft your very own Wildflowers via the Crafting Workshop. From Floral Cart menu, click on the “Craft” button to open the Workshop. The two Recipes for Wildflowers are as follows:
  
  • 2 Wildflowers: To craft 2 Wildflowers, you will need Wildflower Seed Packets and Pieces of Wood. Click on the “Ask” button to send requests for Wildflower Seed Packets to your Friends. If you do not wish to wait for your Friends, you can skip any of these tasks for Farm Bucks. Note: To get Pieces of Wood, harvest for example Pine Trees and White Willow Trees (harvesting Heirloom Trees are count and gives you the chance to craft heirloom Wildflowers).
Wildflowers7

Wildflowers8 
  • 3 Wildflowers: To craft 3 Wildflowers, you will need Wildflower Seed Jars and Mud. To collect Wildflower Seed Jars, click on the “Post” button to post to your Facebook wall – you will get the parts when your Friends click on it, or when you click on a similar newsfeed post.
Wildflowers9

Note: Individual Wildflowers can also be purchased with Farm Bucks from the Floral Cart menu.
Redeeming Wildflowers for Prizes
Once you have collected enough Wildflowers, you can redeem them for some beautiful prizes. Click on your Floral Cart to open up your progress menu.

At the bottom of this menu, there are a total of four prizes that you can redeem for Ice Cubes: 

  • Tricycle Planter (23 Wildflowers)
  • Pack of 3 Wildflower Pavors (41 Wildflowers)
  • Balsa Tree (72 Wildflowers)
  • Wildflower Gazebo (90 Wildflowers)
All four of these prizes can be redeemed as many times as you like, as long as you have enough Wildflowers. Once you have collected all four of the above prizes, you will earn the a Lemon Frizzled Pekin Chicken!
Wildflowers10
Note: The Lemon Frizzled Pekin Chicken can be redeemed for Wildflowers or Farm Bucks more than once.
Click on the “Redeem & Share” button to post a reward feed for your Friends. Make sure to feed your little a Lemon Frizzled Pekin Chicken so she will grow into an Adult a Lemon Frizzled Pekin Chicken that you can harvest for Eggs! Note: Eggs are an Ingredient used in Crafting Kitchen Recipes.
Additional Information:
  • You have 21 days to collect the Floral Cart prizes. If you do not collect them all, the prizes will disappear and you will be unable to claim them.
  • If you do not wish to use the Floral Cart feature, it can be sold or stored in your Inventory.
  • You can only get Wildflowers when harvesting on your own farm. You will not get Wildflowers from Neighbor visits.
  • If you want to see how much time you have left to claim the Floral Cart prizes, hover your cursor over the Floral Cart.
  • You are limited to one Floral Cart per farm.

Blooming Brunch Quest Preview!

8 March 2014 FarmMaster 0
Blooming Brunch Quest Preview:
*Pre-release information subject to change prior to release on March 11, 2014*

Quest 1:  Floral Perfection
  1. Place 1 Floral Cart
  2. Water 10 Pink Perfection Camellias (New crop should be released on Monday March 10, 2014)
  3. Feed 2 Adult Goats
Quest 2:  Lovely Settings
  1. Collect 5 Paper Flower Decorations (Post to Game Feed)
  2. Feed 3 Adult Sheep
  3. Make 2 Bouquet of Orange Yarn Flowers  (Craft in the Workshop)
Quest 3:  Collecting the Wallflowers
  1. Use 3 Farm Hands on your Farm
  2. Perform 10 Neighbor Actions
  3. Make 2 Pink Perfection Baskets or Heirloom Pink Perfection Baskets  (Craft in the Workshop) (Recipe should unlock with the crop)
Quest 4:  Friend Arrangement
  1. Collect 5 Flower Seating Cards (Post to Game Feed)
  2. Harvest 15 Corn
  3. Make 2 Cornbread  (Craft in the Kitchen)


Quest 5:  Dress to Impress
  1. Tend your Rabbit Warren 2 times
  2. Harvest 12 Crimean Irises  (New Crop releasing on Monday March 10, 2014???) (Not sure on this one as we had this crop last year)
  3. Make 2 Crimean Iris Corsages  (Craft in the Workshop) (Recipe should unlock with the crop)
Quest 6:  Plated Flowers
  1. Feed 4 Adult Cows
  2. Harvest 20 Sunflowers
  3. Make 2 Sunflower Butter  (Craft in the Kitchen) (New recipe to be unlocked with the Quest)
Quest 7:  You Are Such a Peach
  1. Collect 5 Flower Cans (Post to Game Feed)
  2. Harvest 6 Peach or Heirloom Peach Trees
  3. Make 2 Peach or Heirloom Peach Lemonade (Craft in the Kitchen)
Quest 8:  Egg-static for the Final Toast
  1. Tend your Pig Pen 2 times
  2. Feed 6 Adult Chickens
  3. Make 2 Rocky Mountain Toasts (Craft in the Kitchen) (New Recipe to be released with the Quest)

The Blue Jay House, Official Guide!

5 March 2014 FarmMaster 0

Spring is on its way, which means Blue Jays are coming out to play! These helpful birds will speed up the growth of your trees if you build them a home and harvest spring crops regularly. You can also earn lovely rewards by feeding the Blue Jays, including the exclusive Coastal Blue Jay!

Note: The Rare Coastal Blue Jay will be available to use on Trees and Groves for 20 uses. After 20 uses, the Rare Coastal Blue Jay l will expire and become a pet (it will count towards your Animal Max Cap, but will not require food nor will it help on trees).
If you are level 11 or higher, you will see the following pop-up. Click on the “Place Blue Jay House” button to place the House on your farm.
Building the Blue Jay House:
Your first step is building your Blue Jay House. You will need the following items to start construction: 
  • Blue Jay Boxes
  • Blue Jay Nests
  • Blue Jay Posts
To collect Blue Jay Boxes, click on the “Post” button to post to your Facebook wall; you will get the parts when your friends click on it, or when you click on a similar newsfeed post.
Click on the “Ask” button to send requests for Blue Jay Nests and Blue Jay Posts to your Neighbors. If you do not wish to wait for your friends, you can skip any of these tasks for Farm Bucks.
Blue2
Once you have collected the required items, click on the “Start Building” button at the bottom of the construction menu. 
Now that your Blue Jay House is almost complete, you will need some help from your Neighbors to finish the job. The Blue Jay House requires three additional helpers, so click on the “Ask Friends” button to send some crew requests to your Friends. When they accept, you will see the spots in the Building Menu begin to fill. If you do not wish to wait for your friends, click on the “Hire One” button to purchase crew members with Farm Bucks. Once you have successfully filled all four spots, click on the “Finish and Share” button.
Blue3
Using the Blue Jay House:
Click on the Blue Jay House to open the main menu. 
Blue4
This menu shows how many Blue Jays you have fed and what prizes you are currently eligible to redeem. 

A – How many Blue Jay Feedings you need and your current progress towards this goal.
B – The button to use when you want to purchase Spring Crops to plant from the General Store.
C – The button to use when you want to craft Treats via the Kitchen. 
D – The total amount of Treats you have crafted. As you feed Blue Jays, this number decreases.
E – The button to use when you want to purchase Fences from the Blue Jay menu (see “Fences” section below).
F – The number of Farm Bucks required to purchase a Prize.
Finding Helper Blue Jays:
Everybody knows that Blue Jays migrate during the spring season, so plant some Spring Crops to attract them and keep an eye out when harvesting!
Helper Blue Jays will appear on your farm after you harvest any of the following Spring Crops: 
  • Leek (Limited Edition)
  • Celeriac (Limited Edition)
  • Strawberry
  • Purple Dragon Carrot Packet
  • Mashua Crop Packet
  • Radish
  • Carrot
  • Asparagus
Blue5
Once you find an Blue Jay, it will have a thought bubble to indicate if it’s hungry or ready to use on Trees and Groves:
Blue6
Blue7

  • Hungry for Treats (Treat thought bubble): The Blue Jay is hungry for Treats (see the “Crafting Treats” section below).
  • Ready to Help (Tree thought bubble): The Blue Jay is ready to help you tend to Trees and Groves (see the “Using Helper Blue Jays” section below).
Note: You are limited to a total of 10 Helper Blue Jays at a time on any given farm.
Fences:
Fences attract more Blue Jays! You can purchase as many Fences as you wish for Farm Bucks from the Blue Jay menu, but you only need 5 to get the max chance at attracting Blue Jays when you harvest Spring Crops. Simply click the Blue Jay House, and then click on the “Get Fences” button.
Blue8
Crafting Treats:
In order to use Helper Blue Jays (Hungry for Treats), you must craft the Treat Recipes. Note: Once they are fed, (Tree thought bubble), you will be able to use them on Trees and Groves (see “Using Helper Blue Jays” section below). You can craft your very own Treats via the Crafting Kitchen. If you would like a quick tutorial on how to craft, please visit our Official Guide: Crafting Kitchen.
From the Blue Jay House menu, click on the “Craft” button to open the Kitchen. You can choose from three different Recipes:


  • 1 Blue Jay Treat: The required Ingredients are Strawberries and Leek (Leek is a limited edition Crop that you can purchase for Coins from the General Store). You will receive a total of one Treat.
Blue9
  • 2 Treats: The required Ingredients are Heirloom Figs and Blue Jay Treat Pouches. You will receive a total of two Treats.
Blue10
  • 3 Treats: The required Ingredients are Celeriac and Blue Jay Treat Bucket (Celeriac is a limited edition Crop that you can purchase for Coins from the General Store). You will receive a total of three Treats.
  Blue11
Using Helper Blue Jays:
Feeding your crafted Treats to an Blue Jay will allow you to use it to tend to your Trees and Groves. To feed a hungry Blue Jay (Treat thought bubble), simply click on it.
Blue12
To use the fed Blue Jay (Tree thought bubble), simply click on it, and then drag and drop it over a Tree or Grove. Similar to Farmhands, a thought bubble will indicate that your Blue Jay will help you with one of the following tasks per Tree and/or Grove:
  • Water: If your Tree or Grove is not watered, use your Blue Jay for Water
  • Speed-Grow: If your Tree or Grove is watered, use your Blue Jay for Speed-Grow
  • Ready for Harvest: If your Tree or Grove is ready to be harvested, use your Blue Jayfor bonus output
Blue13
Once you have used your Helper Blue Jay, it will fly into your Blue Jay House and you will be unable to use that particular Blue Jay a second time.
Note: The Rare Coastal Blue Jay speeds up two Groves or Trees at once.
Earning Prizes:

Once you have fed enough Blue Jays, you can earn some lovely prizes. Click on your Blue Jay House to open up your progress menu.

At the bottom of this menu, there are a total of four that can be earned through feeding Blue Jays:

  • Four Spring Hedges
  • Purple Asparagus (This exclusive Crop Packet can be used as many times as you wish for 7 days)
  • Flowering Dogwood
  • Rare Coastal Blue Jay. This little one speeds up two Groves or trees at once for 20 uses!
Note: All four of these prizes can be earned as many times as you’d like as long as you have fed enough Blue Jays.
Once you have fed enough Blue Jays, you will earn the adorable Rare Coastal Blue Jay!
Blue14
Note: You will need to redeem each of the above prizes at least once before you get credit towards the Rare Coastal Blue Jay. The Rare Coastal Blue Jay will be available to use on Trees and Groves for 20 uses. After that time, the Rare Coastal Blue Jay will live on your farm as a pet and you will be unable to use him to speed up Trees and Groves. In addition, it will count towards your Animal max cap. 
Additional Information:
  • You have 21 days to collect the Blue Jay House prizes. If you do not collect them all, the prizes will disappear and you will be unable to claim them.
  • You are limited to a total of 10 Helper Blue Jays on your farm at once and you can only use each Blue Jay once.
  • If you do not wish to use the Blue Jay House feature, it can be sold or stored in your Inventory.
  • You can only get credit towards the Blue Jay House from feeding Blue Jays on your own farm. You will not get credit from Neighbor visits.
  • If you want to see how much time you have left to claim the Blue Jay House prizes, hover your cursor over the Tree.
  • You are limited to one Blue Jay House per farm.

The Blue Jay Bird House!

3 March 2014 FarmMaster 0

The winter is slowly but surely coming to an end and the first birds chirping in the trees again. Also in Farmville 2, we may tomorrow welcome a particularly beautiful Vorgelart – Blue Jays.

Of course, the blue bird, at that time still relatively cold, a Volgehäusschen need. And as we come in! Our task is to prepare a fancy bird house the newcomers and give them shelter. With the Blue Jays, it will be possible for us to accelerate growth in trees, similar to the instant ripeners! What do you think of the next topic? Just leave quietly a comment

Here the Quest Preview => Blue Jay of Happiness Quest Preview!


No Image

The Great Swan Migration Week 3, Quest Preview!

2 March 2014 FarmMaster 0

It’s week 3 of the Farmville 2 The Great Swan Migration feature. We are now in this third week of this month long feature and for this week we will be building the Blue Jay House. We will also craft some Cranberry Salads, Glass Good Luck Charm and Blue Jay Treats so we might wanna prepare ahead the ingredients for this good.


The Great Swan Migration Week 3 Quest 1: Sticking Your Beak Out


Missions:

  • Get 5 Bird Feeding Bowls and ensure that the returning Swans never go hungry!
  • Harvest 30 Corns to make delightful treats for the returning Swans!
  • Craft 2 Cranberry Salads and keep your ice clearing crew’s morale up!
Reward:
40 xp, 1000 coins

The Great Swan Migration Week 3 Quest 2: Cygnet Magnet

Missions:
  • Complete 1 Blue Jay House and show the Swans how much you love all kinds of birds!
  • Fertilize 4 Apple Trees and impress the swans with your majestic well groomed Apple Trees!
  • Harvest 4 Apple Trees, take a break from clearing Ice Chunks and enjoy your bountiful harvest!
Reward:
40 xp, 1000 coiins

The Great Swan Migration Week 3 Quest 3: Avian Haven

Missions:
  • Craft 3 Pointy Garden Fences, Bird will love perching on these fences! (Pointy Garden Fence = Metal sheet x1, Lumber x1)
  • Water 20 Trees, Birds love healthy trees!
  • Craft 2 Blue Jay Treats, Blue Jays will go crazy over them!
Reward:
40 xp, 1000 coins

The Great Swan Migration Week 3 Quest 4: Cob Job

Missions:
  • Feed 2 Blue Jays and show the world how well you treat your feathered friends!
  • Craft 2 Glass Good Luck Charms and appeal to your birds’ love of shiny objects. (Glass Goodluck Charm = Wool Thread Spindle x1 = Glass x2)
  • Craft 2 Ornate Bells and make some wonderful melodies with all kinds of Birds! (Ornate Bell = Metal Sheet x1, Fine Rabbit Wool)
Reward:
40 xp, 1000 coins

Bonus Challenge:

Missions:
  • Craft 20 Cranberry Salad, a well fed crew is a productive crew! (Cranberry Salad = Cranberry x6, Onion x6)
  • Water 60 Trees
  • Craft 20 Glass Good Luck Charm to appease the superstitious members of your Ice Chunk clearing crew! (Glass Goodluck Charm = Wool Thread Spindle x1, Glass x2)
Reward:
1 Sugar Pack (10 pcs), 40 xp, 1000 coins

Blue Jay of Happiness Quest Preview!

2 March 2014 FarmMaster 0

Feed Blue Jays with treats to speed up trees and win prizes in the coming Farmville 2 Blue Jay House feature. Collect the parts and gather your friends and hire them as your helper in building the Blue Jay House. Once completed you’ll have a Blue Jay that you can use to speed up trees and groves. But in order to use them you will need treats.

Look! Up in the Sky!: Quest 1 of 8

  1. Place 1 Blue Jay House on your Farm
  2. Harvest 10 Blueberries
  3. Feed 3 Adult Animals

Take a Look!: Quest 2 of 8
  1. Collect 5 Blue Jay Guides (Post to Game Feed)
  2. Feed 3 Adult Chickens
  3. Make 2 Berry Custard (Craft in the Kitchen)

Berry Custard Recipe:

Oh Crumbs!: Quest 3 of 8

  1. Harvest 16 Corn
  2. Feed 2 Adult Goats
  3. Make 2 Cornbread (Craft in the Kitchen)

Kitchen craft 42 Corn bread:

Eye on the Blue Jays: Quest 4 of 8
  1. Collect 5 pairs of Bluejay Watching Glasses (Post to Game Feed)
  2. Harvest 12 Strawberries
  3. Make 1- 1 Blue Jay Treat (Craft in the Kitchen-recipe will unlock with Quest)

Real Farmers Eat Quiche: Quest 5 of 8
  1. Tend your Prized Cow Shed 2 times
  2. Feed 2 Adult Cows
  3. Make 2 Swiss Cheese Quiche (Craft in the Kitchen)
Cheese Quiche:
Fly Casual: Quest 6 of 8
  1. Tend your Pig Pen 2 times
  2. Feed 2 Adult Horses
  3. Make 2 Floral Trivets (Craft in the Crafting Kiln)

Photogenic: Quest 7 of 8
  1. Collect 5 Birding Cameras (Post to Game Feed)
  2. Feed 2 Adult Rabbits
  3. Make 2 Blue Handkerchiefs (Craft in the Workshop)
Blue Jay Day: Quest 8 of 8
  1. Tend your Horse Stable 2 times
  2. Harvest 15 Leeks
  3. Make 1- 3 Blue Jay Treat (Craft in the Kitchen-recipe will unlock with the Quest)

The Great Swan Migration, Stage2!

27 February 2014 FarmMaster 0
The Great Swan Migration Feature is broken up into four consecutive stages that unlock over time. Click the links below to find out more information about each stage.
Stage 1 GuideView
Stage 2 Guide: View
Stage 3 Guide: coming soon!
Stage 4 Guide: coming soon!
Oh no! The River has thawed but the Ice Floe is still blocking off the Swan Nesting Area! Luckily, Gus knows a thing or two about clearing Ice Chunks, so that’s where you come in! Assist Gus with his tasks and you can earn great prizes and more importantly, provide safe passage for the Swans. Complete all four stages and get the exclusive baby Speckled Black Swan!
Note: All of the prizes float on the water when placed in the River!
If you are level 15 or higher, you’ll see the following pop up. Click on the “Break The Ice!” button to get started.
 Swan 1
Before you can start clearing the Ice Chunks, you will need to build your Observation Deck to watch the Swans return. Your first step is collecting Building Materials. You will need the following items to start building your Observation Deck: 
  • Binocular Parts
  • Swan Wood Boards
  • Telescope Parts
To collect Binocular Parts, click on the “post” button to post to your Facebook wall; you will get the parts when your friends click on it, or when you click on a similar newsfeed post.
Click on the “Ask” button to send requests for Swan Wood Boards  and Telescope Parts to your Neighbors.
Swan 2
Note: If you do not wish to wait for your friends, you can skip any of these tasks for Farm Bucks.
Once you have collected the required items, click on the “Start Building” button at the bottom of the construction menu.
Swan 3
Now that the Deck is almost complete, you will need a little help from your Neighbors to finish the job. The Observation Deck requires 4 additional helpers, so click on the “Ask Friends” button to send some crew requests to your Friends. When they accept, you will see the spots in the Build Menu begin to fill. If you do not wish to wait for your Friends, click the “Hire One” button to purchase crewmembers with Farm Bucks.
 Swan 4
Completing your Observation Deck (Ice Chunk Quests) 
In order to earn some cool new prizes, you will need to complete the Ice Chunk Quests. Currently, only the first and second set of quests are available. The other two stages of this feature will unlock in the coming weeks.
You can access the Quest Menu from clicking on any of the following options: 
  1. The Observation Deck
  2. The Ice Chunk
Ice_1

Each Ice Chunk Quest has 4 parts that have to be completed. As you complete a part of a quest line, you will earn a new prize. If you complete all 4 parts of an Ice Chunk  Quest, you will win an exclusive prize for your River!
 Ice_2

Ice Chunk Quests – Week 1
As noted above, click on the Observation Deck or any of theIce Chunks to start working on your first set of Quests. As you finish parts of your quest, a green check mark will appear to indicate what parts of the quest have been completed. For every quest you complete, you remove a piece of Ice  from the river and in return, you will receive some Water! The four quests for the Week 1 are as follows:
Swan 7


Swan 8
Swan 9
  Swan 10
Ice Chunk Quests – Week 2
As noted above, click on the Observation Deck or any of the Ice Chunks to start working on your second set of Quests. As you finish parts of your quest, a green check mark will appear to indicate what parts of the quest have been completed. For every quest you complete, you remove a piece of Ice from the river and in return, you will receive some Water! The four quests for the Week 2 are as follows:
Ice_3
Ice_4
Ice_5
Ice_6
Bonus Quests:
Finished the current week of quests early and are looking for something else to do while you wait? If you are level 20 or above, complete a Bonus quest for a chance to earn awesome extra rewards like Salt! In order to unlock the Bonus Quest, complete each week of quests before the feature expires
Note: You have 35 days to complete the bonus quests. Bonus quests will only unlock if you complete a week of quests.
The Bonus quests for Week 1 are as follows:
Swan 11
The Bonus quests for Week 2 are as follows:
Ice_7
Note: You are not required to complete the Bonus quests in order to earn the Great Swan Migration prizes (Decorations or the baby Speckled Black Swan).
Additional Information:
  • You have 35 days to collect the Great Swan Migration prizes and Bonus rewards (optional). If you do not collect them all, the prizes and Bonus rewards (optional) will disappear and you will be unable to claim them.
  • If you want to see how much time you have left to claim the Great Swan Migration prizes and the Bonus rewards (optional), hover your cursor over the Deck.
  • You can purchase additional prizes (Decorations and/or the Speckled Black Swan) for Farm Bucks once you’ve redeemed them from the Observation Deck menu.
  • If you do not wish to use the Observation Deck, it can be sold (frame only) or stored in your Inventory.
  • You are limited to one Observation Deck per Farm.