FarmVille 2 Quest Guide: Circus Sensibilities

9 November 2012 FarmMaster 0

The carnies, clowns and acrobats arrived first, but in a state of disarray and confusion. Let’s help them get set-up.
Circus Sensibilities was unlocked in level 16, it has 4 parts, here below task list to help you complete the quest fast.

Part 1: It’s a Circus

  • Harvest 10 Broccoli. These carnies definitely need more vitamins!
  • Collect 10 Wool for the clown costumes. They need to look really fat.
  • Harvest 3 Horseshoes. Theirs fell off the train!

Part 2: Clown Control

  • Collect 5 Quilt Scraps for clown costumes. The hobo look gets laughs.
  • Craft an Apple Pie. Clowns can’t resist throwing pies.
  • Harvest 2 Peach Trees. We’ll sell peach drinks to the crowds!

Part 3: Bread and Circus

  • Craft 3 Peach Lemonade.
  • Craft 3 Cheddar Loafs
  • Craft 3 Butter for all the popcorn.

Part 4: Clown Car Complication

  • Hire and use 1 Farm Hand. Make sure friends don’t run away with the circus!
  • Harvest Wells 4 times. They need to clean up the elephants’ mess.
  • Craft 4 Dough for the clown car interior. That’s what they said!
No Image

FarmVille 2 Quest Guide: Fair Fare

9 November 2012 FarmMaster 0

Fair Fare quest has 6 parts, which was unlocked in level 24 in FarmVille 2, here below task list to help you finish the quest fast, let’s check out.

Part 1: The Prep Step

  • Collect 5 Cowbells to make your animals look pretty. (Ask Friends)
  • Have 15 animals. They’re your Fertilizer producers!
  • Feed animals 15 times to gather Fertilizer.

Part 2: Heavy Veggies

  • Plant 40 crops.
  • Use Fertilizer on 15 crops.
  • Harvest a Prized Crop for the County Fair.

Part 3: Chicken Chicanery

  • Tend adult Chickens 10 times.
  • Have 3 Prized Chickens.
  • Tend Prized Chickens 3 times to show them off!

Part 4: Regional Distribution

  • Collect 5 Canning Jars to contain all the preserves you’re about to make. (Ask Friends) (Skip 10 FB)
  • Craft 10 Pie Crusts, we’ll need plenty! (Skip 13 FB)
  • Have 5 Apple Trees. That fruit is gonna come in handy! (Skip 10 FB)

Part 5: I Pie with my Little Eye

  • Have 7 Expansions. You’ll need the space!
  • Harvest Apple Trees 5 times. Don’t sell those apples, either! (Skip 4 FB)
  • Harvest 20 Strawberries. You’ll need them for the pies! (Skip 9 FB)

Part 6: Get Rich or Pie Trying

  • Collect 5 Pie Tins for the pies. (Skip 10 FB)
  • Craft 10 Strawberry Pies. The girls are eating strawberry pies! (Skip 24 FB)
  • Craft 10 Apple Pies. The boys are eating apple pies! (Skip 24 FB)

Shady Trough Guide!

3 November 2012 FarmMaster 0


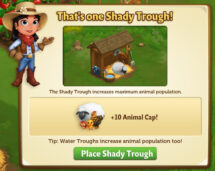
Do you want more room for Animals on your farm? If so, the new Shady Trough is for you! This new and improved trough will increase your Animal population cap by 10 instead of the regular 5.
If you are level 5 or above, you will see the following pop-up upon entering FarmVille 2.

Clicking on “Place Shady Trough” will give you the ability to place the Shady Trough Frame on your Farm. If you do not wish to use the Shady Trough, simply click the “Cancel” button and the frame will be sent to your inventory.

Just like the regular trough, the Shady Trough needs to be built before you can enjoy an increased animal capacity.

Your first step is collecting Building Materials.You will need the following items to start building your Shady Trough:

  • Wood Planks
  • Shingles
  • Straw Bedding

Click on the “Ask” button to send requests for the items to your Neighbors.
You can also purchase Planks, Shingles and Straw Begging for Farm Bucks if you do not wish to wait for your friends to respond to your requests.

Once you have collected the required items, click on the “Start Building” button at the bottom of the construction Menu.

Now that your trough is almost complete, you will need some help from your Neighbors to finish the job. The Shady Trough requires 4 Builders, so click on the “Ask Friends” button to send some crew requests to your Friends. When they accept, you will see the spots in the Building Menu begin to fill. If you do not wish to wait for your friends, click the “Hire One” button to purchase crew members with Farm Bucks. Once you have successfully filled all 4 spots, click on the “Finish Building” button.

Your Shady Trough is now complete! In addition to providing an increase to your Animal Population Cap, your animals will also use the Shady Trough as a nice place to rest from time to time.

Additional Information:
If you are currently at the maximum animal cap the Shady Trough will increase your total Animal capacity by 10.
You can only have 1 Shady Trough on your Farm at a time.
If you sell or delete your Shady Trough, you can purchase a new frame from the General Store for 10,000 Coins.

No Image

Trick or Treat Guide! (FarmVille2)

27 October 2012 FarmMaster 0

Hey Farmers!

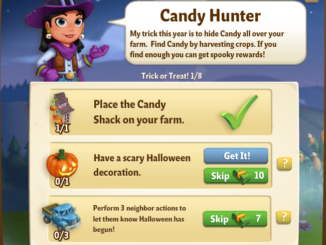
The new Trick or Treat feature is now available! Head on over to FarmVille 2 and harvest your crops for a chance to find pieces of Candy. You can redeem this Candy for all kinds of spooktacular prizes, including the Limited Edition Teddy Sheep!
If you are level 5, you will see the following pop-up when entering FarmVille 2. Click on “Place Candy Shack” to get started. 

Once it’s placed, you will see another pop-up. Click on “Share rewards” to post a feed to your wall that your friends can click on for some free Candy. 

Your Candy Shack comes pre-built, so you can get straight to the Candy collecting! As mentioned earlier in the guide, you have a chance of finding Candy when harvesting your crops. You have a higher chance of finding Candy when harvesting Pumpkins and White Pumpkins, but the most efficient way of getting Candy is from your friends and Neighbors. 

Using the Candy Shack

Click on the Candy Shack to open the Trick or Treat menu. 

This menu shows how many pieces of Candy you have collected and what prizes you are currently eligible to redeem. 

A – The total amount of Candy you have. As you redeem prizes, this number decreases.
B – The button to use when you want to redeem a prize. Once you have enough Candy, this button will turn blue.
C – The number of Farm Bucks required to purchase Candy.


Collecting Candy

If you find candy, it will appear in similar fashion to prized crops. 

When a glowing Candy appears on your farm after harvesting, click on it and you will see the following pop-up:

Click on “share rewards” to post a feed to your wall. Your friends will be able click on this feed to claim some free Candy for themselves. Once you have clicked on the Candy, it will automatically be added to your Candy total in your Candy Shack. 

If you are not finding as much Candy as you would like by Harvesting, it’s time to talk to your Neighbors. Candy can also be received from friends via feed posts and the Free Gifts page. 

Individual pieces of Candy can also be purchased with Farm Bucks from the Candy Shack menu. 

Redeeming Candy for Prizes

Once you have collected enough Candy, it can be redeemed for some awesome prizes. Click on your Candy Shack to open up your progress menu. 

At the bottom of this menu, there are a total of 4 prizes that can be redeemed for Candy:

  • Jack-O-Lantern (5 Candy)
  • Cobweb Fence (12 Candy)
  • Cat-O-Lantern (23 Candy)
  • Bat Kite (56 Candy)


All 4 of these prizes can be redeemed as many times as you like, as long as you have enough Candy. Once you have collected all 4 of the above prizes, you will earn the adorable Teddy Sheep! 

Note: You will need to redeem each of the items before you get credit towards the Teddy Sheep.

Click on the “Get it” button to claim your new 4 legged friend! 

Note: The Teddy Sheep can only be redeemed for Candy once. If you wish to get additional Teddy Sheep, you will have to purchase them with Farm Bucks via the Candy Shack. 

If you don’t feel like collecting Candy, all of the above prizes can also be purchased in unlimited quantities for Farm Bucks. 

No Image

Wandering Witch Bunny! (FarmVille2)

20 October 2012 FarmMaster 0

Hey Farmers!

A tiny, timid, and trembling Witch Bunny has wandered onto your Farm. Will you give it a home? Build a Cauldron, collect Enchanted Carrots and this adorable Bunny will be yours to keep! Honestly, how could you say no to that face?


When you open FarmVille 2, you will see the following pop-up. Click on “How Sad!” to get started. 


After clicking, you will see the Bunny’s Brew Quest Menu. It shows you all of the tasks you have to complete to get the Witch Bunny. 


If you close this menu and need to access it later to see your progress, just click on the Witch Bunny wandering around your farm. 

Your first task asks you to construct a buildable. Your Witch Bunny is hankering for some special stew and it can only be obtained from a Cauldron. Luckily, after you have built the Cauldron, you will be able to keep it as a fun decoration on your Farm!

In order to build the Cauldron you will need building materials and some help from your Neighbors. 


Your first step is collecting Building Materials. You will need the following items to start buildings your Cauldron:

  • Wood Planks
  • Metal
  • Bubbling Brew


Once you have collected the required items, click on the “Start Building” button at the bottom of the construction Menu. 
In addition to the materials, you will need to request the following help from your Neighbors as builders of the Cauldron.

Now that you have the parts you need, you will have to recruit your Neighbors to help you build the Cauldron. If you do not wish to wait for your friends to accept your Crew requests, you can purchase Builders with Farm Bucks by clicking on the “Hire One” button. 


Once you have filled all of the necessary builder spots, it’s time to get your Cauldron built. Click on the “Finish Building” button to complete your structure.

Once you have built your Cauldron, all you have left to do is collect some yummy Enchanted Carrots!

From the Bunny’s Brew Quest Menu, click on the “Ask Friends” button next to the third task. This will allow you to send a request to your friends for Enchanted Carrots. Once you have collected the required amount, you will see the following pop-up:

The Witch Bunny is now yours to keep! Feed your Bunny Milk Bottles and it will grow into a Witch Rabbit that you can harvest for Wool!

Additional Information:

  • There is a separate quest line associated with the Witch Bunny (“Witch Bunny Whispers”). Like all quests, it will reward you will Coins and XP when completed, but it will not award you with a Bunny. To get the Witch Bunny, you must complete the tasks outlined above (“Bunny’s Brew Quest“) that appears when clicking the Wandering Witch Bunny.
  • You have 13 days to complete the Witch Bunny Tasks. If you do not complete them, the Witch Bunny will disappear and you will be unable to claim it!
No Image

Farmville 2 : Hen House Guide!

11 October 2012 FarmMaster 0
FarmVille 2 Hen House Guide


Hankering for more eggs? Looking for a fun way to earn some great rewards? Then our new Hen House feature is for you! The Hen House is a buildable structure in FarmVille 2 that you can harvest daily for a chance to receive Exotic Eggs! In addition to this, you will also receive bonus regular Eggs for every adult chicken you have on your farm. Collect all 5 Exotic Eggs to win an Exclusive Polish Silver Laced Chicken. In order to have a Hen House you must be at least Level 5 and have a minimum of three non-prized, adult chickens on your farm. 

Placing and Building the Hen House

If you qualify for the Hen House, you will be prompted to place it on your farm when you load the game. 


After the Hen House is placed, you will get a visit from Walter. He has noticed what you are building and is interested in making a deal.

Once you have finished chatting with Walter, it’s time to start construction! In order to complete the Hen House you will need building materials and some help from your Neighbors. 

Your first step is collecting Building Materials. You will need the following items to start buildings your Hen House:

  • Wood Planks
  • Hammers
  • Bird Nests


Once you have collected the required items, click on the “Start Building” button at the bottom of the construction Menu. 
In addition to the materials, you will need to request the following help from your Neighbors as builders of the Hen House.

Now that you have the parts you need, you will have to recruit your Neighbors to help you build the Hen House. If you do not wish to wait for your friends to accept your Crew requests, you can purchase Builders with Farm Bucks by clicking on the “Hire One” button. 


Once you have filled all of the necessary builder spots, it’s time to get your Hen House built. Click on the “Finish Building” button to complete your structure. 


Using a Completed Hen House

If you have at least three adult chickens on your farm that are not Prized, you can harvest your Hen House once every twenty four hours. 


To harvest a ready Hen House, simply click on it! If you lack any requirements (such as not having enough chickens, or needing to wait a bit longer before harvesting), the game will tell you what you are missing. Otherwise the Hen House will harvest and you will receive eggs!

Hen House Eggs

When you harvest your Hen House, there are four types of eggs you can receive:

1. Regular Chicken Eggs
2. Uncommon Exotic Eggs
3. Rare Exotic Eggs
4. Ultra Rare Exotic Eggs

The more adult chickens you have on your Farm, the better your chances are of receiving Exotic Eggs! For every adult (non-prized) chicken you have on your farm, you will also receive additional Regular Chicken Eggs when harvesting the Hen House. 

The first time you harvest your completed Hen House, you will receive an Exotic Egg. Exotic Eggs linger on your farm similar to Prized Crops. Just click on the Egg and it will be added to your collection. After that, each daily harvest gives you a chance to receive more Exotic Eggs.


In addition to Hen House Eggs, harvesting the Hen House will give you additional XP points to help you level!

NOTE: Exotic Eggs cannot be used for Crafting or sold in your Market Stand. They are different from the normal eggs that you receive when feeding chickens on your farm.

Exotic Eggs

Exotic eggs can be saved and collected over time. To see your collection progress, click on your Hen House anytime after you have harvested it. 


If you collect two Uncommon Exotic Eggs, two Rare Exotic Eggs, and one Ultra Rare Exotic Egg, Walter will visit your farm and deliver a new baby chicken for you to keep!

If you do not want to wait to collect the exotic eggs, you can use Farm Bucks to skip these steps and get the new baby chicken right away!

Your new Polish Silver Laced Chicken needs baby bottles to reach adulthood, just like your other animals. Once it has matured, it will produce Polish Red Eggs, which can be sold or used for Crafting. 

We hope you enjoy our latest release and we are interested in hearing your feedback! Please post in our Official Discussion thread if you have any thoughts or opinions you would like to share about this feature!

No Image

Prized Animals

3 October 2012 FarmMaster 0

Raising and caring for your animals is more than just fun—it’s rewarding, too! Putting all that work into gathering Milk Bottles and making Feed isn’t easy, but it will pay off when your animal turns into a Prized Animal! Keep feeding and harvesting your animals, and they will eventually mature into prize-winning, blue ribbon critters!
Feeding and Caring for your Animals


Just like any other living thing on your Farm, your animals need care and attention. Animals get hungry for Feed at different times. Watch for a thought bubble to appear over your Animals’ heads with a picture of yellow feed in it—that’s your cue to grind up some crops in the Feed Mill and get the little guys some food! How often an Animal gets hungry depends on the type of Animal and what breed it is, so place your mouse over your Animals to see how long it will be until they are hungry again. Each time you feed an adult Animal, it will give you valuable resources, such as milk, eggs, and wool to sell in the Market.

Growing a Prized Animal


After you’ve diligently cared for an animal for a while, you will see a popup message letting you know that your animal is almost a Prized Animal! Way to go!

Once you have an animal that is almost a Prized Animal, you can hover your mouse over it to see how many more feedings it needs to become a prized animal:


The amount of feed your animal requires in one feeding won’t change just because the animal is almost a Prized Animal—what you’ve been doing is working, so keep it up!

Earning a Prized Animal
When you’ve fed your animal enough times that it becomes a Prized Animal, you will see a popup message letting you know that you have an award-winning creature on your Farm! You’ll pick up a few XP for your hard work. You can share this milestone with your Facebook friends and share some extra Feed with them by clicking on the “Share Rewards” button in the popup message. 

If you’ve prefer not to share, just click the “X” button at the top of the message. 

Taking a Prized Animal to the County Fair


Once an animal becomes Prized, its appetite for Feed decreases. In fact, you don’t have to feed a Prized Animal at all! Rather than having an appetite for ground up fruits and veggies, your Prized Animal gets a taste for something new: the prestige and recognition that comes with being a Blue Ribbon Animal at the County Fair!

County Fair? How Does That Work?


Instead of seeing a thought bubble with feed in it appear above your Prized Animal’s head every so often, you will start to see a thought bubble with a Blue Ribbon appear once every 18 hours. 

If you place your mouse over a Prized Animal before the Blue Ribbon appears over their head, you will see a countdown that shows the time left until that animal is ready to go to the Fair. 

When you see the ribbon, your Prized Animal is ready to go to the County Fair to win you some valuable Coins and XP! Place your mouse over the Prized Animal to see a bubble that says “Take to Show.” When you click on your show-ready Prized Animal, you will see a popup telling you how many coins and XP your Prized Animal won for you. You can take each Prized Animal to the Fair once a day—you don’t want them to get too tired, after all! Your Prized Animal will win you coins and XP each and every time you take her to the County Fair, so compete often and rake in the gold!

My Prized Animal Doesn’t Produce Resources Anymore! Is She Okay?
Yes! Instead of producing Resources like milk, eggs, cheese, and wool, Prized Animals focus their time and energy on winning you coins and XP at the County Fair, and therefore don’t produce Resources once they become Prized Animals.

How Do I Tell the Difference Between a Prized Animals and a Non-Prized Animal on my Farm?
Prized Animals are fairly easy to distinguish from Non-Prized Animals. Prized Animals will actually appear a bit larger than their Non-Prized counterparts. You can also hover your mouse over any of your animals to see what they are. If an animal is a Prized Animal, the bubble that appears when place your mouse over them will say so. 

Storing Prized Animals in your Inventory


To avoid overcrowding, you can only have a limited number of Animals on your Farm. You can increase the number of animals you’re able to have by adding Water Troughs, but 50 Animals is the maximum limit–even with these extra Troughs. Prized Animals count toward this number, even though they don’t eat feed. If you want to make room for Animals that produce Resources on your Farm, you can store your Prized Animals in your Inventory. 

To do this, click on the “Tools” button at the bottom of your game. 

Once you have done this, click on the “Move to Inventory” tool and click on the Animals you would like to add to storage. 

You can take your Prized Animals out of your Inventory at any time and place them on your Farm, but please be aware that doing so will reset their timer back to 18 hours. Prized Animals make great additions to any yard or pasture! 

Selling Your Prized Animals

If you don’t want to store your Prized Animals, you can also sell them using the Sell tool located on the bottom right-hand side of your screen, within the Tools menu:

Select the “Sell” tool, then click on the Prized Animal you would like to sell. You will see a popup asking you if you’re sure you want to sell your animal. If you are, click the button that says “Yes, Sell It.” Prized Animals sell for several hundred coins more than their garden-variety counterparts. 

Happy Farming!

No Image

Quests

3 October 2012 FarmMaster 0
Level Up Faster and Earn More Coins with Quests!


Life on the Farm can get a little quiet. It’s nice to give yourself something fun to do by trying your hand at Quests! Quests are completely optional tasks that are given to you by the characters you meet in FarmVille 2. 

If you complete a quest, you will be rewarded handsomely with Coins, Experience Points (XP), and other great prizes!


How Do I Start a Quest?


Upon entering the game, you may receive a message from one of the characters in FarmVille 2. This pop-up will be an invitation to start a Quest. 

To get started, simply click on the green button at the bottom of this dialogue. Once you do, you’ll see a pop-up that details the Quest’s requirements. If you would like to complete this quest, you can get started right away. If you aren’t interested in participating, click the red “X” button in the top right corner of the pop-up to close the Quest Menu. 

What If I Close a Quest But Want to Access it Later?

To access a Quest after you’ve closed it, just click on the Quest Icon located on the left-hand side of the screen! During the tutorial, you may remember that Marie referred to this icon as a “Note”.


Your Quest progress will be automatically saved as you complete tasks, even if you leave the game. This allows you to complete tasks in your own time, should you wish to participate. 

What Kinds of Tasks Do I Complete in a Quest?


Most Quest requirements consist of activities you would do normally do on your Farm. Planting crops, crafting goods and selling items in your Market Stall are all tasks you will frequently see as Quest requirements. Some tasks will require gathering special items that can only be obtained from your friends or the General Store, so be sure to add some Neighbors!

The Quest Menu will explain in detail what tasks you have to complete in order to progress. 

A – The description of the Quest requirement. This is the task you must complete in order to progress.

B – Your current progress. 

C – The “Action” button. Clicking on this button will automatically take you where you need to go to complete a Quest requirement.

D – How many Farm Bucks are required to skip a particular task.

E – If you need help figuring out how to complete a quest, simply hover your cursor over this button for a hint. 

If you wish to check your progress on a Quest, click on the icon on the left-hand side of your screen. You can see whether or not you’ve completed a task by looking for a large green check mark on the right-hand side of your Quest Menu:

Once you’ve completed a Quest, the character who assigned it to you will show up to let you know what rewards you have earned. 

What Kinds of Rewards Do I Get for Quests?

Quests are not only a fun way to interact with your Farm—they’re also quite lucrative! Generally, most Quest rewards will consist of at least two things:

o A nice pile of Coins to add to your wallet
o Some XP points to help you level up faster

However, some Quests offer additional rewards for all of your hard work, such as Water, Fertilizer or even a new item for your farm!

Once you complete a quest, you have a chance to share some rewards with your friends. At the bottom of the completion pop-up, there is a “Share Rewards” check box that is automatically enabled for you. Clicking the “Okay” button will post a feed to your wall that your friends can click on to claim prizes. If you don’t wish to post, un-check this box before clicking “Okay”. 

What if I Don’t Want to Do Quests?


Quests are completely optional. You won’t miss out on anything if you choose not to participate, nor will you be penalized if you feel that this feature isn’t for you. Remember though, Quests help you progress through the game and earn great rewards, so be sure to at least give them a try!

Quests Make Farming Fun!


Quests are like turning the soil in your field—they keep things fresh and interesting! You can get rewarded for doing things you would do on your Farm no matter what: tending to crops, selling items in the Market, and raising your animals. Why not pick up some extra coins and XP in the process?

No Image

Feed Mill

3 October 2012 FarmMaster 0

If you want your animals to produce Crafting Ingredients, they need to be fed! Hungry animals won’t produce until you give them Feed. Your Feed Mill will turn crops into food for your livestock!


Your Feed Mill is the piece of machinery in the image below:

To use your Feed Mill, click on it. A menu will pop up, showing you the harvested crops you currently have available to use. 
Individual crops yield different amounts of Feed when placed in the Mill. This amount is displayed in small text under the crop’s image. 

Clicking on a crop will add it to your Feed Mill. The total amount of feed you are going to receive shows up at the bottom of the Feed Mill menu. Every time you click on a crop, it will add to this number. 

Clicking on “make” will turn the crops you selected into Feed for your animals. If you accidentally add a crop to the Feed Mill on mistake, click on the small “X” button at the top of the Feed Mill menu. This will let you start the process over, without using the crop you accidentally selected. 

No Image

Farm Hands

3 October 2012 FarmMaster 0
Farming is More Fun With Friends. Hire Some Farmhands!


Farming takes a lot of work, and it’s a tough job to tackle on your own. Luckily, you don’t have to! Hire your friends as Farmhands to harvest your crops faster and get more power for your Crafting Kitchen!
What Does a Farmhand Do?


A Farmhand is a Farmer you can hire to help you get things done on your Farm. You can assign your Farmhands to take care of one of the following tasks:

• Harvest 4 mature crops for you (Farmhands can’t harvest your Trees or tend to your Animals)
• Instantly grow 4 crops that have been watered but aren’t ready to harvest yet
• Instantly bring 4 withered crops back to life
• Add 5 units of power to your Crafting Kitchen

*NOTE: A Farmhand can only do any one of these tasks when you hire them for help. So, for example, your Farmhand can’t Instant Grow 2 crops and harvest 2 crops. They can only do one task at a time. 


Where Do I Get a Farmhand?


To hire a Farmhand, find the hay bales located near the road in front of your Farm.

If you click on the blue markers hovering over each hay bale, you will get a popup window giving you the option to hire your Friends as Farmhands. You will see two lists of names: “All Friends” and “Likes Games.” You can browse either, or both, of these lists and check the boxes next to the names of your Facebook friends who you would like to hire as a Farmhand. 

After you’ve selected all the names you want, click the “Send” button to send a request directly to each friend. You can send requests to a friend once every 18 hours. If you’ve already sent a request to a friend within the last 18 hours, his or her name will disappear from your list of available friends to send requests to.

If you’re in a hurry to harvest all of those crops and don’t want to wait for your friends to accept your request, you can hire Farmhands for 5 Farm Bucks (one-time use). Hover your cursor over an empty hay bale, and click on the “buy” button. Your Farm Cash will be automatically deducted after a confirmation screen.

When a friend accepts your Farmhand request, a truck will pull up on the road in front of your Farm, and your friend’s FarmVille 2 avatar will step out of the truck and sit on a hay bale, awaiting your instructions. Be prompt, though—Farmhands will only wait for a limited amount of time! Hover your mouse over a Farmhand sitting on a hay bale to see how much longer they will wait there.*

*NOTE: If you use Farm Bucks to hire a Farmhand, there is no time limit on how long he will stay.

How Do I Assign Tasks to my Farmhands?
To assign your Farmhand some work to do, click on them while they are sitting on one of the hay bales. They will attach to your mouse, and you can place them over different areas of your Farm. Once they’re over something they can work on (such as a row of crops), the outline of the item will appear green, instead of red. Click again to drop them where you want them to go, and watch them get to work! All of the crops harvested by a Farmhand will go to your Inventory, and you will also get a bag of Fertilizer!

When your Farmhand is finished working, you may notice they linger on your farm for a little bit. If you place your cursor over them, you will see that ask if you want more help. If you do, click on them and you will open a menu that allows you to invite more friends to be your Farmhands if you haven’t asked already. 

After a little while, your helper will run off happily down the road and back home—no need to send them a gift or anything. 

Will my friend have to do anything iIf they accept a Farmhand Request?


Friends who accept your Farmhand request simply have to click “Accept” when you send them the request (farmhand requests can be found in your Farm 2 inbox). Their character will automatically show up on your Farm once they do this, and you can assign them the tasks you need them to complete. They do not have to visit your Farm or personally do any of the tasks you assign them—their avatar in FarmVille 2 will do the work automatically, without them having to do anything more than just accepting your request. 

If my friend and I are playing FarmVille 2 at the same time, and they accept my Farmhand request, will their Farming be interrupted?


No. Your friends will never be impacted by accepting Farmhand requests, even if they are on your farm. They have the enviable ability to be two places at once—how convenient!

I Want To Hire More Than 2 Farmhands at a Time!
As your Farm grows, so does your ability to hire Farmhands. As you level up, more hay bales will unlock for you to hire Farmhands. However, the number of tasks they can complete during a single visit does not change—you can just hire more of them!

Many Hands Make Light Work!
Hiring Farmhands is a great way to get your friends involved in your Farm and get things done fast. Try asking for help and watch those crops pile up in your Inventory!

Happy Farming!

No Image

Expansions

3 October 2012 FarmMaster 0
Expanding Your Farm


When you first arrive at the farm, you’ll notice that things are a bit overgrown. Weeds cover the fields that have sat fallow for a long time. Give yourself a bit of extra room to grow by unlocking new land to add to your farm! As you level up in the game, additional land becomes available for you to unlock. Once you unlock new land, it becomes a part of your farm, and you can grow crops, raise animals, or place buildings and decorations on it!
Starting Out With Expansions


When you first start the game, the land you can farm on is a little small. Marie will walk you through expanding to your first plot, revealing a feed mill and a lemon tree:

Which Plots Can I Unlock?


You will eventually be able to expand your farm to all the grassy areas you see on your screen. As you reach higher levels in the game, these plots will become available for you to unlock. You can hover your mouse over a plot to see which level you need to be on to unlock that plot, as well as which goodies you will unlock when you expand to that plot:

Expanding Your Farm

You can tell if a plot is available to expand on because you will see a sign pop up in the plot that looks like this:

When you click on a plot to expand it, you will see a popup. In this popup, you will see a list of requirements you need to meet before you’re able to unlock a plot, like this:

When you are ready to unlock a plot of land, you need to have all of these requirements in your Inventory. For example, in the case above, if you have four eggs in your inventory but sell one to get more coins so you can have the 1000 coins you need to unlock the land, you will no longer have enough eggs.

Once you have met all the requirements, the “Expand” button will turn blue and you can click on it to call in Marie’s “landscaping service” to clear the land for you:

Clearing land does more than just gives you more space to farm in—it also unlocks cool new items and game mechanics! You already saw this in action the first time you expanded; when you unlocked the land that had the Feed Mill on it, you were able to use the Mill to feed your goats. Every time you expand, you will uncover some new items. Best of all, once you unlock an item via expansion, you also unlock that item in the General Store, so you can purchase more if you want to! 

Clearable Objects


When you expand, there may be items on your new land that you do not want. Rocks and Debris need to be cleared away before you can use the space they are currently occupying. 

How Do I Clear Something From a New Plot?


Clearing large objects isn’t easy—you’re going to need some help! To get started, click on the object you want to clear away. Once you do that, you will see a popup telling you what you need to do in order to clear the object:

This popup lets you know a few things:

o What you need to do to clear the object
o How many tools or people you need to help you 
o What you will get once you clear the object away

In a hurry to clear an object and don’t want to wait for help from neighbors? You can purchase the materials you need and hire help using Farm Bucks.

Clearing requires you to complete two steps: one to gather materials you’ll need to tackle the job, and another to hire the crew needed to complete the task. 

Gathering Materials

o Gather the tools you need to clear debris away by asking your friends to send some your way. 

o You can do this by clicking the “Ask” button in the popup window. A message will be sent from you to your friends (you can choose which friends get this message!), asking your friends to send you the tools that you need. 

o Don’t have time to wait? You can buy the tools you need with Farm Bucks. 

Hiring a Crew

Once you have your Materials, you’ll get a second popup:

o To complete this step, click the “Ask Friends” button to send a request to your friends for help. 

o If they accept your request, they will fill one of the open positions, and you will see their Facebook profile picture next to one of the positions you needed to fill. 

o Don’t have time to wait on a crew of volunteers? You can also hire a crew by paying Farm Bucks for each position you need filled.

Once you have the required number of crew members, the “Finish Clearing” button in the popup will turn blue, meaning that you’re ready to go! Click on it to finish clearing the object away.

Rewards for Clearing an Object


Remember when you first opened up the popup to clear the object away and you saw a part of the popup that looked like this?

These are the rewards you get when you clear away an object. They vary depending on what the object you’re clearing away is made of (for example, clearing a rock gets you bricks, while clearing a piece of wood debris gets you wood planks.) After your crew is finished clearing an object, you will see a nice pile of rewards where the object used to be. Hover your mouse over them to scoop them up and into your Inventory, or just wait and they will be collected for you automatically. 

Expansion Requirements:
For each Expansion, there are a few requirements you need to meet in order to be able to uncover the land! Most Expansions require you to reach a certain level in the game and have a certain amount of coins and items in your Inventory in order to gain access. 

Below is a map of the plots you can uncover on your farm. Your farm in the game won’t have numbers on it, but the map shows roughly where each plot is. Each plot is labeled with a number, which you can match to the requirements to unlock it in the list below the map.

Expansion Requirements (Detailed):


1 – Original land you start out with in the game – comes free when you start playing FarmVille 2!

2- Feed Mill


o 175 Coins to Clear Land

Unlocks: Feed Mill

3 – Family Well


o Have 4 Eggs from feeding your chickens
o Pay 1000 Coins to clear land

Unlocks: Water Well

4 – The Farmstead Kitchen


o Reach Level 5
o Have 5 Trees (skip for 5 Farm Bucks)
o Gather 6 Milk Bottles (skip for 6 Farm Bucks)
o 2000 Coins to Clear Land (skip for 10 Farm Bucks)

Unlocks: Ability to craft recipes in the Kitchen

5 – West Meadow


o Reach Level 8
o Craft 2 Apple Scones for Marie (skip for 11 Farm Bucks)
o Gather 5 Garden Clippers from friends (buy for 10 Farm Bucks)
o 20,000 Coins to clear land (skip for 30 Farm Bucks)

Unlocks
: Cottontail Rabbits

6 – Milk Meadow


o Reach Level 11
o Expand to adjacent land
o Have 11 Adult Animals (skip this for 17 Farm Bucks)
o Gather 7 Iron Hoes (buy for 14 Farm Bucks)
o 50,000 Coins to Clear Land (skip for 50 Farm Bucks)

Unlocks: Longhorn Cows, extra Water Trough

7 – Playground Patch


o Expand to adjacent land
o 100 Farm Bucks for Early Access*

Unlocks: Tire Swings

*NOTE: Right now, some plots are only available by purchasing Early Access with Farm Bucks. Sit tight, though—these plots will be available to earn for free soon!


8 – East Woodlands


o Expand to adjacent land
o 100 Farm Bucks for Early Access*

Unlocks
: Pine trees for logs

9 – The Horse Wilds


o Expand to adjacent land
o 100 Farm Bucks for Early Access*

Unlocks: Appaloosa Horses and Flags

10 – The Waterpatch


o Expand to adjacent land
o 100 Farm Bucks for Early Access*

Unlocks: Extra well for additional water

11 – The Old Silo


o Reach Level 15
o Expand to adjacent land
o Craft 3 Apple Pies for Marie (skip for 18 Farm Bucks)
o Gather 10 Pitch Forks (buy for 20 Farm Bucks)
o 125,000 Coins to Clear Land (skip for 99 Farm Bucks)

Unlocks: Ability to store more feed using the Silo

12 – Mango Gardens


o Reach Level 20
o Have 1 Adult Black Arabian Horse (skip for 18 Farm Bucks)
o Gather 13 Chainsaws (buy for 26 Farm Bucks)
o 300,000 Coins to Clear Land (skip for 199 Farm Bucks)

Unlocks: Peach Trees, Ivy Trellis Arches

13 – Golden Chicken Colony


o Reach Level 24
o Expand to adjacent land
o Craft 5 Banana Cream Cakes (skip for 21 Farm Bucks)
o Gather 15 Produce Crates (buy for 30 Farm Bucks)
o 500,000 Coins to Clear Land (skip for 299 Farm Bucks)

Unlocks: Cochin Chickens, Concrete Birdbaths

14 – Apricot Acres

o Reach Level 28
o Have 8 Saddles (skip for 21 Farm Bucks)
o Gather 18 Garden Gloves (Buy for 36 Farm Bucks)
o 750,000 Coins to Clear Land (skip for 399 Farm Bucks)

Unlocks: Apricot Trees, Dinner Bell

15 – Camarillo Country 


o Reach Level 30
o Craft 8 Apricot Trifles (skip for 24 Farm Bucks)
o Gather 20 Garden Clippers (buy for 40 Farm Bucks)
o 1,000,000 to Clear Land (skip for 449 Farm Bucks)

Unlocks: Camarillo Horses, Hitching Posts 

Expand Away!


Now that you know how to expand, the rest is up to you! Use the extra space to grow more crops and trees to earn coins, build a corral for your horses, or just let the rabbits roam wild in the additional space!

Happy Farming!

No Image

Prize Crops

3 October 2012 FarmMaster 0

Grow brag-worthy crops on your Farm using Fertilizer! Fertilizing your crops increases the number of Resources that you get from one harvest, but it also makes it possible for you to produce Prize Crops!
What’s a Prize Crop?


A Prize Crop is an impressively large crop that you have a chance of obtaining when you harvest a Fertilized crop. Prize Crops appear after you harvest as larger, sparkling versions of the crop you’re harvesting. 

Clicking on these crops will open a pop-up that will show the weight of the Prize Crop you have grown. 

Every Prize Crop that you yield gives you bonus coins, Experience Points (XP), and Mastery Points toward that crop, so it’s really worth your while to put some Fertilizer in your field!

Please note that this feature is exclusive to crops; your Trees can’t produce Prized Crops and your Animals and your animals have their own version of Prize Crops (check out the guide on Prized Animals HERE!)

How Do I Get a Prize Crop?

Putting Fertilizer on a plot makes it possible for that plot to give you a Prize Crop. That’s all you have to do—just plant your crops like you normally would, water them, then add Fertilizer. To use Fertilizer, place your cursor over a planted and watered crop. You will see a pop-up with two icons at the bottom. These icons indicate how much Fertilizer and Speed-Grow you have in your Inventory. Click on the bag icon to Fertilize your crop. 

Having more fertilized plots is kind of like having a lot of tickets in a raffle—you have a better chance of winning, but there is no guarantee that you will. However, fertilizing your crops is the only way to even make it possible to grow a Prize Crop, so use your Fertilizer when you have it!

What Do I Get for a Prize Crop?

As mentioned earlier, Prize Crops appear as larger versions of the crop you’re harvesting. Unlike normal harvested crops, they will linger on your Farm until you interact with them. 

When you see a Prize Crop in your field, click on it. A pop-up will appear which will let you know how much your Prize Crop weighs. In addition to this, you can also see your current weight record for this particular crop. If this Prize Crop is a new personal best… congratulations! 


Clicking on the “Celebrate with Friends” button will post a feed to your wall that your friends and Neighbors can click on to collect rewards. 

For every Prize Crop that you grow, you will get Coins, XP and Mastery Points. The larger your Prize Crop is, the more of these items you will receive as a reward. Crops that unlock at higher levels in the game tend to produce larger Prize Crops than the lower level crops, so growing Prize Crops becomes more profitable the more you play!


What are Mastery Points?
When you harvest a crop, you earn Mastery Points. With enough Mastery Points, you will earn a Ribbon for that particular crop. This is called “Crop Mastery”. There are three levels of Crop Mastery you can achieve; Yellow Ribbon, Red Ribbon and Blue Ribbon. 

When you have earned a Ribbon, you will see a pop-up like the one below. 


You will also be able to place a sign on your Farm that indicates what level of mastery you have reached. This sign is for decoration purposes only… but placing it will let everyone know what you have achieved!


The number of harvests required to achieve Blue Ribbon mastery differ from crop to crop. Just keep planting and harvesting… your Ribbons will show up eventually! If you are in a hurry to earn your Blue Ribbon status, use Fertilizer on your crops. Harvesting Fertilized crops grants you more Mastery Points than harvesting un-fertilized ones. 

Mastering Crops may seem like hard work, but with each level of Mastery you achieve, the heavier your Prize Crops for that type of fruit or vegetable will tend to be. Keeping this in mind, even harvesting unfertilized crops is helpful if you wish to continue producing large Prize Crops, as un-mastered crops tend to yield smaller results. 

Where Can I Get Fertilizer?

Fertilizer is required to grow a Prize Crop. Because of this, you are going to want to keep a steady supply in your Inventory. You can get Fertilizer from a few places:

• When you feed your Animals, there is a chance they will give you a bag of Fertilizer in addition to the other Resources they provide.
• Neighbors who visit your Farm can fertilize your crops.
• Grab it from your friends Facebook feeds.
• Get it as a Free Gift from your friends.
• Purchase it in the General Store for Farm Bucks
• Farm Helpers will occasionally drop a bag of Fertilizer after they finish tending to your crops. 

You’ll spend one Fertilizer for every plot that you fertilize, so make sure you keep an eye on your supplies; running out will mean you can’t grow a Prized Crop!

Get Growing!


Prize Crops are a fun way to get some extra Coins and put your mastery of a certain crop on the fast track! Start fertilizing your crops to see how big you can grow your fruits and vegetables!

Happy Farming!

No Image

Market Stall

3 October 2012 FarmMaster 0

If you are going to have a thriving Farm, you’ll need to earn some Coins to keep everything up and running. Your Market Stand is the key to making money in FarmVille 2. Use it to sell your Resources, Crafted Recipes and Crops for Coins.


Using your Market Stall

Your Market Stall is the little stand located at the front of your Farm. To access it, simply click on it. 

Once you do this, the Market Stall Menu will appear. This menu shows all of the items you currently have available to sell. 

Please note: not everything in FarmVille 2 can be sold in the Market Stand. Here is a list of the current items that can be sold at your Stand:

• Harvested Crops

• Ingredients (edible resources, such as Milk, Eggs and Cheese)
• Finished Products (Final Recipes)
• Resources (Saddles, Horseshoes)
• Tree Resources (Lemons, Apples, etc)

Once your menu is open, making money is easy. Clicking on an item will put it up for sale. The total amount of Coin you are going to receive shows up at the bottom of the Market Stall Menu. Every time you click on an item, it will add to this number. 

Clicking on the green button will sell the items you selected for Coins. If you accidentally place something up for sale on mistake, click on the small “X” button at the top of the Market Stand Menu. This will let you start the process over, without selling the item you accidentally selected. 

When you’re ready to sell, click on the “Sell” button and watch the Coins roll in!

Happy Farming!

No Image

Guide to Consumables

3 October 2012 FarmMaster 0

Even the best Farmer can use a helping hand from time to time. That’s why we have released various Consumables to help you farm even more efficiently.
Consumables can be purchased in the General Store for Farm Bucks. Alternatively, most Consumables can be sent as Free Gifts from your Neighbors.

Below is a list of the current Consumables available in FarmVille 2.

Water

Dry crops will need to be watered before they start to grow, so keeping a healthy supply of water around is important. If you are running low, your water will regenerate on its own over time. You can also send and receive packs of water from your Neighbors from the Free Gifts page.

If you do not wish to wait, you can purchase Water from General Store. The current sizes available for purchase are:

·         Water 5 Pack – 5 Farm Bucks
·         Water 10 Pack – 8 Farm Bucks
·         Water 30 Pack – 21 Farm Bucks

 Fertilizer

Fertilized crops yield more Ingredients when harvested, which means more Coin in your pocket. In addition to this, a Fertilized crop may also produce a Prized Crop, which regular crops do not. 

To use Fertilizer, place your cursor over a planted and watered crop. You will see a pop-up with two icons at the bottom. These icons indicate how much Fertilizer and Speed-Grow you have in your Inventory. Click on the bag icon to Fertilize your crop. 

You can send and receive bags of Fertilizer from your Neighbors via the Free Gifts page.
If you do not wish to wait for your Neighbors, you can purchase Fertilizer from General Store. The current sizes available for purchase are:

·         Fertilizer 2 Pack – 2 Farm Bucks
·         Fertilizer 10 Pack – 8 Farm Bucks
·         Fertilizer 25 Pack – 15 Farm Bucks

For more information about Prized Crops, please visit our guide HERE. 

Feed

If you want your animals to produce Resources, they need to be fed! Hungry animals won’t produce until you give them Feed. Create Feed by placing harvested crops into your Feed Mill.

You can also send and receive bags of Feed from your Neighbors via the Free Gifts page.

If you find yourself running low and don’t wish to wait for your Neighbor’s assistance, you can purchase Feed from the General Store. The current sizes available for purchase are:

·         Feed 5 Pack – 1 Farm Bucks
·         Feed 15 Pack – 2 Farm Bucks
·         Feed 25 Pack – 3 Farm Bucks

For more information about feeding Animals, please visit our guide HERE. 

Milk Bottles
All Baby Animals require a certain number of Milk Bottles before they reach adulthood. Just like their adult counterparts, baby animals will get hungry for Milk Bottles at different intervals.

If you run out of bottles, click the “Ask” button on the following pop-up to request some from your Neighbors. 

Baby Bottles can also be purchased from the General Store. The current sizes available for purchase are:


·         Milk Bottle – 3 Farm Bucks
·         Milk Bottle 5 Pack – 12 Farm Bucks
·         Milk Bottle 10 Pack – 20 Farm Bucks

For more information about raising Baby Animals, please visit our guide HERE. 

Power

To stay in business, the Crafting Kitchen requires Power (Crafting Energy). Every time you use your Kitchen to make a Recipe, it will deduct from your power reserves.

If you are running low, your Power will regenerate on its own over time. You can also request packs of Power from your Neighbors.

If you do not wish to wait, you can purchase Power from General Store. The current sizes available for purchase are:

·         Power 2 Pack – 3 Farm Bucks
·         Power 10 Pack – 8 Farm Bucks
·         Power 15 Pack – 10 Farm Bucks

For more information about the Crafting Kitchen, please visit our guide HERE. 

Speed-Grow
Are you in a hurry to harvest your crops? No problem. Speed-Grow makes crops ready to harvest instantly!

To use Speed-Grow, place your cursor over a planted and watered crop. You will see a pop-up with two icons at the bottom. These icons indicate how much Fertilizer and Speed-Grow you have in your Inventory. Click on the spray bottle icon to instantly grow your crop.

You can purchase Speed Grow from the General Store. The current sizes available for purchase are:

·         Speed-Grow 2 Pack – 3 Farm Bucks
·         Speed-Grow 10 Pack – 10 Farm Bucks
·         Speed-Grow 25 Pack – 20 Farm Bucks

Salt

Salt is an Ingredient needed in certain Crafting Kitchen Recipes. If you run out of Salt, click the “Ask” button on a Recipe Card to request some from your Neighbors. 

If you find yourself running low and don’t wish to wait for your Neighbor’s assistance, you can purchase Salt from the General Store. The current sizes available for purchase are:

·         Salt 2 Pack – 2 Farm Bucks
·         Salt 5 Pack – 4 Farm Bucks
·         Salt 10 Pack – 7 Farm Bucks

For more information about Recipes, please visit our guide HERE. 

Sugar

Sugar is an Ingredient needed in certain Crafting Kitchen Recipes. If you run out of Sugar, click the “Ask” button on a Recipe Card to request some from your Neighbors. 

If you find yourself running low and don’t wish to wait for your Neighbor’s assistance, you can purchase Sugar from the General Store. The current sizes available for purchase are:

·         Sugar 2 Pack – 2 Farm Bucks
·         Sugar 5 Pack – 4 Farm Bucks
·         Sugar 10 Pack – 7 Farm Bucks

For more information about Recipes, please visit our guide HERE. 

Unwither

Did you accidentally let your crops wither? Re-planting crops can be a pain and you lose valuable Coins in the process. Luckily, you can purchase Unwither from the General Store! Unwither brings withered crops back to life instantly!

To use Unwither, click on a withered crop. When a pop-up appears, click the “use” button under the Unwither icon. Your crops will come back to life right before your eyes!

The current sizes available for purchase are:

·         Unwither 2 Pack – 3 Farm Bucks
·         Unwither 10 Pack – 10 Farm Bucks
·         Unwither 25 Pack – 20 Farm Bucks

Typically, you get the most bang for your buck when purchasing large packs of Consumables, as opposed to buying them individually.

Happy Farming!