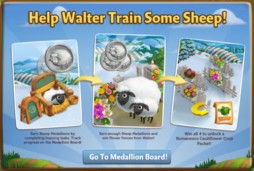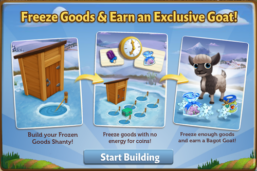
Frozen Goods Shanty!

5 February 2014 FarmMaster 0

Winter has come to FarmVille 2 and it’s time to explore a whole new way to craft recipes with no power and earn great rewards, including an exclusive Baby Bagot Goat!

If you are LEVEL 15 or higher, you will see the following pop-up:

After you get started, you can find your Frozen Goods Shanty near your water crops expansion.
Image 2
Building the Frozen Goods Shanty
Your first step is collecting Building Materials. You will need the following items to start building your Frozen Goods Shanty:
  • Cedar Planks
  • Shanty Insulation
  • Shanty Shingles
Image 3
 
Note: You can send requests for materials to your Friends every 18 hours.
Once you have collected the required items, click on the “Start Building” button at the bottom of the construction menu.
Now that the Frozen Goods Shanty is almost complete, you will need a little help from your Neighbors to finish the job. The Frozen Goods Shanty requires four additional helpers, so click on the “Ask Friends” button to send some crew requests to your Friends.
Image 4
When they accept, you will see the spots in the Build Menu begin to fill. If you do not wish to wait for your Friends, click on the “Hire One” button to purchase crew members with Farm Bucks. Once you have successfully filled all four spots, click on the “Finish & Share” button.
Using the Frozen Goods Shanty
Click on the Frozen Goods Shanty to open the main menu.
Image 5a
This menu shows how many Frozen Orders you have collected and what prizes you are currently eligible to redeem. You earn Frozen Orders by completing the crafting recipes in the Frozen Goods Shanty. This number keeps counting up, even as you redeem prizes. Crafting in the Frozen Goods Shanty does not cost Power.
A – An available Frozen Goods Ice Box. You start with two and can build more for a total of six. Having more Frozen Goods Ice Boxes allows you to earn Frozen Orders faster! (For details on how to build additional Frozen Goods Ice Boxes see below.)
B – The total amount of Frozen Orders you have.
C – Frozen Goods crafting recipes. Complete these recipes when you have an empty Frozen Goods Ice Box to earn Frozen Orders. (For more details on the Frozen Goods crafting recipes see below.)
D – The number of Frozen Orders you will receive for completing a Frozen Goods crafting recipe.
E — The number of Farm Bucks required when purchasing a prize.
F — How long you have left to earn Frozen Orders by crafting Frozen Goods
G – How much time remains before a Frozen Goods recipe is complete and the Frozen Goods Ice Box can be used again. If you do not want to wait you can hurry production by paying the amount of Farm Bucks listed for that recipe.
H – An empty space you can build a new Frozen Goods Ice Box in.
Crafting Frozen Goods Recipes
In order to earn Frozen Goods, you must craft the Frozen Goods Recipes for Cornelius. You can craft Frozen Goods via the Frozen Goods Shanty.
At the top of the Frozen Goods Shanty menu, you can view the Frozen Goods Recipes:
Image 6
 
LE Recipes
The following LE Recipes will be available to craft for a limited period of time, be sure to make them before they expire!
  • Heirloom Peach Popsicle
  • Butterscotch Frozen Yogurt


Permanent Recipes
The following Permanent Recipes will be available until the Frozen Ice Shanty event is complete.
  • Frozen Purple Broccoli
  • Frozen Corn
  • Blueberry Popsicle
  • Frozen Eggplant
  • Heirloom Sour Apple Frozen Yogurt
  • Heirloom Chilled Fruit
  • Heirloom Lemon Ice Cream
  • Chilled Berries
  • Berry Ice Cream
  • Chocolate Ice Cream
  • Butterscotch Ice Cream
Making a Frozen Good
Frozen Good recipes are similar to other crafting recipes with the following distinctions.
  • These recipes can only be made in the Frozen Goods Shanty.
  • You must have an available Ice Box to craft a Frozen Good.
  • Crafting Frozen Goods does not require Power.
Image 7a
Frozen Good Recipe Details
A – The ingredients required to craft a Frozen Good.
B – Click here to craft a Frozen Good once you have all the ingredients.
C – How long it will take for a Frozen Good to be ready in your Ice Box.
D – How many coins you can sell your Frozen Good for after it’s crafted.
E – How many Frozen Orders you will receive for crafting a Frozen Good.
Note: If you try to craft and don’t have an empty ice box the ‘Freeze’ button will be greyed out.In that case you have to wait or can pay to complete.
Building Additional Frozen Goods Ice Boxes
If you would like to earn Frozen Orders faster, you can add up to four more Frozen Ice Boxes to your Frozen Goods Shanty. Each new Frozen Ice Box will allow you to prepare one additional Frozen Goods Recipe inside your Shanty.
Your first step is collecting Building Materials. Each Frozen Ice Box requires different Building Materials to complete:
  • Frozen Ice Box 1
    • Green Tin Sheets
    • Tin Hinges
  • Frozen Ice Box 2
    • Iceboxes
    • Icepicks
  • Frozen Ice Box 3
    • Ice Pickaxes
    • Help Ropes
  • Frozen Ice Box 4
    • Ice Hammers
    • Ice Saws
Note: Your Frozen Ice Boxes may list these required materials in a different order.
Image 8
Note: You can send requests for materials to your Friends every 18 hours.
Once you have collected the required items, click on the “Start Building” button at the bottom of the construction menu.
Now that the Frozen Goods Ice Box is almost complete, you will need a little help from your Neighbors to finish the job. The Frozen Goods Ice Box requires four additional helpers, so click on the “Ask Friends” button to send some crew requests to your Friends.
Image 9
When they accept, you will see the spots in the Build Menu begin to fill. If you do not wish to wait for your Friends, click on the “Hire One” button to purchase crew members with Farm Bucks. Once you have successfully filled all four spots, click on the “Finish & Share” button.
Redeeming Frozen Orders for Prizes
Once you have collected enough Frozen Orders, they can be redeemed for great prizes. Click on your Frozen Goods Shanty to open up your progress menu.
You can redeem the following five prizes with Frozen Orders:
  • Pack of 5 Frosty Stone Pavers (5 Frozen Orders)
  • Goodie Bag (103 Frozen Orders)
  • Pack of 4 Frosty Stone Walls (138 Frozen Orders)
  • Goodie Bag (172 Frozen Orders)
  • Baby Bagot Goat (206 Frozen Orders)
Note: Redeeming Frozen Orders for any Frozen Goods Shanty prize will not deduct from your Frozen Order count total (your Frozen Order count will not decrease).
These prizes can be redeemed multiple times in a row, as long as you have enough Frozen Orders. Once you have collected enough Frozen Orders to reach the end of the meter, you will earn the Baby Bagot Goat!
Image 10
Additional Information
  • You have 4 weeks to collect the prizes. If you do not collect them all, the prizes will disappear and you will be unable to claim them.
  • You are limited to one Frozen Goods Shanty per farm.
  • The Frozen Goods Shanty is unmovable.

Reunite the Swan Couple!

29 January 2014 FarmMaster 0

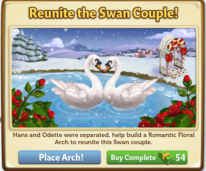
Hans and Odette were separated and are lonely! Build a Romantic Floral Arch to reunite this Swan couple and they’ll live happily together on your Farm!

If you are 15or higher, you will see the following pop-up; click on “Place Arch!” to get started.
After placing the Romantic Floral Arch you will see the Mute Swans Quest Menu. It shows you all of the tasks you have to complete to keep the Mute Swans on your Farm. NOTE: Both Hans and Odette have tasks to complete; in order to view them all click the “Help Hans!” and “Help Odette!” buttons on the left book page.
002 Helping Hans
003 Helping Odette
Notes:
  • If you close this menu and want to access it later to view your progress, just click on Hans or Odette to see their tasks.
  • You can also click on the Romantic Floral Arch to check on your progress.
  • You can complete Hans or Odette tasks in any order.
  • Odette will stay on the River until you finish her tasks; Hans will stay on your Farm.
Building the Romantic Floral Arch
To build the Romantic Floral Arch, you’ll need to collect the following items:
  • Wooden Lattices
  • Pink Satin Ribbons
  • White Painted Lumber
Click on the “Post” button to request Wooden Lattices in your game feed. Click on the “Ask” buttons to request Pink Satin Ribbons and White Painted Lumber from your Neighbors. If you do not wish to wait for your friends, you can skip any of these tasks for Farm Bucks.


  004 Building Materials Menu
Note: You can send a request for materials to your Friends every 18 hours.
005 Hire Builders Menu
Once you have collected the required items, click on the “Start Building!” button at the bottom of the construction menu. In order to build the Romantic Floral Arch you’ll need to hire Friends to help you finish the job!
To get help from Friends click on the “Ask Friends” button to send some crew requests to your Friends. When they accept, you’ll see the spots in the Builder Menu begin to fill. If you do not want to wait for your friends, click the “Hire One” button to purchase crew members with Farm Bucks. Once you have successfully filled all 4 spots, click on the “Finish Building” button.
Welcoming Hans and Odette to Your Farm
After completing all of the requirements in Hans’ quests, you will see the following pop-up:
006 You Helped Hans
Click on the “Share” button to post a reward feed for your Friends. 
After completing all of the requirements in Odette’s quests, you will see the following pop-up:
007 You Helped Odette
Click on the “Share” button to post a reward feed for your Friends. 
After completing Odette’s quest you will receive six Romantic Urns that you can use to decorate your farm.
If you complete all tasks for Hans and Odette they will be ready to make your Farm their home! Once everything is all set you will get to watch a romantic moment between the swans before they move into your Farm for good!
008 Romantic Moment
Additional Information:
  • You have four weeks to complete the Hans and Odette tasks. If you do not complete them, the swans will disappear and you will be unable to reunite them!
  • If you want to see how much time you have left to reunite the swans, hover your cursor over them.
  • You can only reunite the swans once.
  • If you only complete Hans’ tasks before time runs out he will stay on your Farm.
  • If you only complete Odette’s tasks before time runs out she will stay on your Farm.
  • You do not need to complete Barbara’s ‘It Takes Two’ Quests to claim the Mute Swans.
  • After completing the feature you will have the opportunity to purchase Mute Swans from the Market for Farm Bucks for a limited period of time.
  • Hans and Odette will nuzzle after you reunite them when they are living on your Farm. This animation is unique to Hans and Odette and will not happen with Mute Swans purchased from the Market.

Lunar New Year Lantern Festival!

21 January 2014 FarmMaster 0
It’s Lunar New Year in FarmVille 2! Craft Lanterns to celebrate Lunar New Year and earn Red Envelopes, which you can redeem for rewards and the exclusive Baby Buckskin Mini Horse!
If you are level 15 or higher, you will see the following pop-up. Click on the “Get Started” button to celebrate.
 001 Loading
Building the Lunar Lantern Stand
Your first step is collecting Building Materials. You will need the following items to start building your Lunar Lantern Stand:
  • Lantern Paper
  • Tea Lights
  • Lantern Ropes
To collect Lantern Paper, click on the “Post” button to post to your Facebook wall; you will get the parts when your Friends click on it, or when you click on a similar newsfeed post.
Click on the “Ask” button to send requests for Tea Lights and Lantern Ropes to your Neighbors. If you do not wish to wait for your Friends, you can skip any of these tasks for Farm Bucks.
  100 Build Lunar New Year
Note: You can send requests for materials to your Friends every 18 hours.
Once you have collected the required items, click on the “Start Building” button at the bottom of the construction menu.
Now that the Lunar Lantern Stand is almost complete, you will need a little help from your Neighbors to finish the job. The Lunar Lantern Stand requires four additional helpers, so click on the “Ask Friends” button to send some crew requests to your Friends. When they accept, you will see the spots in the Build Menu begin to fill. If you do not wish to wait for your Friends, click on the “Hire One” button to purchase crew members with Farm Bucks. Once you have successfully filled all four spots, click on the “Finish & Share” button.
  101 Hire Lunar Builders
Using the Lunar Lantern Stand
Click on the Lunar Lantern Stand to open the main menu.
010 Lantern Festival HUD 4
This menu shows how many Red Envelopes you have collected and what prizes you are currently eligible to redeem.
A – The total amount of Red Envelopes you have. You earn Red Envelopes by gifting Lanterns to your Friends. This number keeps counting up, even as you redeem prizes.
B – The button to use when you want to craft Red Lanterns and gift to your Friends (earn Red Envelopes).
C – The number of Farm Bucks required to purchase a prize.
D – The amount of Red Envelopes you will receive once a Friend has accepted that particular Lantern gift.
E – The total amount of that particular Lantern, which is ready to gift to your Friends.
F – If you want to invite your Friends over and gift them a Lantern, click on this button and a request will post to your feed and let you send request to Friends.


Crafting Lunar Lanterns
In order to earn Red Envelopes, you must craft the Lunar Lantern Recipes and invite your Friends over to pick up their Lunar Lantern gift. You can craft your very own Lunar Lanterns via the Lantern Stand.
From the Lunar Lantern Stand menu, click on the “Make” button to open the Recipe menu. You can choose from three different recipes:
  • Red Lantern: The required ingredients are Wool and Tong Qua Winter Melons. Note: To get wool, feed your Adult Sheep and Rabbits (feeding Prized Sheep and Rabbits do not count). Tong Qua Winter Melon is a Limited Edition Crop that grows on land.
 014 Make Red Lantern
  • Box Lantern: The required ingredients are Horseshoes and Lunar Paper. Note: Wood can be harvested from Pine Trees (harvesting Heirloom Trees does not count). You can Ask your Friends for Lunar Paper.
Box Lantern Recipe
  • Lotus Lantern: The required ingredients are Horseshoes and Lotus Silk. Note: To get Horseshoes, feed your Adult Horses (feeding Prized Horses does not count). You can Post to your Friends for Lotus Silk
 011 Make Lotus Lantern
Once you have filled your six Lantern slots, the “Make 1” button on the Recipe Card will grey out and you will be unable to craft more until Friends have accepted what you have already crafted.
015 Limit Reached
Collecting Red Envelopes
To get Red Envelopes, you will need to enlist the help of your Friends. From the Lunar Lantern Stand menu, click on the “invite” button to send requests to your Friends. Some other Friends will visit your farm from time to time and accept a Lunar Lantern gift too!
Note: If you do not wish to wait, you can purchase these visitors and/or individual Red Envelopes for Farm Bucks from the Lunar Lantern Stand menu.
When Red Envelopes appear on your farm after a Friend has accepted a Lantern gift, click on them and you will see the following pop-up:
 012 Share Red Envelopes
Click on the “Share Red Envelopes” button to post a feed to your wall. Your Friends will be able to click on this feed to claim some free Red Envelopes too. Once you have clicked on the Red Envelope, it will automatically be added to your Lunar Lantern Stand.
Note: You can share Red Envelopes with Friends every 18 hours. Simply click on the “Share Red Envelopes” button at the bottom of the message.
Redeeming Red Envelopes for Prizes:
Once you have collected enough Red Envelopes, they can be redeemed for some great prizes. Click on your Lunar Lantern Stand to open up your progress menu.
You can redeem the following five prizes with Red Envelopes:
  • Water Lanterns (15 Red Envelopes)
  • Lunar Firework (25 Red Envelopes)
  • Goodie Bag with 1 Lotus Silk, 5 Bags of Fertilizer, 5 Power, and 5 Unwithers (45 Red Envelopes)
  • Rainbow Eucalyptus (70 Red Envelopes)
  • Baby Buckskin Mini Horse (100 Red Envelopes)
Note: Redeeming Red Envelopes for any of the Lunar Lantern Stand prizes will not deduct from your Red Envelope count total (your Red Envelope count will not decrease).
These prizes can be redeemed multiple times in a row, as long as you have enough Red Envelopes. Once you have collected enough Red Envelopes to reach the end of the meter, you will earn the Baby Buckskin Mini Horse!
  021 Winning Prize 5_b
The Baby Buckskin Mini Horse can be redeemed with Red Envelopes or Farm Bucks more than once. You can purchase additional Baby Buckskin Mini Horses for Farm bucks after you have earned the first one for Red Envelopes. After you have redeemed the Baby Buckskin Mini Horse for the first time, your Red Envelope meter will reset and you will be able to earn all the prizes additional times.
Additional Information
  • You have 21 days to collect the prizes. If you do not collect them all, the prizes will disappear and you will be unable to claim them.
  • You can earn additional items for crafting Lanterns by visiting other Neighbors’ Lunar Lantern Stands during Neighbor Visits.
  • You are limited to one Lunar Lantern Stand per farm.
  • The Lunar Lantern Stand is unmovable.

New Coin Expansions!

17 January 2014 FarmMaster 0
Early Access to our latest Expansions is here! Get a head start on the Forest to the North Expansions and be the first of your friends to get an additional Silo and Furnace! For a limited time, these new Expansions will be available to all players that are level 50 and above for special purchase. After this period, the Expansions will be level locked (level 72+) and available for high Coins (7 million+ Coins). 
There are a total of five new “Forest to the North” Expansions available. In addition to this, we have raised the Maximum Coin Cap from 8 Million Coins to 10 Million Coins!
  
Early Access Expansion Rewards:
All players who expand early will receive the amazing benefits listed below:
  • Players level 50 or above will have access to the Forest to the North Expansions (After that time, the first of the five Expansions will unlock at level 72)
  • Early access to an additional Silo – increase your Feed capacity by 25!
  • Early access to an additional Furnace – harvest for 30 more Power every four hours!
  • Unlock without completing the Expansion requirements – save millions of Coins and no crafting or collecting parts from friends required!
If you do not wish to expand early, no problem – we will be rolling this feature out to all players over the upcoming weeks. After Early Access has ended, the requirements for each Expansion will be as follows: 
  
21 – The Bird’s Nest
  • Reach Level 72
  • Craft Egg Rolls from the Crafting Kitchen
  • Gather 20 Binoculars from your friends
  • 7 Million Coins to Clear Land
  • Unlocks: Baby Wild Turkey and The Bird’s Nest


22 – The Storage Shack
  • Reach Level 77
  • Craft Macaroni and Cheese from the Crafting Kitchen
  • Gather 20 Locks from your friends
  • 7 Million Coins to Clear Land
  • Unlocks: The Storage Shack Silo (ability to store more feed)
23 – Maple Meadow
  • Reach Level 82
  • Craft Lavender-Gingerbread Short Cookies from the Crafting Kitchen
  • Gather 20 Buckets from your friends
  • 8 Million Coins to Clear Land
  • Unlocks: Sweet Maple Tree and Stone Fountain
24 –Clearing into the Woods
  • Reach Level 87
  • Craft Walnut Date Bread from the Crafting Kitchen
  • Gather 20 Axes from your friends
  • 8 Million Coins to Clear Land
  • Unlocks: Farmhouse in ”cream” tone
25 – The Old Furnace
  • Reach Level 93
  • Craft Raspberry Cheesecake from the Crafting Kitchen
  • Gather 20 Flint Stone from your friends
  • 9 Million Coins to Clear Land
  • Unlocks: Chopping Block, Rocking Chair, and ability to get additional power from a rustic Furnace
If you would like to view a list of the land and water Expansions that are available, check out our official guide: Expansion Guide.
No Image

Expanding Your Farm!

17 January 2014 FarmMaster 0

When you first arrive at the farm, you will notice that things are a bit overgrown. Weeds cover the fields that have sat fallow for a long time. Give yourself a bit of extra room to grow by unlocking new land to add to your farm! As you level up in the game, additional land becomes available for you to unlock. Once you unlock new land, it becomes a part of your farm, and you can grow crops, raise animals, or place buildings and decorations on it!

Starting Out With Expansions:
When you first start the game, the land you can farm on is a little small. Marie will walk you through expanding to your first plot, revealing a feed mill and a lemon tree:
Feed Mill - FarmVille 2
Which Plots Can I Unlock? 
You will eventually be able to expand your farm to all the grassy areas and the river you see on your screen. As you reach higher levels in the game, these plots will become available for you to unlock. You can hover your mouse over a plot to see which level you need to be on to unlock that plot, as well as which goodies you will unlock when you expand to that plot:
Expanding Your Farm:
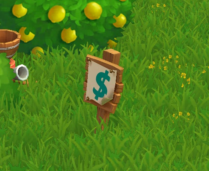
You can tell if a plot is available to expand on because you will see a sign pop up in the plot that looks like this:
FarmVille 2
When you click on a plot to expand it, you will see a pop-up. In this pop-up, you will see a list of requirements you need to meet before you are able to unlock a plot, like this:
FarmVille 2
When you are ready to unlock a plot of land, you need to have all of these requirements in your Inventory. For example, in the case above, if you have four eggs in your inventory but sell one to get more Coins so you can have the 1,000 Coins you need to unlock the land, you will no longer have enough eggs.
Once you have met all the requirements, the “Expand” button will turn blue and you can click on it to call in Marie’s “landscaping service” to clear the land for you:
FarmVille 2
Clearing land does more than just gives you more space to farm in—it also unlocks cool new items and game mechanics! You already saw this in action the first time you expanded; when you unlocked the land that had the Feed Mill on it, you were able to use the Mill to feed your goats. Every time you expand, you will uncover some new items. Best of all, once you unlock an item via expansion, you also unlock that item in the General Store, so you can purchase more if you want to!
Clearable Objects:
When you expand, there may be items on your new land that you do not want. Rocks and Debris need to be cleared away before you can use the space they are currently occupying.
  
How Do I Clear Something From a New Plot?
Clearing large objects is not easy—you are going to need some help! To get started, click on the object you want to clear away. Once you do that, you will see a popup telling you what you need to do in order to clear the object:
FarmVille 2
This popup lets you know a few things:
  • What you need to do to clear the object
  • How many tools or people you need to help you
  • What you will get once you clear the object away
Clearing requires you to complete two steps: one to gather materials you will need to tackle the job, and another to hire the crew needed to complete the task.  
If you are in a hurry to clear an object and do not want to wait, you can purchase the materials you need and hire help using Farm Bucks.
  
Gathering Materials:
  • Gather the tools you need to clear debris away by asking your friends to send some your way.
  • You can do this by clicking on the “Ask” button in the pop-up window. A message will be sent from you to your friends (you can choose which friends get this message), asking your friends to send you the tools that you need.
  • Don’t have time to wait? You can buy the tools you need with Farm Bucks.
Hiring a Crew:
Once you have your Materials, you will see a pop-up similar to this one:
FarmVille 2
  
  • To complete this step, click on the “Ask Friends” button to send a request to your friends for help.
  • If they accept your request, they will fill one of the open positions, and you will see their Facebook or Zynga profile picture next to one of the positions you needed to fill.  
  • Don’t have time to wait on a crew of volunteers? You can also purchase crewmembers for Farm Bucks.
Once you have the required number of crewmembers, the “Finish Clearing” button in the pop-up will turn blue, meaning that you are ready to go! Click on it to finish clearing the object away.
Rewards for Clearing an Object:
Remember when you first opened up the pop-up to clear the object away and you saw a part of the pop-up that looked like this?
FarmVille 2
These are the rewards you get when you clear away an object. They vary depending on what the object you are clearing away is made of (for example, clearing a rock gets you Bricks, while clearing a Piece of Wood debris gets you Wood Planks). After your crew is finished clearing an object, you will see a nice pile of rewards where the object used to be. Hover your mouse over them to scoop them up and into your Inventory, or just wait and they will be collected for you automatically.
Expansion Requirements:
For each Expansion, there are a few requirements you need to meet in order to be able to uncover the land! Most Expansions require you to reach a certain level in the game and have a certain amount of Coins and items in your Inventory in order to gain access. See the “Expansion Requirements” section below for details on each Expansion.
Expansion Requirements (Detailed): 
1 & 2 – Original land you start out with in the game – comes free when you start playing FarmVille 2!
3 – The Feed Mill
  • Reach Level 2
  • 175 Coins to Clear Land
  • Unlocks: Feed Mill and Lemon Tree
4 – The Family Well
  • Reach Level 2
  • Sell 8 Eggs from the Market Stand
  • Harvest 16 Wheat
  • 1,000 Coins to Clear Land
  • Unlocks: Water Well
5 – The Farmstead Kitchen
  • Reach Level 2
  • Have 5 Trees
  • Sell 4 Milk from the Market Stand
  • 2,000 Coins to Clear Land
  • Unlocks: Ability to craft Recipes in the Kitchen


6 – The West Meadow
  • Reach Level 5
  • Craft 2 Apple Scones from the Crafting Kitchen
  • Gather 2 Garden Clippers from your friends
  • 20,000 Coins to Clear Land
  • Unlocks: Cottontail Rabbit
7 – Apricot Acres
  • Reach Level 6
  • Sell 10 Saddles from the Market Stand
  • Gather 18 Garden Gloves from your friends
  • 750,000 Coins to Clear Land
  • Unlocks: Apricot Tree and Dinner Bell
8 – Milk Meadow
  • Reach Level 11
  • Expand to adjacent land
  • Craft 9 Peach Lemonades from the Crafting Kitchen
  • Gather 7 Iron Hoes from your friends
  • 50,000 Coins to Clear Land
  • Unlocks: Longhorn Cow and an additional Water Trough
9 – The Old Silo
  • Reach Level 15
  • Expand to adjacent land
  • Craft 3 Apple Pies from the Crafting Kitchen
  • Gather 10 Pitch Forks from your friends
  • 125,000 Coins to Clear Land
  • Unlocks: Ability to store more feed using the Silo
10 – Camarillo Country
  • Reach Level 15
  • Expand to adjacent Appaloosa River (see the “Appaloosa River Expansions” section below)
  • Unlocks: The Appaloosa River, Camarillo Horse, and Hitching Post
11 – Mango Gardens
  • Reach Level 20
  • Have 1 Adult Brown Swiss Cow
  • Gather 13 Chainsaws from your friends
  • 300,000 Coins to Clear Land
  • Unlocks: Peach Trees and Ivy Trellis Arches
12 – Golden Chicken Colony
  • Reach Level 24
  • Expand to adjacent land
  • Craft 5 Banana Cream Pies from the Crafting Kitchen
  • Gather 15 Produce Crates from your friends
  • 500,000 Coins to Clear Land
  • Unlocks: Cochin Chickens and Concrete Birdbath
13 – Playground Patch
  • Reach Level 34
  • Expand to adjacent land
  • Crafting 20 Cherry Cobblers from the Crafting Kitchen
  • Gather 20 Permits to Expand from your friends
  • 2 Million Coins to Clear Land
  • Unlocks: Tire Swing
14 – East Woodlands
  • Reach Level 38
  • Expand to adjacent land
  • Craft 30 Squash Soup from the Crafting Kitchen
  • Gather 20 Blue Toolboxes from your friends
  • 3 Million Coins to Clear Land
  • Unlocks: Pine Tree
15 – The Horse Wilds
  • Reach Level 43
  • Expand to adjacent land
  • Crafting 12 Loaves of Barley Bread from the Crafting Kitchen
  • Gather 20 Scythes from your friends
  • 4 Million Coins to Clear Land
  • Unlocks: Appaloosa Horse and Flag
16 – The Waterpatch
  • Reach Level 48
  • Expand to adjacent land
  • Craft 15 Asparagus Quiche from the Crafting Kitchen
  • Gather Expansion Blueprints from your friends
  • 4 Million Coins to Clear Land
  • Unlocks: Extra Well for additional Water
17 – The Hog Wilds
  • Reach Level 54
  • Craft 15 Walnut Pinwheels from the Crafting Kitchen
  • Gather 20 Expansion Maps from your friends
  • 4 Million Coins to Clear Land
  • Unlocks: Baby Hampshire Pig
18 – The Date Orchard
  • Reach Level 56
  • Craft 20 Jelly Donuts from the Crafting Kitchen
  • Gather 20 Spot Lights from your friends
  • Unlocks: Date Tree and Swing Set
  • 4 Million Coins to Clear Land
19 – The Old Treehouse
  • Reach Level 63
  • Craft 25 Walnut Stuffed Dates from the Crafting Kitchen
  • Gather 20 Cameras from your friends
  • Unlocks: Tree House
  • 5 Million Coins to Clear Land
20 – The Old Watering Hole
  • Reach Level 68
  • Craft 25 Quinoa Breakfast Muffins from the Crafting Kitchen
  • Gather 20 Celebration Ribbons from your friends
  • Unlocks: An additional Water Trough
  • 5.5 Million Coins to Clear Land
The Forest to the North Expansions:
21 – The Bird’s Nest
  • Reach Level 72
  • Craft Egg Rolls from the Crafting Kitchen
  • Gather 20 Binoculars from your friends
  • 7 Million Coins to Clear Land
  • Unlocks: Baby Wild Turkey and The Bird’s Nest
22 – The Storage Shack
  • Reach Level 77
  • Craft Macaroni and Cheese from the Crafting Kitchen
  • Gather 20 Locks from your friends
  • 7 Million Coins to Clear Land
  • Unlocks: The Storage Shack Silo (ability to store more feed)
23 – Maple Meadow
  • Reach Level 82
  • Craft Lavender-Gingerbread Short Cookies from the Crafting Kitchen
  • Gather 20 Buckets from your friends
  • 8 Million Coins to Clear Land
  • Unlocks: Sweet Maple Tree and Stone Fountain
24 –Clearing into the Woods
  • Reach Level 87
  • Craft Walnut Date Bread from the Crafting Kitchen
  • Gather 20 Axes from your friends
  • 8 Million Coins to Clear Land
  • Unlocks: Farmhouse in ”cream” tone
25 – The Old Furnace
  • Reach Level 93
  • Craft Raspberry Cheesecake from the Crafting Kitchen
  • Gather 20 Flint Stone from your friends
  • 9 Million Coins to Clear Land
  • Unlocks: Chopping Block, Rocking Chair, and ability to get additional power from a rustic Furnace
  
The Appaloosa River Expansions: 
If you are level 15 or higher and have the Camarillo Country Expansion (Expansion #15), you will unlock the first set of the Appaloosa River Expansions.
1 – Appaloosa River – Unlocks when you expand Camarillo Country and reach level 15!
  • Unlocks: Crop Dryer –
2 – Buffalo Brook 
  • Reach Level 15
  • Expand to adjacent land
  • Craft 8 Cheddar Loaves from the Crafting Kitchen
  • Get 18 Boater Hats from your friends
  • 750,000 Coins to Clear Land
  • Unlocks: Baby Black Water Buffalo 
3 – The Riverside 
  • Expansion Coming Soon!
4 – The Far Shore
  • Expansion Coming Soon!
Tip: Have you not quite made it to the minimum level requirement for an Expansion? Get a head start by gathering your Expansion Permits. They will come in handy once you level up!
Now that you know how to expand, the rest is up to you. Use the extra space to grow more Crops and Trees to earn Coins, build a corral for your horses, or just let the rabbits roam wild in the additional space!

The Winter Cream Separator!

14 January 2014 FarmMaster 0
The time for Winter Cream is here and Barbara needs your help making her Bûche de Crème Cake for her B&B! Help Barbara by crafting Winter Cream using regular Milk, and then separating it for a chance to find the Bûche de Crème Ingredients for her cake. Complete the Bûche de Crème Ingredients collection to earn the exclusive baby Rocky Mountain Goat!
If you are level 12 or higher, you will see the following pop-up. Click on the “Place Winter Cream Separator” button to get started.
  Winter Cream Separator - FarmVille 2
Building the Winter Cream Separator:

Your first step is collecting construction parts. You will need the following items to start building your Winter Cream Separator:

  • Copper Cream Cans
  • Walnut Boards
  • Shiny Screws
  
To collect Copper Cream Cans, click on the “Post” button to post to your Facebook wall – you will get the parts when your friends click on it, or when you click on a similar newsfeed post. 
Click on the “Ask” button to send requests for Walnut Boards and Shiny Screws to your Neighbors. If you do not wish to wait for your friends, you can skip any of these tasks for Farm Bucks.
Winter Cream Separator - FarmVille 2
Note: You can post and send requests for materials to your friends every 18 hours.

Once you have collected the required items, click on the “Start Building” button at the bottom of the construction Menu. 
Now that the Winter Cream Separator is almost complete, you will need some assistance from your Neighbors to finish the job. The Winter Cream Separator requires four additional helpers, so click on the “Ask Friends” button to send some crew requests to your friends. When they accept, you will see the spots in the Build Menu begin to fill. If you do not wish to wait for your friends, click on the “Hire One” button to purchase crew members with Farm Bucks. Once you have successfully filled all four spots, click on the “Finish & Share” button.
  Winter Cream Separator - FarmVille 2
Using the Winter Cream Separator:  
The Winter Cream Separator requires a certain amount of Adult Cows on your farm that are not Prized to be functional. If you lack any requirements (such as not having enough Cows), the game will tell you what you are missing. When you feed your Adult Cows, they will drop Milk, which can be found in the “Ingredients” section of your Inventory.
Tip: Limited Edition Cows produce more Milk when fed!


Collecting Winter Cream: 
In order to get the Bûche de Crème Ingredients for Barbara’s cake, you will need to collect Winter Cream and then separate it. To see your Winter Cream count, click on the Winter Cream Separator to open the main menu. Your Winter Cream total is located on the left-hand side of this screen. The number at the bottom of the Winter Cream indicates how many you currently have in your Inventory.
  Winter Cream Separator - FarmVille 2
Crafting Winter Cream: You can craft your very own Winter Cream via the Crafting Kitchen. From the Winter Cream Separator menu, click on the “Craft” button to open the Kitchen. The Recipe for Winter Cream is as follows:
  • Winter Cream: The required Ingredients are Milk and Cream Ladle. Note: To get Milk, feed your Adult Cows (feeding Prized Cows do not count).
  Winter Cream Separator - FarmVille 2
Feeding Adult Cows: You can find Winter Cream by feeding your Adult Cows (feeding Prized Cows do not count). If you find some, they will appear on your farm in a similar fashion to Prize Goods.
Winter Cream Separator - FarmVille 2
When a Winter Cream appears on your farm after harvesting, click on it and you will see the following pop-up:
Winter Cream Separator - FarmVille 2 
Click on the turquoise “Share” button to post a feed to your wall. Your friends will be able click on this feed to claim some free Winter Cream for themselves too! Once you have clicked on the Winter Cream, it will be automatically added to your Winter Cream Separator. 
Once you have collected at least two Winter Creams, you will be able to separate them by clicking on the blue “Separate” button from the Winter Cream Separator menu.
Winter Cream Separator - FarmVille 2
 
As you separate Winter Cream, you will find a Bûche de Crème Ingredient, which will be automatically added to your Winter Cream Separator.
Bûche de Crème Ingredients:  
To earn the baby Rocky Mountain Goat, you will need to collect types of the Bûche de Crème Ingredients. To get these types of Ingredients, all you need to do is keep separating Winter Cream!
There are three types of Bûche de Crème Ingredients you can receive:
  1. Cultured Butter
  2. Crème Fraiche
  3. Whipping Cream
  
These Bûche de Crème Ingredients are not used for crafting like the “Half and Half” Recipe. Instead, they are automatically added to your Bûche de Crème Ingredients collection. To earn the baby Rocky Mountain Goat, you will need to have Cultured Butter, Crème Fraiche, and Whipping Cream in your Ingredients collection. A green check mark will indicate which Bûche de Crème Ingredients you have completed. Once you have collected all three of the Bûche de Crème Ingredients, you can trade them in for the baby Rocky Mountain Goat!
Tip: The more Adult Cows you have on your Farm, the better your chances are of receiving the Bûche de Crème Ingredients.
If you do not want to wait to collect the Bûche de Crème Ingredients, you can use Farm Bucks to skip these steps and get the new baby Rocky Mountain Goat right away!

Winter Cream Separator - FarmVille 2
 
  
Your new baby Rocky Mountain Goat will need Baby Bottles to reach adulthood, just like your other animals. Once it has matured, it will produce Milk.
Additional Information:
  • You have 21 days to earn the baby Rocky Mountain Goat. The timer at the bottom of your Winter Cream Separator menu indicates how long you have to collect the baby goat. If you do not collect it, the prize will disappear and you will be unable to claim it.
  • The Winter Cream Separator requires a minimum number of Adult Cows on any given farm in order to use it.
  • If you lack any requirements (such as not having enough Cows), the game will tell you what you are missing.
  • If you do not wish to use the Winter Cream Separator feature, it can be sold (frame only) or stored in your Inventory.
  • You can collect the baby Rocky Mountain Goat as many times as you wish (before the feature expires).
  • If you want to see how much time you have left to claim the baby Rocky Mountain Goat, hover your cursor over the Separator.
  • Limited to one Winter Cream Separator per farm.

The Medallion Board!

7 January 2014 FarmMaster 0

Introducing, the Medallion Board! Train Sheep to unlock Flower Fence Sets from Walter. Get all four Sets to unlock an exclusive Romanesco Cauliflower Crop Packet!

If you are level 12 or higher, you will see the following pop-up. Click on the “Go to Medallion Board” button to get started.

Using the Medallion Board:
The Medallion Board feature has four stages. Each stage requires a certain amount of Sheep to be trained in the Sheep Nursery. As you train Sheep by completing the Development Quest tasks, you will earn Sheep Medallions (two per Development Quest task), which will also fill your Sheep Medallion Bar. Once your bar is full, you can harvest the Medallion Board.
To see your Medallion Board Bar, click on the Medallion Board to open the main menu. Your Bar is located on the bottom of this screen. The number at the bottom of the bar indicates how many Medallions you need to collect and your current progress towards this goal.
Medallion Board - FarmVille 2
 
As you complete each Stage you will unlock a new Flower Fence Set. The Stages and respective Flower Fence Sets are as follows: 
  • Stage 1: Rose Fence
  • Stage 2: Tulip Fence
  • Stage 3: Orchid Fence
  • Stage 4: Chrysanthemum Fence
Once you have completed enough of the Development Quest tasks, you will be able to harvest your Board by clicking on it.
Medallion Board - FarmVille 2
 
If you do not want to wait to fill the Medallion Board Bar, you can use Farm Bucks to skip these steps and get the next Flower Fence Set right away! 
Romanesco Cauliflower Crop Packet:
Once you have earned all four of your Flower Fence Sets, you can claim the Romanesco Cauliflower Crop Packet! The Cauliflower Crop Packet is used in high value recipes in the Crafting Kitchen and Prized Cauliflower are worth more points at the County Fair.
Click the “Share and Go To Market” button to purchase your first Packet for Coins from the General Store.
  Medallion Board - FarmVille 2


Additional Information:
  • You are limited to one Medallion Board per farm.
  • You have 14 days to earn the four Flower Fence Sets. If you do not collect them all, the Fence Sets will disappear and you will be unable to claim them. 
  • Once you have earned a Flower Fence set, you can purchase additional sets (of that particular Flower Fence) in the General Store for Farm Bucks. 
  • Training Goats and Rabbits does not count towards the Medallion Board. Only training Sheep will count.
  • If you want to see how much time you have left to claim your Flower Fence Sets, hover your cursor over the Medallion Board.

The Sheep Nursery!

7 January 2014 FarmMaster 0

The Sheep Nursery Feature is broken up into three consecutive development stages (quest sets) that you can complete at your own pace.  


The Sheep Nursery is here! Use this building to train your baby Sheep to develop their personality and train them to produce extra resources!
If you are level 12 or higher, you will see the following pop-up. Click on the “Place Sheep Nursery” button to place the Nursery Frame on your farm.
  Sheep Nursery - FarmVille 2 
Building the Sheep Nursery:
Before you can start raising your baby Sheep, you will need to build your Nursery. Your first step is collecting Building Materials. You will need the following items to start building your Sheep Nursery:
  • Sheep Bedding
  • Baby Sheep Toys
  • Shearing Baskets
To collect Sheep Bedding, click on the “Post” button to post to your Facebook wall; you will get the parts when your friends click on it, or when you click on a similar newsfeed post.
Click on the “Ask” button to send requests for Baby Sheep Toys and Shearing Baskets to your Neighbors. If you do not wish to wait for your friends, you can skip any of these tasks for Farm Bucks.
  Sheep Nursery - FarmVille 2
Once you have collected the required items, click on the “Start Building” button at the bottom of the construction menu.
  
Now that the Nursery is almost complete, you will need a little help from your Neighbors to finish the job. The Sheep Nursery requires four additional helpers, so click on the “Ask Friends” button to send some crew requests to your friends. When they accept, you will see the spots in the Build Menu begin to fill. If you do not wish to wait for your friends, click on the “Hire One” button to purchase helpers with Farm Bucks.
  Sheep Nursery - FarmVille 2
Using your Sheep Nursery (Development Quests):
Raising a baby Sheep requires love, affection, and special attention. That is why the Sheep Nursery is here to help you! The Nursery is broken up into three development stages (quest sets): Choose a Bonus, Choose a Personality, and Name Your Sheep. Each development stage (quest set) has three tasks that have to be completed. As you complete each development stage, you will unlock the next stage. In addition, the quest will differentiate depending on what Bonus and/or Personality you choose.
Once your Nursery is up, you will need to place one baby Sheep inside. Note: You can train any baby Sheep on your farm or from the General Store in the Nursery, including the ones available for Coins. Click on the Sheep Nursery to open the Quest Menu.
Development Quest 1 – Choose a Bonus:
The first step is to select a Bonus for your baby Sheep. You can choose between a Fertilizer, a Wool (you will receive one extra Fertilizer or Wool every time you feed the Adult Sheep) and an Appetite Bonus (your Adult Sheep will be hungry in half the amount of time guaranteed). Note: You can only choose one Bonus per baby Sheep.
Once you have selected a Bonus, click on the green “Confirm” button to turn the page to the next Development Quest.
  Sheep Nursery - FarmVille 2
Click on the “Make It” button for the Recipe you wish to Craft and you will be sent to your Kitchen and/or Workshop. Once you have completed and performed all three of the tasks, click on the turquoise “Complete & Share” button.


Sheep Nursery - FarmVille 2
Development Quest 2 – Choose a Personality:
The next step is to pick a Personality for your baby Sheep. You can choose between Radiant, Relaxed, and Rebellious. The Personality you pick will determine how your baby Sheep will behave once it is an adult (e.g. animate). Note: You can only choose one Personality per baby Sheep.
Once you have selected a Personality, click on the green “Confirm” button to turn the page to the next Development Quest.
  Sheep Nursery - FarmVille 2
  
Click on the “Make it” button for the Recipe you wish to Craft and you will be sent to your Kitchen and/or Workshop. Once you have completed and performed all three of the tasks, click on the turquoise “Complete & Share” button.
Sheep Nursery - FarmVille 2
 
Development Quest 3 – Name Your Sheep: 
The final step is to name your baby Sheep. You can use up to 14 characters (with spaces). Note: You can only name your Sheep while in regular Screen mode (not in Full Screen mode).
Sheep Nursery - FarmVille 2
  
Once you have chosen a name, click on the green “Confirm” button to turn the page to the final Development Quest. Click on the “Make it” button for the Recipe you wish to Craft and you will be sent to your Kitchen and/or Workshop. Once you have completed and performed all three of the tasks, click on the turquoise “Complete & Share” button.
  Sheep Nursery - FarmVille 2
  
Congratulations! You have trained your baby Sheep into an Adult that will produce an extra Fertilizer, Wool, or have an Appetite Bonus! Click your Sheep to move and place it on your farm.
The Flower Fences & the Romanesco Cauliflower Crop Packet:
For a limited time only, you can earn special Flower Fences! Get all four Sets to unlock an exclusive Romanesco Cauliflower Crop Packet! In order to earn these Fences and the Crop Packet, you must complete the tasks of the Development Quests to earn Sheep Medallions, regardless of their Bonus and/or Personality. As you complete a Development Quest task, you will earn two Sheep Medallions. A number will appear on the card (bottom right hand corner of the Sheep Nursery menu) to indicate how many Sheep Medallions you have earned and your progress towards the next goal.
Sheep Nursery - FarmVille 2
In addition, you can view your progress in the Medallion Board. Click on the “See Progress” button to access the Board.
  
Once you have earned enough Sheep Medallions by completing the Development Quest tasks, you will unlock the Flower Fences. Click on the turquoise “Place and Share” button to share some rewards with friends!
Sheep Nursery - FarmVille 2
 
Note: You have limited time to earn the Flower Fences and the Romanesco Cauliflower Crop Packet. If you do not collect all of the Sheep Medallions within the allotted time, the Flower Fences and the Romanesco Cauliflower Crop Packet will disappear, and you will be unable to claim them.
Additional Information:
  • You can only use baby Sheep with the Nursery.
  • You can re-use the Nursery to train as many Sheep as you would like.
  • If you do not wish to use the Sheep Nursery feature, it can be sold (frame only) or stored in your Inventory.
  • You are limited to three Sheep Nurseries per Farm. You can get one more Sheep Nursery for free, and one more Sheep Nursery for Farm Bucks from the General Store.


New Fun for High Level Farmers!

3 January 2014 FarmMaster 0

We have added new fun for our high level farmers! Levels 81 – 100 are now available, along with new Animals, Crops, and high-valued crafting Recipes. See below for all of the details on our latest release, and enjoy!

If you are level 10 or higher, you will see the following pop-up. Click on the “Get it Now” button to get started.


Levels: 
  • 81 – 100
Animals:
  • Guinea Hog (Level 41)
  • Black Sultan Chicken (Level 45)
  • African Buffalo (Level 53)
Crops:
  • Water – Watercress (Level 29)
  • Land – Oat (Level 63)
Crafting Kitchen Recipes:
  • Levels 29 – 45
    • Sautéed Watercress and Radishes (Level 29)
    • Watercress Soup (Level 29)
    • Watercress and Orange Salad (Level 29)
    • Goat Cheese Sandwich (Level 33)
    • Cucumber Watercress Salad (Level 33)
    • Tea Sandwich (Level 33)
    • Cheese Grits (Level 45)
    • Watercress and Potato Salad (Level 50)
  • Levels 60 – 65
    • Spinach Salad (Level 61)
    • Raspberry Vinaigrette (Level 62)
    • Raspberry Bing Salad (Level 62)
    • Vinegar (Level 61)
    • Oatmeal (Level 63)
    • Cranberry Oatmeal (Level 64)
    • Oatmeal Cranberry Cookie (Level 65)
  • Levels 77 – 95
    • Tropical Oatmeal (Level 77)
    • Tropical Cupcake (Level 77)
    • Banana Bread Oatmeal (Level 77)
    • Century Eggs (Level 95)
    • Lavender Honey Ice Cream (Level 95)
    • Crate of Milk (Level 95)
Crafting Workshop Recipes:
  • Levels 13 – 19
    • Spur (Level 13)
    • Lasso (Level 13)
    • Wagon Wheel (Level 13)
    • Horse Blanket (Level 15)
    • Riding Boots (Level 15)
    • Glass Butterfly Charm (Level 15)
    • Blue Guitar (Level 19)
    • Wood Guitar Body (Level 19)
    • Guitar Body (Level 19)
  • Levels 23 – 28
    • Good Fortune Charm (Level 23)
    • Decorated Saddle (Level 23)
    • Decorative Photo Frame (Level 23)
    • Metal Photo Frame (Level 23)
    • Wooden Photo Frame (Level 26)
    • Duck Photo Frame (Level 27)
    • Pizza Board (Level 28)
  • Levels 30 – 40
    • Cheese Board (Level 30)
    • Double Edged Cheese Knife (Level 31)
    • Utah Wreath (Level 33)
    • Utah Soap (Level 33)
    • Utah Earrings (Level 33)
    • Feather Toys (Level 35)
    • Feather Bundle (Level 35)
    • Feathered Wool Pouch (Level 35)
    • Stuffed Duck Toy (Level 40)
Crafting Kiln Recipes: 
  • Levels 23 – 32
    • Tuscan Sunflower Tile (Level 23)
    • Tuscan Decorative Plate (Level 23)
    • Tuscan Decorative Jar (Level 23)
    • Acoma Vase (Level 26)
    • Lizard Vase (Level 26)
    • Feather Pot (Level 26)
    • Commemorative Plate (Level 29)
    • Flower Teacup (Level 32)
    • Teapot (Level 32) 

Carve Ice Sculptures!

30 December 2013 FarmMaster 0
Carve Ice Sculptures! Help Marie build an Ice Carving Table, collect Ice Cubes, and then you’ll earn some amazing prizes. Harvest your regular Trees, Heirloom Trees, and Water Crops for a chance to find Ice Cubes, which you can redeem for all kinds of prizes, including the baby Blue Grey Cow!
  
If you are level 12 or higher, you will see the following pop-up. Click on the “Place Ice Carving Table” button to get started.
Carve Ice Sculptures - FarmVille 2
 
Building the Ice Carving Table:
Your first step is building your Ice Carving Table. You will need the following items to start construction:
  • Ice Chisels
  • Ice Saws
  • Pairs of Ice Tongs
To collect Fancy Ice Chisels, click on the “Post” button to post to your Facebook wall; you will get the parts when your Friends click on it, or when you click on a similar newsfeed post. 
Click on the “Ask” button to send requests for Ice Saws and Pairs of Ice Tongs to your Neighbors. If you do not wish to wait for your Friends, you can skip any of these tasks for Farm Bucks.
  Carve Ice Sculptures - FarmVille 2
Note: You can post and send requests for materials to your Friends every 18 hours.
Once you have collected the required items, click on the “Start Building” button at the bottom of the construction menu.
Now that your Ice Carving Table is almost complete, you will need a little help from your Neighbors to finish the job. The Ice Carving Table requires four additional helpers, so click on the “Ask Friends” button to send some crew requests to your Friends. When they accept, you will see the spots in the Building Menu begin to fill. If you do not wish to wait for your Friends, click on the “Hire One” button to purchase crew members with Farm Bucks. Once you have successfully filled all four spots, click on the “Finish and Share” button.
Carve Ice Sculptures - FarmVille 2
Using the Ice Carving Table: 
Click on the Ice Carving Table to open the main menu. 
  Carve Ice Sculptures - FarmVille 2
This menu shows how many Ice Cubes you have collected and what prizes you are currently eligible to redeem. 

A – The total amount of Ice Cubes you have collected. As you redeem prizes, this number decreases.
B – If you want to send requests to your Friends for Small Ice Trays, which are used for crafting Small Crates of Ice. Note: You can have a maximum of 12 Small Ice Trays at any given time.
C – If you want to ask your Friends for Large Ice Trays, which are used for crafting Large Crates of Ice, press this button and a feed will be automatically posted to your wall. Note: You can have a maximum of 12 Large Ice Trays at any given time.
D – If you want to purchase Ice Cubes for Farm Bucks.
E – The button to use when you want to collect Ice Cubes by crafting in the Workshop. 
F – The button to use when you want to redeem a prize. Once you have enough Ice Cubes, this button will turn turquoise.
G – The number of Farm Bucks required to purchase the prize.
Collecting Ice Cubes: 
Harvesting Regular and Heirloom Trees: You can find Ice Cubes by harvesting your regular and Heirloom Trees. If you find some, they will appear on your farm in a similar fashion to Prize Goods.
  Carve Ice Sculptures - FarmVille 2
Harvesting Water Crops: You can find Ice Cubes by harvesting your Water Crops. If you find some, they will appear on your farm in a similar fashion to Prize Goods.
Carve Ice Sculptures - FarmVille 2


Note: Harvest regular Trees, Heirloom Trees, and Water Crops during Snowfall to increase your chances of finding Ice Cubes!
When an Ice Cube appears on your farm after harvesting, click on it and you will see the following pop-up:
  Carve Ice Sculptures - FarmVille 2 
  
Click on the turquoise “Share” button to post a feed to your wall. Your Friends will be able click on this feed to claim some free Ice Cubes for themselves too! Once you have clicked on the Ice Cube, it will be automatically added to your Ice Carving Table. 
Crafting: You can craft your very own Ice Cubes via the Crafting Workshop. From the Ice Carving Table menu, click on the “Craft” button to open the Workshop. The two Recipes for Ice Cubes are as follows:
  
  • Small Crates of Ice: To craft Small Crates of Ice, you will need Small Ice Trays and Pieces of Wood. Click on the “Ask” button to send requests for Small Ice Trays to your Friends. If you do not wish to wait for your Friends, you can skip any of these tasks for Farm Bucks. Note: To get Pieces of Wood, harvest Pine Trees and White Willow Trees (harvesting Heirloom Pine Trees and Heirloom White Willow Trees will not count).
  Carve Ice Sculptures - FarmVille 2
   
  • Large Crates of Ice: To craft Large Crates of Ice, you will need Large Ice Trays and Water. To collect Large Ice Trays, click on the “Post” button to post to your Facebook wall – you will get the parts when your Friends click on it, or when you click on a similar newsfeed post.

Carve Ice Sculptures - FarmVille 2
 
Note: Individual Ice Cubes can also be purchased with Farm Bucks from the Ice Carving Table menu.
Redeeming Ice Cubes for Prizes: 
Once you have collected enough Ice Cubes, you can redeem them for some beautiful prizes. Click on your Ice Carving Table to open up your progress menu. 

At the bottom of this menu, there are a total of four prizes that you can redeem for Ice Cubes: 

  • 3x Crystal Path (25 Ice Cubes)
  • Swan Ice Sculpture (45 Ice Cubes)
  • Goodie Bag (65 Ice Cubes) Note: You have a chance of earning Salt and/or Fertilizer
  • Horse Ice Sculpture (85 Ice Cubes)
All four of these prizes can be redeemed as many times as you like, as long as you have enough Ice Cubes (220 Ice Cubes total). Once you have collected all four of the above prizes, you will earn the baby Blue Grey Cow!
  Carve Ice Sculptures - FarmVille 2
Note: The baby Blue Grey Cow can be redeemed for Ice Cubes or Farm Bucks more than once.
It looks like the baby Blue Grey Cow has warmed up to you! Click on the “Share Ice Cubes” button to post a reward feed for your Friends. Make sure to feed your little cow Baby Bottles so she will grow into an Adult Blue Grey Cow that you can harvest for Milk! Note: Milk is an Ingredient used in Crafting Kitchen Recipes.
Additional Information:
  • You have 21 days to collect the Ice Carving Table prizes. If you do not collect them all, the prizes will disappear and you will be unable to claim them.
  • If you do not wish to use the Ice Carving Table feature, it can be sold or stored in your Inventory.
  • You can only get Ice Cubes when harvesting regular and Heirloom Trees on your own farm. You will not get Ice Cubes from Neighbor visits.
  • If you want to see how much time you have left to claim the Ice Carving Table prizes, hover your cursor over the Ice Carving Table.
  • You are limited to one Ice Carving Table per farm.

The Holiday Book, Stage 4!

23 December 2013 FarmMaster 0

Early Guide: This feature is not currently live to players, but stay tuned, as it will be available soon! 


The Holiday Book Feature is broken up into four consecutive stages that unlock over time. Click the links below to find out more information about each stage.

Stage 1 Guide: View
Stage 2 Guide: View
Stage 3 Guide: View
Stage 4 Guide: View
Oh boy! Marie found your old Family Holiday Book, which is all about decorating! Assist Marie with her tasks to earn beautiful Decoration Lights for buildings on your farm and other great rewards. Complete all four stages and get the exclusive baby Watermael Chicken!
Note: The Adult Watermael Chicken will produce 5x Fertilizer when fed!
  
Completing Your Rocking Chair (Holiday Book Quests):
In order to earn some great prizes, you will need to complete the Holiday Book Quests. You can access the Quest Menu from clicking on the Rocking Chair. 
Holiday Book - Stage 4 - FarmVille 2

   
Each Holiday Book Quest has six parts that have to be completed. As you finish parts of your quest, a green check mark will appear to indicate what parts of the quest have been completed. If you complete all six parts of the Holiday Book, Stage 4 Quest, you will win Power, and Holiday Wreath and Bell Decorations for a building on your farm!
Holiday Book - Stage 4 - FarmVille 2


Holiday Book Quests – Week 4: 
As noted above, click on the Rocking Chair to start working on your third set of Holiday Book Quests. The Holiday Book, Stage 4 Quest tasks require you to make Wreaths in the Crafting Workshop, collect Bells from Carriage Rides, and get Hooks by completing quests for Cornelius and/or collect Hooks from your Newsfeed.
Surprise Decoration: Click on the “Post” button to post a request for a Surprise Decoration (one out of the six Decorations) to your Facebook wall; you will get a Surprise Decoration (one out of the six Decorations) when your Friends click on it, or when you click on a similar newsfeed post! Note: You can post a request using this button every four hours.
Holiday Book - Stage 4 - FarmVille 2
The first step is to craft Pine Holiday Wreath, Blue Wreath, and Flower Wreath. Click on the “Make” button to head into the Crafting Workshop to get started.

Holiday Book - Stage 4 - FarmVille 2
The next step in this quest is to collect Silver Bells and Gold Bells from Carriage Rides. You can collect Silver Bells as you craft goods from the Crafting Workshop for Carriage Rides. You can collect Gold Bells as you take Carriage Rides. Note: If you do not wish to complete any of these tasks, you can skip this step for Farm Bucks. If you would like a tutorial on the Winter Carriage Ride, please view our official guide: Winter Carriage Ride. 
To collect Silver Bells and Gold Bells, click on the “Collect” button to open the Luggage Cart (Winter Carriage Ride).
Holiday Book - Stage 4 - FarmVille 2
 
As you craft goods, you can find Silver Bells. If you find some, they will appear on your farm in a similar fashion to Prize Goods. 
  Holiday Book - Stage 4 - FarmVille 2  
As you take Carriage Rides, you can find Gold Bells. If you find some, they will appear on your farm in a similar fashion to Prize Goods. 
Holiday Book - Stage 4 - FarmVille 2
Additionally, you can get Silver Bells and Gold Bells by collecting Friends’ and Neighbors’ requests from your Newsfeed.
   
The final step in this quest is to collect Hooks by completing quests for Cornelius. Click on the “Go To Quest” button to start Cornelius’s ‘Holiday Stocking’ quests. If you do not wish to complete any of these quests, you can skip this step for Farm Bucks. Cornelius’s ‘Holiday Stocking’ quests are as follows:
Holiday Book - Stage 4 - FarmVille 2
Holiday Book - Stage 4 - Q8Holiday Book - Stage 4 - FarmVille 2


As you complete the quests for Cornelius, you will receive the following pop-up to indicate that you have earned Hooks:
Holiday Book - Stage 4 - FarmVille 2
    
You can also get Hooks by collecting Friends’ and Neighbors’ requests from your Newsfeed (see image below):
Holiday Book - Stage 4 - FarmVille 2

 
As you complete the Holiday book Quests, you will receive special rewards, such as Power! Click on the “Share” button to share Holiday Hooks with Friends.
 Holiday Book - Stage 4 - FarmVille 2
Holiday Wreaths and Bells:  
In order to earn the lovely Holiday Wreath and Bell Decorations, you will need to complete the Holiday Book, Stage 4 Quests. As you complete each quest, various buildings on your farm will be decorated with the Wreaths and Bells! Below is a list of the buildings that you can decorate with the Wreaths and Bells:
  1. Water Troughs
  2. Silos
As mentioned earlier in the guide, once you complete the entire Stage 4 Quests, you will win a baby Watermael Chicken! To redeem your special prize, simply click on the turquoise “Share Holiday Hooks” button.
Holiday Book - Stage 4 - FarmVille 2
 
It looks like this little one has warmed up to you! Be sure to feed your new Chicken Baby Bottles, so it will grow into an Adult and produce 5x Fertilizer when fed!
Holiday Fences: 
Have you completed the Holiday Book, Stage 4 Quests and are looking for something else to do? Complete the Holiday Book, Stage 4 Quests multiple times to earn Bonus Fences with Wreaths and Bells!
  Holiday Book - Stage 4 - FarmVille 2 
Each additional time you complete the Holiday Book, Stage 4 Quests, you will receive the following pop-up. Click on the “Place and Share” button to share some of the rewards with Friends!
  Holiday Book - Stage 4 - FarmVille 2
Note: You are not required to complete the Holiday Book, Stage 4 Quests multiple times in order to earn the exclusive baby Watermael Chicken. 
Additional Information: 
  • You have 35 days to collect the Holiday Book prizes and Decorations. If you do not collect them all, the prizes and the Decorations will disappear and you will be unable to claim them.
  • If you want to see how much time you have left to claim the Holiday Book prizes and the Decorations, hover your cursor over the Chair.
  • If you do not wish to use the Rocking Chair, it can be sold (frame only) or stored in your Inventory after 1/7/14. Note: You will only receive Snowflakes when the Rocking Chair is built and the Holiday Book Quests are active (You will not receive Snowflakes if the Rocking Chair is not fully constructed or if the Holiday Book Quests are not active).
  • You are not required to complete the Holiday Book, Stage 4 Quests multiple times in order to earn the exclusive baby Watermael Chicken. 
  • You are limited to one Rocking Chair per Farm.  

The Winter Carriage Ride!

23 December 2013 FarmMaster 0


The
Winter Carriage Ride is here! Craft goods for Carriage Rides with
Friends and receive great gifts, including Baby Bottles, Water,
Fertilizer, and Power after each Ride. In addition, you will be earning
Silver Bells and Gold Bells for the Holiday Book. Complete all five of
the Carriage Rides and you will also earn the Thawing Fountain, which gives you 75 FREE Water over time!

Note:
Turn up the sound on your computer to enjoy the splendid sounds and
music of the Winter Carriage Rides as you visit your favorite FarmVille 2
Characters’ farms, which include Walter, Barbara, Gus, and Marie!

If
you are level 12 or higher, you will see the following pop-up. Click on
the green “Place Luggage Cart” button to place the Cart on your farm. 

  Winter Carriage Ride - FarmVille 2

Building the Luggage Cart:

Before
you can host a Carriage Ride, you will need to build your Luggage Cart.
Your first step is collecting Building Materials. You will need the
following items to start building your Cart:

  • Handbags
  • Cart Wheels
  • Metal Sheets

To
collect Handbags, click on the “Post” button to post to your Facebook
wall; you will get the parts when your Friends click on it, or when you
click on a similar newsfeed post.

Click
on the “Ask” button to send requests for Cart Wheels and Metal Sheets
to your Neighbors. If you do not wish to wait for your Friends, you can
skip any of these tasks for Farm Bucks.

Winter Carriage Ride - FarmVille 2


Note: You can send a request for materials to your Friends every 18 hours.

Once you have collected the required items, click on the “Start Building” button at the bottom of the construction Menu. 

Now
that your Luggage Cart is almost complete, you will need to hire
Friends to help you finish the job. The Luggage Cart requires four
additional helpers, so click on the “Ask Friends” button to send some
crew requests to your Friends. When they accept, you will see the spots
in the Building Menu begin to fill. If you do not wish to wait for your
Friends, click on the “Hire One” button to purchase crew members with
Farm Bucks. Once you have successfully filled all four spots, click on
the “Finish Building” button. 

Winter Carriage Ride - FarmVille 2
 

Carriage Rides:

The
Thawing Fountain can be earned after a total of five stages. In order
to earn it, you will need to host 5 Carriage Rides for Friends. To
prepare for a Carriage Ride, click on your Luggage Cart.

  Winter Carriage Ride - FarmVille 2

No
Carriage Ride is complete without all of the fixings, so it’s time to
start whipping up some delicious treats, goods, and supplies for your
rides! From the Quest menu, click on the “Craft” button for the Recipe
you wish to Craft and you will be sent to your Kitchen and/or Workshop.


As
you Craft Recipes, you have a chance to earn Silver Bells for the
Holiday Book! To learn more about the Holiday Book, Stage 4, please view
our official guide: Holiday Book, Stage 4.

Winter Carriage Ride - FarmVille 2


Note: Hosting a Carriage Ride uses up the goods you have crafted.


Stage One: 

  • Craft Toy Trains
  • Craft Cheese Quiche
  • Craft Tomato Soups

Stage Two: 

  • Craft Winter Drapes
  • Craft Collard Green Soups
  • Craft Fig Cakes

Stage Three: 

  • Craft Cornbread
  • Craft Glass Good Luck Charms
  • Craft Fragrant Perfumes

Stage Four: 

  • Craft Fancy Toy Bunnies
  • Craft Flax Fruitcakes
  • Craft Wool Pouches

Stage Five:

  • Craft Friendship Quilts
  • Craft Pumpkin Pies
  • Craft Leather Trunks

The
Winter Carriage Ride requires four guests to be present before your
ride can begin, so click on the “Ask Friends” button to send some
requests to your Friends. When they accept, you will see the spots in
the Guest Menu begin to fill.

  Winter Carriage Ride - FarmVille 2

If
you do not wish to wait for your Friends, click on the “Hire One”
button to purchase guests with Farm Bucks. Once you have successfully
filled all four spots, click on the “Go for a Ride” button to kickoff
the ride!

Winter Carriage Ride - FarmVille 2


Once
your Carriage Ride is ready to leave, the Carriage with your guests
will trot off and you will see the following pop-up. Click on the “Share
This Moment” to let all of your Friends know you are going on a
Carriage Ride!

Winter Carriage Ride - FarmVille 2


After
the Carriage returns from the ride, you will see the following pop-up.
Click on “Share Rewards” button to post a feed to your wall that your
Friends can click to collect rewards, too!

  Winter Carriage Ride - FarmVille 2

Earning Rewards with the Winter Carriage Ride:

You
will earn rewards each time you host a Carriage Ride. The more Carriage
Rides you host, the more rewards you will receive at the end of each
ride. Below is a list of items you have a chance of earning: 

  • Power
  • Fertilizer
  • Speed-Feed
  • Speed-grow
  • Baby Bottles
  • Fine Saddles
Winter Carriage Ride - FarmVille 2

Winter Carriage Ride - FarmVille 2


The Winter Carriage Ride reward icons at the bottom of the Guest Menu
indicate how many rides you have hosted. As you host rides, you will see
the Winter Carriage Ride reward icons will be replaced by green check
marks.

Winter Carriage Ride - FarmVille 2


You
can host up to a total of five Carriage Rides per Luggage Cart and once
you have finished your final ride, you will earn the Thawing Fountain, which gives you 75 FREE Water over time! Click on the “Place and Share” button to place your Thawing Fountain on your farm.

  Winter Carriage Ride - FarmVille 2

Overtime, you can harvest 5 free Water from the Thawing Fountain for a total of 15 times (up to 75 Water).
If you want to see how much time is left until you can harvest the
Fountain again, hover your cursor over it (see image below). Once you
have harvested all 75 Water from the Thawing Fountain, you will not be able to harvest it for more Water. After that time, the Thawing Fountain is yours to keep as a beautiful decoration!

  Winter Carriage Ride - FarmVille 2

Additional Information: 

  • Once the Luggage Cart is placed on your Farm, you have 28 days to finish the quests and host your Carriage Rides with Friends.
  • You can have up to two Luggage Carts on your farm (including frames).
  • If
    you delete the first Luggage Cart, you will only be able to have a
    total of one. The second Cart can be deleted or stored in your
    Inventory.
  • Once you have hosted your Carriage Rides, you will be unable to use and/or sell any of the goods.
  • Once you have finished hosting all of your rides, the Luggage Carts are yours to keep as decorations!
  • Once you have harvested all 75 Water (15 harvests) from the Thawing Fountain, you will not be able to harvest it for more Water.