The Fall Bonfire!

20 November 2013 FarmMaster 0

The Fall Bonfire is here! Craft goods for Bonfire Parties with Friends and receive great gifts after each party. Complete all five of the Bonfire Parties and you will also earn a Red Bell Pepper Crop Packet!
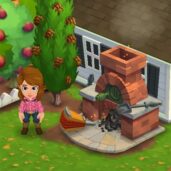
If you are level 12 or higher, you will see the following pop-up. Click on the green “Place Fire Pit” button to place the Pit on your farm. 
Fall Bonfire - FarmVille 2
 
Before you can host a Bonfire Party, you will need to build your Fire Pit. Your first step is collecting Building Materials. You will need the following items to start building your Pit:
  • Kindling Piles
  • Limestone Bricks
  • Stone Hammers
To collect Kindling Piles, click on the “Post” button to post to your Facebook wall; you will get the parts when your friends click on it, or when you click on a similar newsfeed post.
Click on the “Ask” button to send requests for Limestone Bricks and Stone Hammers to your Neighbors. If you do not wish to wait for your Friends, you can skip any of these tasks for Farm Bucks.
Fall Bonfire - FarmVille 2
 
Note: You can send a request for materials to your Friends every 18 hours.
Once you have collected the required items, click on the “Start Building” button at the bottom of the construction Menu. 
Now that your Pit is almost complete, you will need to hire Friends to help you finish the job. The Fire Pit requires four additional helpers, so click on the “Ask Friends” button to send some crew requests to your Friends. When they accept, you will see the spots in the Building Menu begin to fill. If you do not wish to wait for your friends, click on the “Hire One” button to purchase crew members with Farm Bucks. Once you have successfully filled all four spots, click on the “Finish Building” button. 
Fall Bonfire - FarmVille 2
 
Bonfire Parties:
The Red Bell Pepper Crop Packet can be earned after a total of five stages. In order to earn it, you will need to host 5 Bonfire Parties for Friends. To prepare for a Bonfire Party, click on your Fire Pit.
Fall Bonfire - FarmVille 2
 
No Bonfire Party is complete without s’mores and snacks, so it’s time to start whipping up some delicious treats, goods, and supplies for your parties! From the Quest menu, click on the “Craft” button for the recipe you wish to Craft and you will be sent to your Kitchen and/or Workshop.
Note: Hosting a Bonfire Party uses up the goods you have crafted.
Stage One
  • Have Olive Oil
  • Have Lumber
  • Have Tinder
  Fall Bonfire - FarmVille 2
  
Stage Two
  • Have Pumpkin Pie
  • Have Tomato Soup
  • Have Vegetable Kabobs
Fall Bonfire - FarmVille 2
 
Stage Three
  • Have Milk Chocolate Bars
  • Have Marshmallow Candy
  • Have Graham Crackers
Fall Bonfire - FarmVille 2
Stage Four
  • Have Leather Journal
  • Have Votive Candle
  • Have Vintage Flashlight
  Fall Bonfire - FarmVille 2
Stage Five:
  • Have Feather Charm
  • Have Bonfire Banjos
  • Have Outdoor Pillows
Fall Bonfire - FarmVille 2
 
The Fall Bonfire requires four guests to be present before your party can begin, so click on the “Ask Friends” button to send some requests to your Friends. When they accept, you will see the spots in the Guest Menu begin to fill.
   Fall Bonfire - FarmVille 2
If you do not wish to wait for your Friends, click on the “Hire One” button to purchase guests with Farm Bucks. Once you have successfully filled all four spots, click on the “Kindle the Fire Now” button to kickoff the party!
Fall Bonfire - FarmVille 2
  
Once your Bonfire Party is complete, your guests will run off and you will see the following pop-up. Click on “Share Rewards” button to post a feed to your wall that your Friends can click to collect rewards, too!
Fall Bonfire - FarmVille 2
 
Earning Rewards with the Fall Bonfire:
You will earn rewards each time you host a Bonfire Party. The more Bonfire Parties you host, the more rewards you will receive at the end of each party. Below is a list of items you have a chance of earning: 
  • Power
  • Fertilizer
  • Speed-Feed
  • Speed-Grow
  • Baby Bottle
  • Piece of Wood
Fall Bonfire - FarmVille 2
 
 
Night Time Bonus:
In addition to these awesome rewards, you will receive a +1 Crop bonus for a limited time after each Bonfire Party! A small crescent moon icon above your Neighbor Bar will indicate the Bonus is active. Hover over this icon if you’d like to see how much time you have remaining until it expires (see image below):
Fall Bonfire - FarmVille 2

The Fall Bonfire reward icons at the bottom of the Guest Menu indicate how many parties you have hosted. As you host parties, you will see the Fall Bonfire reward icons will be replaced by green check marks.
  Fall Bonfire - FarmVille 2
  
You can host up to a total of five Bonfire Parties per Fire Pit and once you have finished your final party, you will earn a Red Bell Pepper Crop Packet! Click on the  “Place and Share” button to purchase your Crop Packet in the General Store for Coins.
Fall Bonfire - FarmVille 2
 
Additional Information: 
  • Once the Fire Pit is placed on your Farm, you have 20 days to finish the quests and host your Bonfire Parties with Friends.
  • You can have up to five Fire Pits on your farm (including frames).
  • If you delete the first Fire Pit, you will only be able to have a total of four. The second, third, fourth, and fifth Pits can be deleted or stored in your Inventory.
  • Once you have hosted your Bonfire Parties, you will be unable to use and/or sell any of the goods.
  • Once you have finished hosting all of your parties, the Fire Pits are yours to keep as decorations!

Harvest More Power!

20 November 2013 FarmMaster 0
Great news, Farmers!
You can now harvest your Furnace for Power every FOUR HOURS! What do you think of this new update? Leave us a comment below to share your thoughts with the FarmVille 2 Team.

The Crafting Drive Stage 2!

19 November 2013 FarmMaster 0
  
The Crafting Drive Booth Feature is broken up into three consecutive stages that unlock over time. Click the links below to find out more information about each stage.
Stage 1
Stage 2
Stage 3Coming Soon!
The Crafting Drive Booth is here! Crafting in the Booth will earn you Points, which you can redeem for great rewards and the adorable baby Lionhead Rabbit!
Note: Animal Hospital Charity and the Crafting Drive Booth are fictional parts of the storyline in FarmVille 2, and are not actually affiliated with any real-world business or charity.
If you are level 12 or higher, you will see the following pop-up. Click on the “I’ll Help” button to get started.
  Crafting Drive - FarmVille 2
  
Before you can start crafting, you will need to build your Crafting Drive Booth. Your first step is collecting Building Materials. You will need the following items to start building your Booth:
  • Animal Balloons
  • Bunting Cloths
  • Bunny Posters
To collect Animal Balloons, click on the “Post” button to post to your Facebook wall – you will get the parts when your Friends click on it, or when you click on a similar newsfeed post.
  
Click on the “Ask” button to send requests for Bunting Cloths and Bunny Posters to your Neighbors. If you do not wish to wait for your Friends, you can skip any of these tasks for Farm Bucks.
Crafting Drive - FarmVille 2
  
Note: You can send a request for materials to your Friends every 18 hours.

Once you have collected the required items, click on the “Start Building” button at the bottom of the construction Menu. 

Now that the Crafting Drive Booth is almost complete, you will need a little help from your Neighbors to finish the job. The Crafting Drive Booth requires four additional helpers, so click on the “Ask Friends” button to send some crew requests to your Friends. When they accept, you will see the spots in the Build Menu begin to fill. If you do not wish to wait for your Friends, click on the “Hire One” button to purchase crew members with Farm Bucks.
Crafting Drive - FarmVille 2
Using the Crafting Drive Booth: 
Click on the Crafting Drive Booth to open the main menu.
  Crafting Drive - FarmVille 2
This menu shows how many Points you have earned in the current week, what rewards you have redeemed and what rewards you are currently working towards. It also shows your cumulative points that go towards earning the baby Lionhead Rabbit (Final Reward).
A – The Points Total (cumulative amount of Points you have earned during the Crafting Drive). You earn Points by crafting the Crafting Drive Recipes. NoteThis number keeps counting up, and does not get reset every week (see “the Baby Lionhead” section below for more details).
B – If you want to ask your Friends for Points, click on this button and a request will post to your feed. 
– The button to use when you want to purchase Points for Farm Bucks.
D – Use these arrow buttons to scroll through the Crafting Drive Recipes.
E – The button to use when you want to craft the Crafting Drive Recipes (earn Points).
F – The Crafting Drive Booth bar, which tracks your progress towards Milestone Goals and earning the babyLionhead RabbitNoteThis bar will reset each week when the next Stage becomes available.
How to Get Points in the Crafting Drive:
There are multiple ways to get Points in the Crafting Drive:
  1. Crafting Recipes:
    1. The first Stage (Week 1) has 2 different Recipes, and then 2 new Recipes that are worth higher Points unlock the following Stages (Week 2 & 3).
    2. When new Recipes unlock, you can craft those, as well as the previously unlocked Recipes, which means you can craft up to 4 Recipes in parallel during Week 2, and up to6 Recipes during Week 3!
    3. Ask your Friends for Donation Points by posting a feed to your wall (See B. in the “Using the Crafting Drive Booth” section above).
    4. Use your Farm Helpers! Each Farm Helper will drop a Donation Package after they’ve completed a Neighbor Visit task.
    5. Purchase Points for Farm Bucks (See C. in the “Using the Crafting Drive Booth” section above).
Crafting Drive Recipes:
In order to earn Points, you must craft the Crafting Drive Recipes. From the Crafting Drive Booth menu, click on the “Craft Recipe” button to open the Recipe menu.
Stage 1
The two Recipes for the Week 1 are as follows:
  • Pet Collar: The required Ingredients are Wool and Rhinestone. You will receive a total of two Points per Pet Collar crafted. Note: To get Wool, feed your Adult Sheep and Adult Rabbits (feeding your Prized Sheep and Prized Rabbits do not count).
  Crafting Drive - FarmVille 2
  • Animal Blanket: The required Ingredients are Fur and Blueberries. You will receive a total of one Point per Animal Blanket crafted. Note: To get Fur, feed your Adult Buffalo and Adult Deer (feeding your Prized Buffalo and Prized Deer do not count).
Crafting Drive - FarmVille 2
Stage 2
The two Recipes for the Week 2 are as follows:
  • Pooper Scooper: The required Ingredients are Pieces of Wood and Copper Poop Scoop. You will receive a total of five Points per Pooper Scooper crafted. Note: To get Pieces of Wood, harvest your Pine Trees and White Willow Trees. 
   Crafting Drive - FarmVille 2
  • Porcelain Treat Bowl: The required Ingredients are Mud and Strawberries. You will receive a total of three Points per Porcelain Treat Bowl crafted. Note: To get Mud, feed your Adult Pigs (feeding your Prized Pigs do not count).
  Crafting Drive - FarmVille 2
  • Week 3 Recipes: Coming Soon!
    • Note: These Recipes will be worth SEVEN and TEN Points!
Farmhand Donation Packages:
In addition to Crafting, you can earn Points from your Farmhands. As you use your Farmhands, they will donate a Package to you for the Animal Hospital, which gives you Points in the Crafting Drive. These Packages linger on your farm and appear as a small blue box. Once you have found a Package, click on it and you will receive the following message:
Crafting Drive - FarmVille 2
Click on the “Open Booth and Share” button to share some Points with Friends!
Earning Rewards:
In order to earn the Crafting Drive rewards, you will need to accrue enough Points to hit your Milestone Goal. Once you have collected enough Points for your current Milestone Goal, they will be automatically redeemed for some great rewards. After you redeem each reward, a green check mark will appear to indicate what Milestone Goal has been reached. Click on your Crafting Drive Booth to open up your progress menu. 
Stage 1
The Milestone Goals and respective rewards for Week 1 are as follows: 
  • Milestone 1:  +6 Speed-Grow
  • Milestone 2:  +10 Speed-Grow
  • Milestone 3:  +20 Speed-Grow
  • Milestone 4:  +34 Speed-Grow
Stage 2
The Milestone Goals and respective rewards for Week 2 are as follows: 
  • Milestone 1:  +10 Fertilizer
  • Milestone 2:  +16 Fertilizer
  • Milestone 3:  +30 Fertilizer
  • Milestone 4:  +64 Fertilizer
Stage 3 – Coming Soon!
The Baby Lionhead Rabbit:
The final reward for the Crafting Drive Booth is the baby Lionhead Rabbit. In order to earn this adorable Rabbit, you will need to earn enough Points (Points Total) towards the Crafting Drive Goal. The Crafting Drive Goal is based on the cumulative Points you get over the 3-week period, and can be redeemed for the baby Lionhead Rabbit as soon as the Goal has been reached.
  Crafting Drive - FarmVille 2
 If you do not want to wait to get the baby Lionhead Rabbit, you can use Farm Bucks to get enough Points and unlock the Rabbit right away! 
Additional Information:
  • Every week, the Crafting Drive Booth bar is reset and you will now work towards a new set of rewards. Note: Your Points Total (number below the baby Lionhead Rabbit) will not be reset.
  • You have 21 days to collect the rewards. If you do not collect them all, the rewards will disappear and you will be unable to claim them.
  • If you want to see how much time you have left to claim the Crafting Drive Booth rewards, click on the 
    Booth and look at the timer below the “Get a Bunny.”
  • You are limited to one Crafting Drive Booth per farm.
  • The Crafting Drive Booth is unmovable.

Support Typhoon Haiyan Relief Efforts!

15 November 2013 FarmMaster 0
Direct Relief is partnering with Zynga to support relief efforts following Typhoon Haiyan in the Philippines. Show your support by contributing to Direct Relief, and get exclusive decorations & packs of Water. 
Restrictions apply. Zynga will donate 100% of its share of the in-game currency purchase price to Direct Relief. Contributions are not tax-deductible. For more information, visit: http://www.directrelief.org/zynga

The Pasture & Fuel Pump!

14 November 2013 FarmMaster 0

This feature is currently only available to players who have purchased Early Access. For more information about this, please see our official guide: Early Access to the Pasture is here!

Introducing, the Pasture! Use the Pasture to store an unlimited number of your Prized Animals, and then harvest it to fill your Fuel Pump!
If you are level 15 or higher, you will see the following pop-up. Click on the “See your Pasture” button to get started.


The next step is to place your Fuel Pump on your farm (not the Pasture). Now, the best part is that the Pump is already built for you! (See the “Fuel Pump” section below for more details). After you’ve placed the Pump on your farm, Walter will pay you a special visit.
The Pasture - FarmVille 2
 
The third step is to click on the bouncing yellow arrow, which will then bring up the Pasture menu. From this menu, click on the “Add Prized Animals” button to automatically add all of your Prized Animals from the farm to the Pasture!
Note: This will only add the Prized Animals on your farm. It will not automatically add the Prized Animals in storage buildings or your Inventory.
  The Pasture - FarmVille 2
  
Inside the Pasture:
Click on the Pasture to open the main menu.
The Pasture - FarmVille 2
 
This menu shows you all of the Prized Animals that are inside the Pasture, your current population, and how many Prized Animals you will need to upgrade your Fuel Pump. 

A – The total number of Prized Animals in the Pasture

– Use these tabs when you want to sort through your Prized Animals by category
– Use these arrow buttons to scroll through all of your Prized Animals in the Pasture
D – Minus Symbol: Use this button when you want to remove a Prized Animal from the Pasture (Note: This button is only available when you hover over a placement card from this menu)
– Use this button when you want to store a Prized Animal (wandering on your farm) in the Pasture (Note: This button will grey out when there are no Prized Animals available)
F – Use this button when you want to upgrade your Fuel Pump (Note: This button will disappear where there are no upgrades available)
G – Your current Fuel Pump Capacity
H – Use this checkbox when you want to store all of your Prized Animals (wandering on your farm) with one click in the Pasture
  
Using the Pasture:
We’ve made it even easier to store your Prized Animals in the Pasture from the farm! Once you’ve Prized an Animal, you will see the following pop-up if the respective storage building is full. Click on the “Send to Pasture” button to automatically send your Prized Animal to the Pasture. Note: If a Fuel Pump upgrade is available, you will see a “Pasture and Upgrade” button on the pop-up. Click on this button to bring up the “Upgrade your Fuel Pump” pop-up and begin collecting the building parts for the upgrade.
  Pasture - Send to Pasture
The Fuel Pump
One of the many benefits of storing Prized Animals in the Pasture is they keep the grass trimmed down, which results in the production of resources for the Fuel Pump!
The Pasture - FarmVille 2
 
Using the Fuel Pump:
The first time you click on your Fuel Pump, you will receive some FREE Fuel! Afterwards, there will be an 18-hour cooldown period. Overtime all of your Prized Animals in the Pasture will produce the resources that are required to fill the Fuel Pump. To get Fuel, all you have to do is store Prized Animals in the Pasture, and then harvest the Fuel Pump after the cooldown of 18-hours.
The Pasture - FarmVille 2
 
Helpful Tip: The more Prized Animals in your Pasture and the greater the Fuel Pump Capacity, the more Fuel you get from your Pump!
Upgrading the Fuel Pump:
In order to get the most Fuel out of your Pump, you will need to upgrade it relative to the number of Prized Animals in your Pasture. Currently, you can upgrade your Fuel Pump to a maximum of 45 Capacity. Each upgrade will differ slightly in appearance from the previous Pump. Note: You will only get the extra Fuel from your additional Prized Animals if you upgrade the Fuel Pump.
Once you unlock a new upgrade for your Fuel Pump, you will see the message, “Click to upgrade” after harvesting your Pump:
The Pasture - FarmVille 2
In addition to this, the green “Upgrade” button on the Pasture menu will be visible (see the “Inside the Pasture (F.)” section above).
Each upgrade will require different parts. Below is a list of the different items you may need to collect in order to upgrade:
  • Propellers
  • Gear Differentials
  • Aluminum Metal Plates
  • Bolt Cutters
  • Hatch Doors
  • Rubber Hoses
Below is an example of the “Upgrade your Fuel Pump” pop-up:
The Pasture - FarmVille 2
 
From the “Upgrade your Fuel Pump” pop-up, click on the “Post” button to post a request to your Facebook wall – you will get the parts when your Friends click on it, or when you click on a similar newsfeed post.
Click on the “Ask” button to send requests for parts to your Neighbors. If you do not wish to wait for your Friends, you can skip any of these tasks for Farm Bucks.
Note: You can send a request for materials to your Friends every 18 hours.

Once you have collected the required items, click on the “Start Building” button at the bottom of the construction Menu. 

Once you have collected the building parts, you will need a little help from your Neighbors to finish the job. The Fuel Pump upgrades require four additional helpers, so click on the “Ask Friends” button to send some crew requests to your Friends. When they accept, you will see the spots in the Build Menu begin to fill. If you do not wish to wait for your Friends, click on the “Hire One” button to purchase crew members with Farm Bucks.
Below is an example of the “Hire Upgrade Crew” pop-up:
  The Pasture - FarmVille 2
Once you have filled all four spots, click on the “Finish and Share” button to complete the Fuel Pump upgrade and start regenerating extra Fuel!
Fuel-Dependent Buildings:
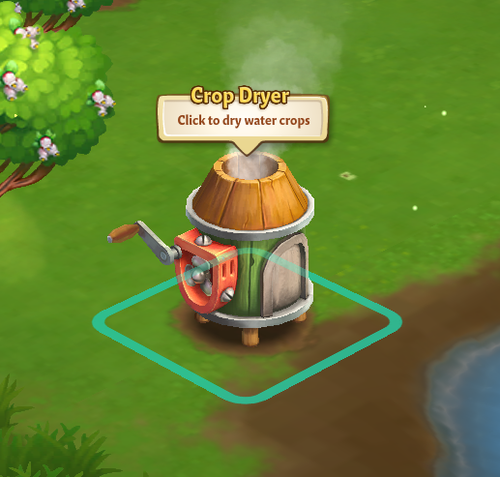
Fuel is an important resource, as it’s required to use the Fertilizer Plane and the Crop Dryer. In order to maximize your Fuel Pump to get the most Fuel, be sure to store all of your Prized Animals in the Pasture and upgrade whenever available!
In a hurry to get Fuel? You can purchase packs of Fuel from the General Store or you can send requests for Fuel to your Friends.
The Pasture - FarmVille 2
 
Note: Some players may not have access to all of the features listed above. To ensure that FarmVille 2 remains an enjoyable experience for as many players as possible, we are slowly releasing content over the coming months. We are very excited to get these features out to all of you as soon as possible, and we appreciate your continued patience. 
Additional Information:
  • You are limited to one Fuel Pump per farm. 
  • You are limited to one Pasture per farm.
  • If you want to see how much time you have remaining until you can harvest the Fuel Pump, hover your cursor over the Pump.
  • If you want to see how many more Prized Animals are required until you can upgrade your Fuel Pump, hover your cursor over the Pasture.

The Fertilizer Plane!

14 November 2013 FarmMaster 0

Note: Some players may not have access to all of the features listed below. To ensure that FarmVille 2 remains an enjoyable experience for as many players as possible, we are slowly releasing content over the coming months. We are very excited to get these features out to all of you as soon as possible, and we appreciate your continued patience. 

Oh no, the Fertilizer Plane is broken! Luckily, Walter is fairly handy with mechanical issues, but he’ll need a little time to collect the parts for the repairs. That’s where you come in. Help Walter collect the repair parts and use the Fertilizer Plane right away!
If you are level 15 or higher, you will see the following pop-up. Click on the “Check it out” button to get started.


Building the Fertilizer Plane:

Your first step is collecting construction parts. You will need the following items to start building your Fertilizer Plane: 

  • Propellers
  • Gear Differentials
  • Aluminum Metal Plates
To collect Propellers, click on the “Post” button to post to your Facebook wall – you will get the parts when your Friends click on it, or when you click on a similar newsfeed post.
Click on the “Ask” button to send requests for Gear Differentials and Aluminum Metal Plates to your Neighbors. If you do not wish to wait for your Friends, you can skip any of these tasks for Farm Bucks.
Fertilizer Plane - FarmVille 2
 
  
Note: You can send a request for materials to your Friends every 18 hours.

Once you have collected the required items, click on the “Start Building” button at the bottom of the construction Menu. 

Now that the Fertilizer Plane is almost complete, you will need a little help from your Neighbors to finish the job. The Fertilizer Plane requires four additional helpers, so click on the “Ask Friends” button to send some crew requests to your Friends. When they accept, you will see the spots in the Build Menu begin to fill. If you do not wish to wait for your Friends, click on the “Hire One” button to purchase crew members with Farm Bucks.
Fertilizer Plane - FarmVille 2
 
  
Once you’ve filled all four of the helper spots, click on the “Finish and Share” button to share some rewards with Friends!
Using the Fertilizer Plane:
Once the Fertilizer Plane has been repaired, you will receive the following message. Click on the “Okay” button to get started.
Fertilizer Plane - FarmVille 2
 
 
The first time the Fertilizer Plane starts up after it’s been repaired, it’ll fly over your farm and drop some Fertilizer for you, which will be added to your HUD. After this time, the Plane will disappear until you activate it.
  
Fertilize faster with the Fertilizer Plane! The Fertilizer Plane can be used to fertilize watered Crops (land and Water), watered Trees (regular, Heirloom, Elder, and Mastered), and watered Groves (regular, Heirloom, Elder, and Mastered) with a single click. The Fertilizer Plane runs on Fuel, which you can obtain from your Pasture. 
To activate the Fertilizer Plane, click on a watered Crop, Tree, or Grove, and then click on the Fertilizer Plane icon on the tooltip (see image below). Note: The number on the Plane icon indicates how many Fertilizer Planes are available for you to use, based on the total amount of Fuel you have in reserve.
Fertilizer Plane - FarmVille 2
 
 
After this step, you will be in Fertilizer mode, which is a 3 x 3 square plot (see image below). Once you have highlighted the area, click your mouse and then watch the Plane go flying by! Note: You do not have to wait for each Plane to Fertilize. Simply, click as fast as you want to call in a bunch of Planes at one time!
Fertilizer Plane - FarmVille 2
 
Note: You can view your current Fuel reserves while you’re in Fertilizer Mode:
  Fertilizer Plane - FarmVille 2
To exit Fertilizer Mode, simply click on the “Cancel” button at the bottom of the game page:
Fertilizer Plane - FarmVille 2
 
Fuel:
The Fertilizer Plane shares your Fuel reserves with the Crop Dryer. Keep this in mind when you need to use both the Plane and the Dryer. 
Out of Fuel? There are a few different ways to get more: 
  • Ask your friends to send you Fuel
  • Purchase Fuel Packs for Farm Bucks
  • Upgrade your Fuel Pump in the Pasture.
  • Give it some time— Fuel for your Fertilizer Plane gradually replenishes itself over time
  
Fertilizer: 
The Fertilizer Plane will only use the Fertilizer from HUD. If you have less than 9 Fertilizer left in your HUD, you will use whatever amount is remaining per plot. Keep in mind that you have a chance of earning FREE Fertilizer every time you use your Plane!
  Fertilizer Plane - FarmVille 2
  
Helpful Tip: The more Crop plots and Trees you fertilize, the higher the chance of finding Fertilizer! Once the Plane drops the Fertilizer, just scoop it up with your mouse to collect into your HUD.
  
Additional Information:
  • You are limited to one Fertilizer Plane per farm.
  • Fertilizer Plane only uses the Fertilizer from HUD.
  • The Fertilizer Plane does not have a cooldown, however in a single session, you can only use the Plane relative to the amount of Fuel and Fertilizer you have in your HUD.
  • If you have less than 9 Fertilizer left in your HUD, you will use whatever amount is remaining per plot.
No Image

The Crafting Drive!

13 November 2013 FarmMaster 0
  
  
The Crafting Drive Booth Feature is broken up into three consecutive stages that unlock over time. Click the links below to find out more information about each stage.
Stage 1: Link
Stage 2Coming Soon!
Stage 3Coming Soon!
The Crafting Drive Booth is here! Crafting in the Booth will earn you Points, which you can redeem for great rewards and the adorable baby Lionhead Rabbit!
Note: Animal Hospital Charity and the Crafting Drive Booth are fictional parts of the storyline in FarmVille 2, and are not actually affiliated with any real-world business or charity.
If you are level 12 or higher, you will see the following pop-up. Click on the “I’ll Help” button to get started.
  Crafting Drive - FarmVille 2
  
Before you can start crafting, you will need to build your Crafting Drive Booth. Your first step is collecting Building Materials. You will need the following items to start building your Booth:
  • Animal Balloons
  • Bunting Cloths
  • Bunny Posters
To collect Animal Balloons, click on the “Post” button to post to your Facebook wall – you will get the parts when your Friends click on it, or when you click on a similar newsfeed post.
  
Click on the “Ask” button to send requests for Bunting Cloths and Bunny Posters to your Neighbors. If you do not wish to wait for your Friends, you can skip any of these tasks for Farm Bucks.
Crafting Drive - FarmVille 2
  
Note: You can send a request for materials to your Friends every 18 hours.

Once you have collected the required items, click on the “Start Building” button at the bottom of the construction Menu. 

Now that the Crafting Drive Booth is almost complete, you will need a little help from your Neighbors to finish the job. The Crafting Drive Booth requires four additional helpers, so click on the “Ask Friends” button to send some crew requests to your Friends. When they accept, you will see the spots in the Build Menu begin to fill. If you do not wish to wait for your Friends, click on the “Hire One” button to purchase crew members with Farm Bucks.
Crafting Drive - FarmVille 2
Using the Crafting Drive Booth: 
Click on the Crafting Drive Booth to open the main menu.
  Crafting Drive - FarmVille 2
This menu shows how many Points you have earned in the current week, what rewards you have redeemed and what rewards you are currently working towards. It also shows your cumulative points that go towards earning the baby Lionhead Rabbit (Final Reward).
A – The Points Total (cumulative amount of Points you have earned during the Crafting Drive). You earn Points by crafting the Crafting Drive Recipes. NoteThis number keeps counting up, and does not get reset every week (see “the Baby Lionhead” section below for more details).
B – If you want to ask your Friends for Points, click on this button and a request will post to your feed. 
– The button to use when you want to purchase Points for Farm Bucks.
D – Use these arrow buttons to scroll through the Crafting Drive Recipes.
E – The button to use when you want to craft the Crafting Drive Recipes (earn Points).
F – The Crafting Drive Booth bar, which tracks your progress towards Milestone Goals and earning the babyLionhead RabbitNoteThis bar will reset each week when the next Stage becomes available.
How to Get Points in the Crafting Drive:
There are multiple ways to get Points in the Crafting Drive:
  1. Crafting Recipes:
    1. The first Stage (Week 1) has 2 different Recipes, and then 2 new Recipes that are worth higher Points unlock the following Stages (Week 2 & 3).
    2. When new Recipes unlock, you can craft those, as well as the previously unlocked Recipes, which means you can craft up to 4 Recipes in parallel during Week 2, and up to6 Recipes during Week 3!
    3. Ask your Friends for Donation Points by posting a feed to your wall (See B. in the “Using the Crafting Drive Booth” section above).
    4. Use your Farm Helpers! Each Farm Helper will drop a Donation Package after they’ve completed a Neighbor Visit task.
    5. Purchase Points for Farm Bucks (See C. in the “Using the Crafting Drive Booth” section above).
Crafting Drive Recipes:
In order to earn Points, you must craft the Crafting Drive Recipes. From the Crafting Drive Booth menu, click on the “Craft Recipe” button to open the Recipe menu.
Stage 1
The two Recipes for the Week 1 are as follows:
  • Pet Collar: The required Ingredients are Wool and Rhinestone. You will receive a total of two Points per Pet Collar crafted. Note: To get Wool, feed your Adult Sheep and Adult Rabbits (feeding your Prized Sheep and Prized Rabbits do not count).
  Crafting Drive - FarmVille 2
  • Animal Blanket: The required Ingredients are Fur and Blueberries. You will receive a total of one Point per Animal Blanket crafted. Note: To get Fur, feed your Adult Buffalo and Adult Deer (feeding your Prized Buffalo and Prized Deer do not count).
Crafting Drive - FarmVille 2
  • Week 2 Recipes: Coming Soon!
    • Note: These Recipes will be worth THREE and FIVE Points!
  • Week 3 Recipes: Coming Soon!
    • Note: These Recipes will be worth SEVEN and TEN Points!
Farmhand Donation Packages:
In addition to Crafting, you can earn Points from your Farmhands. As you use your Farmhands, they will donate a Package to you for the Animal Hospital, which gives you Points in the Crafting Drive. These Packages linger on your farm and appear as a small blue box. Once you have found a Package, click on it and you will receive the following message:
Crafting Drive - FarmVille 2
Click on the “Open Booth and Share” button to share some Points with Friends!
Earning Rewards:
In order to earn the Crafting Drive rewards, you will need to accrue enough Points to hit your Milestone Goal. Once you have collected enough Points for your current Milestone Goal, they will be automatically redeemed for some great rewards. After you redeem each reward, a green check mark will appear to indicate what Milestone Goal has been reached. Click on your Crafting Drive Booth to open up your progress menu. 
Stage 1
The Milestone Goals and respective rewards for Week 1 are as follows: 
  • Milestone 1:  +6 Speed-Grow
  • Milestone 2:  +10 Speed-Grow
  • Milestone 3:  +20 Speed-Grow
  • Milestone 4:  +34 Speed-Grow
Stage 2 – Coming Soon!
Stage 3 – Coming Soon!
The Baby Lionhead Rabbit:
The final reward for the Crafting Drive Booth is the baby Lionhead Rabbit. In order to earn this adorable Rabbit, you will need to earn enough Points (Points Total) towards the Crafting Drive Goal. The Crafting Drive Goal is based on the cumulative Points you get over the 3-week period, and can be redeemed for the baby Lionhead Rabbit as soon as the Goal has been reached.
  Crafting Drive - FarmVille 2
 If you do not want to wait to get the baby Lionhead Rabbit, you can use Farm Bucks to get enough Points and unlock the Rabbit right away! 
Additional Information:
  • Every week, the Crafting Drive Booth bar is reset and you will now work towards a new set of rewards. Note: Your Points Total (number below the baby Lionhead Rabbit) will not be reset.
  • You have 21 days to collect the rewards. If you do not collect them all, the rewards will disappear and you will be unable to claim them.
  • If you want to see how much time you have left to claim the Crafting Drive Booth rewards, click on the 
    Booth and look at the timer below the “Get a Bunny.”
  • You are limited to one Crafting Drive Booth per farm.
  • The Crafting Drive Booth is unmovable.

County Fair Guide!

8 November 2013 FarmMaster 0

Note: Prize Fruit at the County Fair is a complex part of the feature, which touches many elements of the game. We are slowing rolling this out to all players over the upcoming months, so please be aware that you may not have this part of the County Fair right away. We are very excited to get this out to all of our players as soon as possible, and we appreciate your patience.  


Howdy, Farmers! 
Get your Seeds and Fertilizer ready, because the County Fair has come to town! Now, everybody knows that a little healthy competition with your Friends and Neighbors is all in good fun. Grow Prize Crops & Prize Fruit to win medals and other great rewards and compete with Friends and Neighbors in weekly events.
If you are level 20 or higher, you will see the following pop-up. Click on the green “Check it out” button to get started:
County Fair - FarmVille 2
Walter will pay you a special visit in a shiny new truck with a wagon hitched to the back.
County Fair - FarmVille 2
Click the green “I Will” button and then go harvest some Crops (land or Water).
Prize Goods (Crops):
You can find Prize Crops after harvesting both land and Water Crops. Prize Crops linger on your farm and appear to be larger than your regular harvested Crops. Once you have found your first Prize Crop, click on it to view its size and weight.
County Fair - FarmVille 2
Stunning! Your Prize Crop is perfect for the County Fair. Click the “View Progress” button to check out the County Fair Board for the first time.
   County Fair - FarmVille 2
Prize Goods (Fruit):
Prune your Trees to make them Heirloom, and then harvest them for Heirloom Fruit, which will give you even more points at the County Fair. Prize Fruit will linger on your farm and appear to be larger than your regular harvested Fruit. Once you have found your first Prize Fruit, click on it to view its size and weight. Note: You can only earn Prize Fruit from harvesting Heirloom Trees. Harvesting regular Trees will not produce Prize Fruit
Trees Guide - FarmVille 2
Rewards:
You will receive Coins, Medal points, and XP each time you find a Prize Good (Prize Crop and Prize Fruit). If you are the first to find a Prize Crop or a Prize Fruit of a certain type, you will receive extra “bonus points.” If you are the  “Top Producer” of a certain Crop or Fruit, you will also receive extra “bonus points.” In addition to this, you will earn even more Coins once you attend the County Fair Awards Ceremony at the end of the week! (See the “First-Grower Bonus” and “Bonus Hints” sections below for further details).
County Fair Board:
The County Fair Board will keep track of your progress for Prize Goods (Crops & Fruit), Points, and Medals. In addition, you can view Bonus Hints (tips & tricks), the County Fair countdown timer, rules, and the Prize Shovel. The image below provides a high level description of each individual feature and click the corresponding link to view further details.
   County Fair - FarmVille 2
a)     Medal Meter: Displays your total points, Medal status, and how many points needed to reach your next Medal goal.
b)     My Friends: The “Leaderboard” that shows how your score compares with your Friends.
c)     My Prize Goods: Displays all of the Prize Goods (Crops & Fruit) you have collected and the points for each.
d)     Rules: Displays the game rules, and tips & tricks for how to get bigger Prized Goods.
e)     Bonus Hints: This Section suggests Crops (land and Water) and Trees to plant, water, and harvest to get special point bonuses.
f)      Prize Shovel: The special Prize Shovel, which gets you twice the Prize Good points for a day when purchased.
g)     County Fair Timer: This countdown timer indicates how much time remains until the next County Fair event.
Medal Meter:
This meter displays your Medal status, total points, and how many points needed to reach your next Medal goal. See section “Earning Points & Medals” to learn more about how to earn points and Medals. 
County Fair - FarmVille 2


My Friends:
The “My Friends” tab is the Leaderboard that shows how your score compares with your Friends’ scores. Here you can view how many points each Friend has and who is behind and in front of you. Hover over your Friends to view their best Prize Goods and which Prized Goods they have earned them the Most Points. Click on the “Congratulate” and “Brag” buttons to share Fertilizer with Friends so they can grow Prized Goods, too!
  
County Fair - FarmVille 2
Note: The Prize Goods points will reset every week after the County Fair Awards Ceremony.
My Prize Goods:
This tab displays all of the Prize Goods you have collected and your total points for each one. It also shows if you are the 1st, 2nd, or 3rd “Top Producer” among your Friends for that Prize Good (if you earned the most points per that Prize Crop or Prize Fruit).
Top Producer:
Players who get the most points for a certain Prize Good out of their Friends receive special “Top Producer” bonus points. You will see your place for each crop on the “My Prize Goods” tab. Be 1st at the end of the week to earn bonus points at the County Fair! (See the “First-Grower Bonus” and “Bonus Hints” sections below for further details).
  County Fair - FarmVille 2
Note: The “Top Producer” ranks and Prize Good points will reset every week after you take your Prize Crops and Fruit to the County Fair Awards Ceremony.
Rules:
This tab displays the game rules, and tips & tricks for how to get bigger Prize Goods. See the “Bonus Hints” section to view even more Prize Good hints and special tricks.
   County Fair - Rules NEW
Bonus Hints:
This section suggests Crops and Trees to plant that help you earn special bonus points. Use the yellow triangle tabs to view additional tips. See the “Rules” section to view even more tips & tricks about how to maximize your Prize Goods.
County Fair - FarmVille 2
You can easily tend to the “Bonus Hints” Crops and Trees. Simply, hover over the image to the left of the tip & trick and click the following option:
County Fair - FarmVille 2
Note: You are only able to Plant, Water, Fertilize, Speed-Grow, and Harvest Crops from this menu. 
  1. Plant: Plant the Crop in an open plot.
  2. Water: Water the planted Crop.
  3. Fertilize: Fertilize the watered Crop.
  4. Speed-Grow (not shown above): Use Speed-Grow on the planted, watered, and Fertilized Crop, then harvest it right away.
First-Grower Bonus:
If you want to earn even more points for the County Fair, be the first person among your Friends to find a Prize Crop or Prize Fruit of a particular Crop and/or Heirloom Tree. This reward is the “First-Grower Bonus,” which earns you up to 250 BONUS points at a time.
Note: From the County Fair Board menu, a small clock icon to the left will indicate which Crops and Trees you have earned the First-Grower Bonus.
When you are the first person (among your Friends) to find a Prize Crop and/or Prize Fruit, you will receive the following message:
County Fair - FarmVille 2

 Click on the “Share Fertilizer & View Progress” to share some Fertilizer with your Friends!
  
Earning Points & Medals:
You earn points for every Prize Good you grow, which will unlock special Medals: Bronze, Silver, Gold, and Platinum. Prize Goods that weigh more will earn you more points. In addition, Mastered Crops and Trees will produce bigger Prize Goods that are also worth more points. Note: Only Fertilized Crops and harvesting Heirloom Trees will earn you Prize Goods.
Helpful Tips: Use Fertilizer on your watered Heirloom Trees for a better chance of finding Prize Fruit after harvests! In addition, using Speed-Grow on Crops and Heirloom Trees will increase your chances of finding a bigger Prize Good.
County Fair - FarmVille 2
Medals:
There are four different types of Medals: Bronze, Silver, Gold, and Platinum. Each Medal is complete with a tiered series of levels. As you accrue points, you move up through each level (per your total amount of points) each week.
  • Bronze: 1 – 3 Levels
  • Silver: 1 – 6 Levels
  • Gold: 1 – 9 Levels
  • Platinum: 1 – 15 Levels
The diagram below illustrates the four different Medals (Bronze, Silver, Gold, and Platinum) and each level specific to that Medal (33 levels total):
County Fair - FarmVille 2
Each week you can move up one Medal. For example, if you have Bronze Medal 1, you are working towards Bronze Medal 2; if you have Bronze Medal 3, you are working towards Silver Medal 1.
If you do not reach your next Medal goal in time for the County Fair Awards Ceremony, you will go back to the base of your previous Medal level. For example, if you have Silver Medal 3, you will go back to Silver Medal 1; if you have Gold Medal 1, you will go back to Silver Medal 6; if you have Gold Medal 5, you will go back to Gold Medal 1, and so forth. Note: Bronze Medals are excluded from this rule.
Fertilize and grow Prize Goods to maintain and boost your Medal level status! Check the “Bonus Hints” on the County Fair Board for tips & tricks on how to maximize your chances of finding a Prize Crop or Fruit, and leveling up your Medals.
   County Fair - FarmVille 2
Jumbo Time
Once you have filled your Medal Meter to the top, you will earn even bigger Prize Goods that are worth even more points for the remainder of the week (regardless of your Medal and Medal level).
County Fair - FarmVille 2
While in Jumbo Time, click your Wagon to view your Medal Meter and progress:
County Fair - FarmVille 2
Note: The Jumbo Time status will reset every week after the County Fair Awards Ceremony.
Prize Shovel:
The special Prize Shovel gets you twice the Prize Good points when using it to harvest Crops and Heirloom Trees. After purchase, it is yours to use for 24 hours. You can view the cooldown timer on the County Fair Board.
   County Fair - FarmVille 2
To use the Shovel, simply harvest your fertilized Crops and Heirloom Trees!
County Fair - FarmVille 2
After the cooldown timer runs out, you can purchase more from the County Fair Board or from your Medal status in the Neighbor Bar. See section “Fame” to learn more about this feature.
County Fair - FarmVille 2
Rewards for Medals – More Visit Actions and More Visitors:
Having a Medal means you will be more helpful to your friends! If you have a Medal, you will get more Visit Actions when visiting your friends. Your friends will appreciate the extra actions, and you’ll have more chances to get rewards!
  • Bronze: 6 Visit Actions
  • Silver: 7 Visit Actions
  • Gold: 8 Visit Actions
  • Platinum: 9 Visit Actions
County Fair - FarmVille 2
Also, if you have a Medal, your friends will get special Rewards for visiting your farm (Water, Fertilizer, Prize Crops, and Prize Fruit). Better Medals mean that your friends will get more Rewards. If you have a Medal you will be sorted to the front of your friends’ Neighbor Bar, so better Medals means more helpful visitors to your farm. Get more and more visitors to make your farm famous! You also have a chance of finding Prize Fruit when harvesting Heirloom Trees during Neighbor Visits. Depending on your Neighbor’s current County Fair Medal, you can find up to four of them!
  • Bronze: Visitors to your farm will get 1 Water, 1 Fertilizer, and 1 Prize Crop or Prize Fruit
  • Silver: Visitors to your farm will get 2 Water, 2 Fertilizer, and 2 Prize Crops or Prize Fruit
  • Gold: Visitors to your farm will get 3 Water, 3 Fertilizer, and 3 Prize Crops or Prize Fruit
  • Platinum: Visitors to your farm will get 4 Water, 4 Fertilizer, and 4 Prize Crops or Prize Fruit
To view a Friend’s Medal level and Neighbor Visit rewards, hover over your cursor over their avatar in the Neighbor Bar:
County Fair - FarmVille 2
Note: Neighbor Visit bonuses only depend on the Medal, not Medal level. For example, players with Bronze Medal 1, 2, and 3 will all receive the same amount of Visit Actions, and their visiting Friends will receive the same rewards. However, players with Silver Medal 1 will receive more visit actions and their visiting friends will receive more rewards than players with a Bronze Medal. You can tell the Medal level by looking at the ribbon above the Medal (see image below).
County Fair - FarmVille 2
After visiting Neighbors and completing your Visit Actions, share some rewards with your Friends! Click on “Share Rewards” to post a feed to your wall that your Neighbors can click to collect rewards, too!
   County Fair - FarmVille 2
You can only visit a Neighbor once every 18-hours. Once you have completed all Neighbor Visit Actions, your Friend’s avatar will grey out until the 18-hour cooldown has expired (see image below).
  County Fair - FarmVille 2
Visit your Neighbors with Medals to maximize your bonus rewards and help level up your Medals faster. If you want to be an extra helpful Friend, Fertilizer your Neighbors’ Crops or Heirloom Trees and maybe they will return the favor!
Fame:
More Visitors makes your farm more famous. Winning Medals at the County Fair will bring you more helpful Visitors. You will receive one Fame point from each player who visits your farm. To view your Fame, hover over your name in the Neighbor Bar. You can also view your current Medal and points total.
County Fair - FarmVille 2
County Fair Timer:
This countdown timer indicates how much time remains until the next County Fair Awards Ceremony event.
   County Fair - FarmVille 2
Awards Ceremony:
County Fair - FarmVille 2
Every Thursday, you will go to the County Fair Awards Ceremony to collect amazing rewards and see how you performed among your Friends and Neighbors. A purple icon will hover over your Wagon to let you know that the Ceremony is about to begin. Click your Wagon to head on over with your Prize Crops.
County Fair - FarmVille 2
Once you arrive at the County Fair, you will see how many points you earned for that week and which special bonuses you’ve earned. 
  County Fair - FarmVille 2
Afterwards, you will then see what Medal you earned for all of your hard work that week, and your new goal for next week. Click “Get Rewards & Share” to share some with Friends and view the rest of your rewards:
County Fair - FarmVille 2

Such as, many Coins!
  County Fair - FarmVille 2
Last but not least, you can see which Friends you beat and whom you are close to passing for next week. In addition, you can see which of your Friends got first place! 
   County Fair - FarmVille 2
Click on the “Go Back to Farm” button to return home and start planting your Crops and Heirloom Trees for this week’s County Fair event!
Additional Information:
  • You must be at a minimum of level 20 to participate in the County Fair feature.
  • You can only receive Prize Crops from harvesting Fertilized Crops. You will not receive Prize Crops from harvesting Trees, tending to Animals or Buildings.
  • You can only receive Prize Fruit from harvesting Heirloom Trees. Harvesting regular Trees will notproduce Prize Fruit.
  • All players must go and can only go to County Fair once a week (Thursdays).
  • Your Medal status will decrease each week you do not attend the County Fair. Note: Bronze Medals do not apply to this rule.
  • The County Fair Wagon is unmovable.
  • If you want to see how much time remains until the County Fair, hover your cursor over the wagon.

The Trees Guide!

8 November 2013 FarmMaster 0
Some players may not have access to all of the features listed below. To ensure that FarmVille 2 remains an enjoyable experience for as many players as possible, we are slowly releasing content over the coming months. We are very excited to get these features out to all of you as soon as possible, and we appreciate your continued patience. 
What would a farm be without Trees? In FarmVille 2, Trees are more than just beautiful foliage to decorate with. To really get the most out of your farming experience, you will need to learn how to use these items to their full potential. To get you started, this guide will walk you through the basics of Trees, Heirloom Trees, Tree Mastery, and Prize Fruit at the County Fair.
Outline:

The links below offer detailed information about the different stages of Trees. Click on the links to learn more about how a particular stage works: 

1. Introduction to Trees
2. Heirloom Trees
2.1. Introduction to Heirloom Trees
2.2. Toolshed
2.3. Using Pruning Shears
2.4. Harvesting Pruned Trees
2.5. Crafting with Heirloom Fruit
2.6. Earning Coins
2.7. Heirloom Trees – Additional Information
3. Elder Trees
3.1. Introduction to Elder Trees
3.2. Elder Trees – Additional Information
4. Tree Mastery
4.1. Master Faster with Speed-Grow
4.2. Tree Mastery – Additional Information
5. Prize Fruit at the County Fair
5.1. Prize Fruit at the County Fair – Additional Information
1. Introduction to Trees
When you reach Level 3, you can expand your farm to unlock a new and important part of the game: Trees! Ingredients obtained from your Trees can be used to create Crafted Goods in the Crafting Kitchen, Workshop, and Kiln, which you can sell for Coins in your Market Stand.
Trees - FarmVille 2
Like most things in FarmVille 2, Trees require Water to grow. When you first purchase a Tree, it will appear as a sapling on your farm. Water it and it will grow into a full-sized Tree that can be harvested for Ingredients or Wood.
Trees - FarmVille 2
Once your Tree is fully grown, it will need to be periodically watered in order for it to produce. Similar to crops, Trees take a certain amount of time to grow (after being watered) before they will yield Ingredients. If you are curious how long you have to wait for your Tree to mature, look at the countdown timer that appears when placing your cursor over the Tree.
Trees - FarmVille 2


When a Tree is ready to be harvested, it will undergo a visual change and say “Ready” when you hover your cursor over it. 
Trees - FarmVille 2
Clicking on a mature tree will harvest it for Ingredients. These goods will be automatically added to your Inventory and your Tree will be ready for water again.
  
  Trees - FarmVille 2
2. Heirloom Trees
2.1. Introduction to Heirloom Trees:
Now that you have learned the basics, are you interested in earning twice the amount of Coins and XP for crafted goods? If so, then Heirloom Trees are for you! Prune your Trees to make them Heirloom, and then harvest them for Heirloom Fruit, which you can use in high Coin and XP crafting Recipes! If that wasn’t enough, Heirloom Trees will also produce Prize Fruit, which will give you more points at the County Fair.
Heirloom Trees have the added benefit of needing less Water and once your Heirloom Tree becomes Elder, it can also be stored in your Inventory! 
If you are level 14 or higher, you will see the following pop-up. Click on the “Place Free Toolshed” button to get started.
Trees - FarmVille 2
2.2. Toolshed:
Before you can start to Prune your Trees, you’ll need a Toolshed to store your Shears. Click on your Toolshed to open the main menu.
   Trees - FarmVille 2
This menu shows how many Pruning Shears you have collected.
– The total amount of Pruning Shears you have. As you Prune Trees, this number decreases.
– The button to use when you want to collect Pruning Shears from Friends.
– The button to use when you want to use Pruning Shears on Trees.
– The number of Farm Bucks required to purchase Pruning Shears.
2.3. Using the Pruning Shears: 
You can Prune Trees individually (inside or outside of a Grove), or an entire Grove. To use the Pruning Shears, click the “Use” button from the Toolshed menu (see C. above) or hover over a watered Tree and/or Grove, and then click the Pruning Shears icon (see image below).
Note: To Prune an individual Tree inside of a Grove, highlight the Tree that you would like to Prune.
Trees - FarmVille 2
Note: You can use Pruning Shears on any Tree that has not already been Pruned. If you do not have enough Shears to Prune an entire Grove, you will only Prune as many Trees as possible with the number of Shears you have in your Toolshed. If you want to Prune a particular Tree inside of a Grove, simply highlight it in the Grove, and then click to Prune.
2.4. Harvesting Pruned Trees:
Before you can craft Heirloom Recipes, you will need Heirloom Fruit. Heirloom Trees will take the same amount of time as before they were Pruned to mature.
  
Once you harvest your first Pruned Tree, you’ll receive the following message:
  Trees - FarmVille 2
Click on the “Post for more Shears” button to ask your Friends for more Shears and also share some Pruning Shears with Friends!

In addition to Heirloom Fruit, you also have a chance of receiving Prize Fruit when harvesting an Heirloom Tree. For more information about Prize Fruit, please see the “Prize Fruit at the County Fair” section of this guide.
2.5. Crafting with Heirloom Fruit: 
As you harvest Pruned Trees, you will receive Heirloom Fruit, which you can then use in high Coin and XP Recipes! To craft Heirloom Recipes, click on your Crafting Kitchen, and then click on the “Heirloom” tab.
  Trees - FarmVille 2
Note: Heirloom Trees and Heirloom Fruit will count towards any quest that requires you to harvest a Tree or craft a Recipe with Fruit Ingredients. Harvesting Trees: For example, harvesting an Heirloom Apple Tree will count towards a quest that asks you to harvest an Apple Tree. Crafting Recipes: For example, crafting Heirloom Apple Pie will count towards a quest that asks you to craft an Apple Pie Recipe.
2.6. Earning Coins:
Once you’re finished Crafting, it’s time to earn some money! Your Finished Products can be sold in your Market Stand for Coins. The more difficult the Recipe, the higher the Coin yield will be.
 2.7.  Heirloom Trees – Additional Information:
  • You are limited to one Toolshed at any given time.
  • If you want to see how many harvests you have left until an Heirloom Tree becomes Elder, hover over your cursor over it.
  • You can only craft Heirloom Recipes using Heirloom Fruit.
  • Heirloom Trees and Heirloom Fruit will count towards any quest that requires you to harvest a Tree or craft a Recipe with Fruit Ingredients. Harvesting Trees: For example, harvesting an Heirloom Apple Tree will count towards a quest that asks you to harvest an Apple Tree. Crafting Recipes: For example, crafting Heirloom Apple Pie will count towards a quest that asks you to craft an Apple Pie Recipe. 
  • You can only earn Prize Fruit from harvesting Heirloom Trees. Harvesting regular Trees will notproduce Prize Fruit.
3.  Elder Trees
3.1. Introduction to Elder Trees:
As you Prune your Trees, they’ll mature and eventually become “Elder.” Once a Tree becomes Elder, it will resume production of its original resource (e.g. an Heirloom Lemon Tree that reaches Elder status will produce regular Lemons once again). 
The best thing about Elder Trees is that they can be stored in your Inventory or sold for free Pruning Shears! You can store as many Elder Trees as you wish, at any given time.
If you want to see how many harvests you have left until an Heirloom Tree becomes Elder, hover over your cursor over it (see image below).
  Trees - FarmVille 2
Once your Tree becomes an Elder, you will receive the following messaging. Click on the “Store Elder Tree” button to store it in your Inventory or click on the “Sell for Shear” button to get a Pruning Shear for free. If you wish to keep the Tree on your farm, click the little “x” in the top right corner of the pop-up.
  Trees - FarmVille 2
Note: Once an Heirloom Tree becomes an Elder, harvesting it will count towards Tree Mastery, but it will no longer produce Prize Fruit (only Heirloom Trees produce Prize Fruit).
 3.2.  Elder Trees – Additional Information: 
  • You are limited to one Toolshed at any given time.
  • If you want to see how many harvests you have left until an Heirloom Tree becomes Elder, hover over your cursor over it.
  • You can only craft Heirloom Recipes using Heirloom Fruit.
  • Heirloom Trees and Heirloom Fruit will count towards any quest that requires you to harvest a Tree or craft a Recipe with Fruit Ingredients. Harvesting Trees: For example, harvesting an Heirloom Apple Tree will count towards a quest that asks you to harvest an Apple Tree. Crafting Recipes: For example, crafting Heirloom Apple Pie will count towards a quest that asks you to craft an Apple Pie Recipe. 
  • You can only earn mastery points from harvesting Heirloom Trees. Harvesting regular Trees will notproduce Prize Fruit.
4.  Tree Mastery 
Note: Please keep in mind that this feature is designed to be completed over time; do not feel pressured to master all of your Trees right away. 
Similar to Crop Mastery, when you harvest a Tree (regular or Heirloom) you earn Mastery Points. With enough Mastery Points, you will earn a Ribbon for that particular Tree. This is called “Tree Mastery.” There are three levels of Tree Mastery you can achieve: Yellow Ribbon, Red Ribbon, and Blue Ribbon. 
Trees - FarmVille 2
When you have earned a Ribbon, you will see a pop-up like the one below. 
Trees - FarmVille 2
Each time you earn a Mastery Ribbon, you will be able to place a sign on your farm that indicates what level of mastery you have reached. This sign is for decoration purposes only… but placing it will let everyone know what you have achieved!
  Trees - FarmVille 2
The number of harvests required to achieve Blue Ribbon mastery differs from Tree to Tree. Just keep harvesting Trees and your Ribbons will show up eventually! If you are in a hurry to earn your Blue Ribbon status, harvest Heirloom Trees and/or use Speed-Grow on your Trees. Harvesting Heirloom Trees will help you master that particular Tree 3X faster than harvesting regular Trees. In addition, using Speed-Grow earns twice the Mastery Points than regular harvests! 
4.1.  Master Faster with Speed-Grow!
Are you in a hurry to master your Trees? Master faster by Pruning your Trees into Heirloom or with Speed-Grow! Use Speed-Grow to earn twice the Mastery, even if the Tree is not ready to be harvested.

To use Speed-Grow, hover your cursor over a Tree until you see a pop-up with a blue bottle icon (see image below). This icon indicates how much Speed-Grow you have in your Inventory. Click on the blue bottle icon to instantly grow your Tree.

  Trees - FarmVille 2
Mastering Trees may seem like hard work, but with each level of Mastery you achieve, the more resources your Tree will produce.
Trees - FarmVille 2
4.2.  Tree Mastery – Additional Information:
  • Hover over the Tree Mastery Sign to view progress towards your next Ribbon.

  • Speed-Grow will only work on Trees that are watered.
  • The more Heirloom Trees of the same type you harvest, the faster you’ll master that particular Tree.
  • Once an Heirloom Tree becomes an Elder, harvesting it will count towards Tree Mastery.
5.  Prize Fruit at the County Fair:
Are you looking to get first place at the County Fair? Tired of your Neighbors beating you by only a few points? Prize Fruit may be the edge you need to secure your victory! Prize Fruit can be obtained by harvesting Heirloom Trees and they are worth a lot of points at the County Fair.
If you are level 20 or higher, you will see the following pop-up. Click on the “Okay” button to get started.
Trees - FarmVille 2
The next step is to Prune your Trees to make them Heirloom, and then harvest them for Prize Fruit.
Prize Fruit lingers on your farm and will appear larger than regular Heirloom Fruit. Once you have found your first Prize Fruit, click on it to view its size and weight.
  Trees - FarmVille 2
You will receive bigger Prize Fruit depending on the Mastery level (Yellow, Red, or Blue Ribbon). Helpful Tip: Use Fertilizer on your watered Heirloom Trees for a better chance of finding Prize Fruit after harvests, and use Speed-Grow for the best chance!
  Trees - FarmVille 2
You also have a chance of finding Prize Fruit when harvesting Heirloom Trees during Neighbor Visits. Depending on your Neighbor’s current County Fair Medal, you can find up to four of them! 

5.1.  Prize Fruit at the County Fair – Additional Information:
  • Hover over the Tree Mastery Sign to view progress towards your next Ribbon.
  • Speed-Grow will only work on Trees that are watered.
  • The more Heirloom Trees of the same type you harvest, the faster you’ll master that particular Tree.
  • Once an Heirloom Tree becomes an Elder, harvesting it will count towards Tree Mastery, but it will no longer produce Prize Fruit.

The Duck Horn!

6 November 2013 FarmMaster 0

Introducing, the Duck Horn! Feed Ducks to unlock special rewards from Walter. Get all four of the rewards to unlock an exclusive Duck Potato Crop Packet!

If you are level 10 or higher, you will see the following pop-up. Click on the “Sure” button to get started.
Using the Duck Horn:
The Duck Horn feature has four stages. Each stage requires a certain amount of Duck Feedings. When you feed your Ducks, they will fill your Duck bar. Once your bar is full, you can harvest the Duck Horn.
To see your bar, click on the Duck Horn to open the main menu. Your bar is located on the bottom of this screen. The number at the bottom of the bar indicates how many Duck Feedings you need and your current progress towards this goal.
Duck Horn - FarmVille 2
As you complete each stage you will unlock a new reward. The stages and respective rewards are as follows:
  • Stage 1: Consumables (Water, Fertilizer, Power, Coins)
  • Stage 2: Water Iris Decoration (Note: You can only place this Decoration on the River)
  • Stage 3: Consumables (Water, Fertilizer, Power, Coins)
  • Stage 4: Duck Habitat (Note: You can place this Decoration on both land and the River)
Once you have fed enough Ducks, you will be able to harvest your Horn by clicking on it.
Duck Horn - FarmVille 2
The more Ducks you have on the farm and the more Speed-Feed you use to feed them, the faster you fill your bar. In addition, feeding Prized Ducks counts twice!
If you do not want to wait to fill the Duck bar, you can use Farm Bucks to skip these steps and get the next reward right away! 
Duck Potato Crop Packet:
Once you have earned all four of your Duck Horn rewards, you can claim your Duck Potato Crop Packet! The Duck Potato Crop is used in high value recipes in the Crafting Kitchen and Prized Duck Potatoes are worth more points at the County Fair.
Click the “Share and Go To Market” button to purchase your first Packet for Coins.
  Duck Horn - FarmVille 2
Additional Information:
  • You are limited to one Duck Horn per farm.
  • You have 10 days to earn the Duck Horn rewards. If you do not collect them all, the rewards will disappear and you will be unable to claim them. 
  • Feeding Sheep, Cows, Pigs, Goats, Horses, Peacocks, Buffaloes, Alpacas, and Chickens does not count towards the Duck Horn. Only feeding Ducks (Adult and Prized) will count.
  • If you want to see how much time you have left to claim your rewards, hover your cursor over the Horn.

The Duck House Guide!

5 November 2013 FarmMaster 0
The Duck House has arrived in FarmVille 2! Use this building to store up to 18 Prized Ducks and feed them all with a single click! If that wasn’t enough, Prized Ducks in the House will only require half the Feed and you also gain an additional +50 Feed Capacity!
If you are level 15 or higher, you will see the following pop-up. Click on the “Place on Farm” button to get started.
  Duck House - FarmVille 2
Note: You can purchase a completed Duck House for Farm Bucks (Building Materials and additional helpers are not required).
Building the Duck House:

Your first step is collecting construction parts. You will need the following items to start building your Duck House:

  • Duck Ladders
  • Duck Posts
  • Bags of Moss
To collect Duck Ladders, click on the “Post” button to post to your Facebook wall – you will get the parts when your friends click on it, or when you click on a similar newsfeed post.
Click on the “Ask” button to send requests for Duck Posts and Bags of Moss to your Neighbors. If you do not wish to wait for your friends, you can skip any of these tasks for Farm Bucks.
Duck House - FarmVille 2
Note: You can send a request for materials to your Friends every 18 hours.

Once you have collected the required items, click on the “Start Building” button at the bottom of the construction Menu. 

Now that the Duck House is almost complete, you will need a little help from your Neighbors to finish the job. The Duck House requires four additional helpers, so click on the “Ask Friends” button to send some crew requests to your Friends. When they accept, you will see the spots in the Build Menu begin to fill. If you do not wish to wait for your friends, click on the “Hire One” button to purchase crew members with Farm Bucks.
  Duck House - FarmVille 2
Using the Duck House:
Click on the Duck House to open the main menu. 
Duck House - FarmVille 2
Inside the Duck House, you will see placements that you can fill with Prized Ducks. Prized Ducks will take up one spot in your House regardless of breed (see below: American Pekin Duck).
  Duck House - FarmVille 2
Adding & Removing Ducks: 
To add Prized Ducks in the House, check the “Auto Fill” box and click on the green “Add Prized Ducks” button. All of your Prized Ducks will automatically waddle into the House!
To remove a Prized Duck from the House, open the main menu and click on the red “–“ (minus symbol) box on the bottom left hand corner of the placement slot (see below: A).
The Duck cards have symbols on them to indicate different things:

   Duck House - FarmVille 2
A. Minus Symbol: Remove Ducks
B. Feed: How much Feed the Ducks will consume
C. White Feathers: How much the Ducks will produce (see below: Feeding)
D. Mastery: Animal Mastery Ribbons
Feeding: 
Prized Ducks stored in the House will eat half of the amount of Feed they normally do. For example, a Duck that eats 10 Feed outside of the House will eat 5 Feed when inside the House. Note: Any Prized Duck that would normally eat an odd amount of feed outside of the Duck House will be rounded up by one. For example, a Duck that would normally eat 9 Feed will only need 5 Feed when stored in the Duck House. 
White Feathers:
Each time you harvest the Duck House you will get White Feathers, which can be used in Crafting Workshop Recipes. Fill your Duck House all the way to get the most White Feathers when you harvest!
Note: The White Feathers will automatically go into your Inventory.
  Duck House - FarmVille 2
Additional Information: 
  • The timer for your Duck House will pause when placed in Storage, and then resume once placed back on your farm.
  • If you do not wish to use the Duck House feature, it can be sold (frame only) or stored in your Inventory.
  • If you want to see how much time you have left to harvest, hover your cursor over the House.
  • You are limited to one Duck House per farm.
  • Rotate the House to view a different angle!

Sprinklers are here!

25 October 2013 FarmMaster 0

Note: This is a complex feature that touches many elements of the game. We are slowing rolling this out to all players over the upcoming months, so please be aware that you may not have this feature right away. We are very excited to get this out to all of our players as soon as possible, and we appreciate your patience. 

Sprinklers are here! Use Sprinklers to water multiple Crops, Trees, and Groves on your farm with one single click. If that wasn’t enough, purchase additional Sprinklers to water your entire farm!
If you are level 15 or higher, you will see the following pop-up. Click on the “Learn More” button to get started.
  
  Sprinklers - FarmVille 2
Sprinklers - FarmVille 2


Building your Standard Sprinkler:
To build the Standard Sprinkler, you will need to collect the following items: 
  • Sprinkler Heads
  • Valves
  • Water Tubings
To collect Sprinkler Heads, click on the “Post” button to post to your Facebook wall – you will get the parts when your friends click on it, or when you click on a similar newsfeed post.
Click on the “Ask” button to send requests for Valves and Water Tubings to your Neighbors. If you do not wish to wait for your friends, you can skip any of these tasks for Farm Bucks.
  Sprinklers - FarmVille 2
Note: You can send requests for materials to your Friends every 18 hours.
Once you have collected the required items, click on the “Start Building!” button at the bottom of the construction Menu. 
  Sprinklers - FarmVille 2
Now that the Standard Sprinkler is almost complete, you will need to hire Friends to help you finish the job! The Standard Sprinkler requires four additional helpers, so click on the “Ask Friends” button to send some crew requests to your Friends. When they accept, you will see the spots in the Builder Menu begin to fill. If you do not want to wait for your friends, click on the “Hire One” button to purchase crew members with Farm Bucks. Once you have successfully filled all four spots, click on the “Finish Building” button.
  Sprinklers - FarmVille 2
Getting Started:

How many things can I Water at once?
  • Crops: You can water up to 9 Crops using the Standard Sprinkler. 
  • Trees & Groves: You can water anything covered within the AoE (Area of Effect) of a Sprinkler. For example, if you place Trees or Groves within the AoE of the sprinkler, you will be able to Water everything that is in that particular area.
Using the Standard Sprinkler:
There are two different ways you can use the Sprinkler: 
  1. Water Painting Mode
  2. Manually Clicking Mode
Water Painting Mode: In order to use the Standard Sprinkler in Water Painting Mode, you must have enough Water in your HUD (see image below) or Wells relative to that particular area (Crops, Trees, or Grove). Note: If you do not have enough Water (HUD and Wells), you will be notified by a message.
Standard Sprinkler - FarmVille 2
Once you’re ready to use the Standard Sprinkler, simply place the Sprinkler in the un-watered area of a Crop, Tree, or Grove (AoE: See “How Many things can I Water at once” section above). The next step is to click and drag (painting-like motion) your mouse over the AoE that you’d like to Water (similar to the Feed Painting Mode), and then watch the Water spout out!
  Standard Sprinkler - FarmVille 2
Note: If you run out of Water from your HUD, your Standard Sprinkler will automatically harvest from your Wells.
Manually Clicking Mode: In order to use the Standard Sprinkler in the Manually Clicking Mode, you must have enough Water in your HUD (see image above), Wells, or Water in your Inventory relative to that particular area (Crops, Trees, or Grove).
Once you’re ready to use the Standard Sprinkler in the Manually Clicking Mode, simply right click it, and then drag and drop it in close proximity to the area (AoE) that you’d like to Water (see image below). Click the Standard Sprinkler to activate it and watch the Water spout out! Note: If you are in the Manually Clicking Mode cooldown, you can continue to use the Standard Sprinkler in the Water Painting Mode, however the cooldown timer will still be visible.
  Standard Sprinkler - FarmVille 2
If you do not have enough Water to use over a particular area, you will be notified in the game.
Note: Similiar to the Beehives, you can place the Standard Sprinkler over Crops (see image above). 
Standard Sprinkler - FarmVille 2
How often can I use the Standard Sprinkler? 
If you use the Water Painting mode, you can use the Sprinkler as often as you’d like. Note that the cooldown timer will still be visible, however you can continue to use the Sprinkler regardless of this timer.
Helpful Tip: Use the Water Painting mode to Water your Crops, Trees, and Groves as efficiently as possible.
If you do not use the Water Painting mode, there is a short cooldown in between each Standard Sprinkler session. Simply hover your cursor over the Standard Sprinkler if you want to see how much time you have left until you can use it again.
Standard Sprinkler - FarmVille 2
Out of Water? There are a few different ways to get more:
  • Wells – Use the Water from your Wells
  • Inventory – Use Water reserves from your Inventory
  • General Store – Purchase Water Packs from the General Store
Do you like your Standard Sprinkler? You can purchase additional Sprinklers (Standard and Premium) in the General Store!
Sprinklers - FarmVille 2
Helpful Tip: The more Sprinklers that cover your farm, the easier it is for you to Water your Crops, Trees, and Groves!
Additional Information:
  • Your first Standard Sprinkler is free, but you can purchase additional Sprinklers (Standard, Deluxe, and Super Deluxe) in the General Store.
  • Hover your cursor over the Standard Sprinkler if you want to see how much time you have left until you can use it again (Manually Clicking Mode only).
  • If you lack any requirements (such as not having enough Water), the game will tell you what you are missing.

The Homesick Alpaca!

23 October 2013 FarmMaster 0
Oh no, the little Alpaca following Gus is homesick! Lucky for him, farmers have a way with animals. Help Gus show the little one some love and he’ll reward you with the baby Alpaca!
  The Homesick Alpaca - FarmVille 2
If you are level 12 or higher, you will see the following pop-up. Click on the “I Can Help” button to get started.
The Homesick Alpaca - FarmVille 2
After clicking and talking to Gus, you’ll see the Homesick Alpaca Quest Menu. It shows you all of the tasks you have to complete to get the Homesick Alpaca.
The Homesick Alpaca - FarmVille 2
Note: If you close this menu and need to access it later to see your progress, just click on the Homesick Alpaca wandering on your farm or the Alpaca Bed.
The Homesick Alpaca Quests:
The Homesick Alpaca Quest tasks require you to build an Alpaca Bed, collect Alpaca Shears by completing three quests for Walter, and crafting Suncatchers. Click on the “Build It” button to get started.
  The Homesick Alpaca - FarmVille 2
Building the Alpaca Bed:
To build the Alpaca Bed, you will need to collect the following items:
  • Bolivian Blankets
  • Spittoons
  • Adobe Bricks
To collect Bolivian Blankets, click on the “Post” button to post to your Facebook wall – you will get the parts when your Friends click on it, or when you click on a similar newsfeed post.
Click on the “Ask” button to send requests for Spittoons and Adobe Bricks to your Neighbors. If you do not wish to wait for your Friends, you can skip any of these tasks for Farm Bucks.
The Homesick Alpaca - FarmVille 2
Note: You can send requests for materials to your Friends every 18 hours.
Once you have collected the required items, click on the “Start Building” button at the bottom of the construction Menu. 
The Homesick Alpaca - FarmVille 2
Now that the Alpaca Bed is almost complete, you will need to hire Friends to help you finish the job! The Alpaca Bed requires four additional helpers, so click on the “Ask Friends” button to send some crew requests to your Friends. When they accept, you will see the spots in the Builder Menu begin to fill. If you do not want to wait for your friends, click on the “Hire One” button to purchase crew members with Farm Bucks. Once you have successfully filled all four spots, click on the “Finish and Share” button.
The Homesick Alpaca - FarmVille 2
The next step in this quest is to collect Alpaca Shears by completing three quests for Walter. Click on the “Go To Quest” button to complete the first three of Walter’s ‘The Wool to Win’ quests (Wool You Please, The Spitting Image, and Bunny Business). If you do not wish to complete any of these quests, you can skip this step for Farm Bucks.
The Homesick Alpaca - FarmVille 2
As you complete a quest, look out for some Wool and Fertilizer prizes, and then click on the “Share” button to share some of your rewards with Friends!  
The Homesick Alpaca - FarmVille 2
The final step in the quest is to craft Suncatchers. To craft Suncatchers, you will need the following Ingredients: Yellow Glaze (Lemon & Pottery Slip) and Fired Glass (Porcelain + Piece of Glass). Click on the “Make It” button to head into the Crafting Kiln to get started.
The Homesick Alpaca - FarmVille 2
Note: If you do not wish to complete these tasks, you can skip this step for Farm Bucks.
After completing all of the requirements in the Homesick Alpaca Quests, you will see the following pop-up:
The Homesick Alpaca - FarmVille 2
It looks like the baby Alpaca has warmed up to you! Click on the “Adopt Alpaca and Share” button to post a reward feed for your Friends. Make sure to feed your little Alpaca Baby bottles so it will grow into an adult Alpaca that you can harvest for Wool! 
Note: Wool is an Ingredient used in exclusive Crafting Workshop Recipes.
Additional Information:
  • You have 14 days to complete the Homesick Alpaca Tasks. If you do not complete them, the Alpaca will disappear and you will be unable to claim it!
  • If you want to see how much time you have left to claim the Homesick Alpaca, hover your cursor over the Alpaca Bed.
  • If you want to see how much time you have left to claim the Homesick Alpaca, hover your cursor over it.
  • You can only rescue the Homesick Alpaca once.
  • You do need to complete the first three of Walter’s ‘The Wool to Win’ quests (Wool You Please, The Spitting Image, and Bunny Business).

The Trick-or-Treat Stand!

16 October 2013 FarmMaster 0

The time has come for Trick-or-Treating! Crafting Trick-or-Treat Bags in the Trick-or-Treat Stand will earn you Tickets, which you can redeem for rewards and the exclusive baby Harlequin Rabbit

If you are level 10 or higher, you will see the following pop-up. Click on the “Start Building” button to get started.
   Trick-or-Treat Stand - FarmVille 2
Building the Trick-or-Treat Stand:
Your first step is collecting Building Materials. You will need the following items to start building your Trick-or-Treat Stand. 
  • Cauldrons
  • Spiderweb Tablecloths
  • Jack-O-Lanterns
To collect Caldrons, click on the “Post” button to post to your Facebook wall; you will get the parts when your friends click on it, or when you click on a similar newsfeed post.
Click on the “Ask” button to send requests for Spiderweb Tablecloths and Jack-O-Lanterns to your Neighbors. If you do not wish to wait for your friends, you can skip any of these tasks for Farm Bucks.
Trick-or-Treat Stand - FarmVille 2
Note: You can send requests for materials to your friends every 18 hours.       
Once you have collected the required items, click on the “Start Building” button at the bottom of the construction Menu. 
  Trick-or-Treat Stand - FarmVille 2
Now that the Trick-or-Treat Stand is almost complete, you will need a little help from your Neighbors to finish the job. The Trick-or-Treat Stand requires four additional helpers, so click on the “Ask Friends” button to send some crew requests to your friends. When they accept, you will see the spots in the Build Menu begin to fill. If you do not wish to wait for your friends, click on the “Hire One” button to purchase crew members with Farm Bucks.
  Trick-or-Treat Stand - FarmVille 2
Using the Trick-or-Treat Stand:
Click on the Trick-or-Treat Stand to open the main menu. 
  Trick-or-Treat Stand - FarmVille 2
This menu shows how many Tickets you have collected and what prizes you are currently eligible to redeem. 

A – The total amount of Tickets you have. You earn Tickets by giving Trick-or-Treat Bags to your friends. This number keeps counting up, even as you redeem prizes.
B – The button to use when you want to Craft Trick-or-Treat Bags and give to your friends (earn Tickets). 
C – The number of Farm Bucks required to purchase a prize.
D – The amount of Tickets you will receive once a friend has taken that particular Trick-or-Treat Bag.
E – The total amount of that particular Trick-or-Treat Bag, which is ready to give to your friends.
F – If you want to invite your friends over to Trick-or-Treat and take a Trick-or-Treat Bag, click this button and a request will post to your feed and let you send a request to friends.
Crafting Trick-or-Treat Bags:
In order to earn Tickets, you must craft the Trick-or-Treat Bag Recipes and invite your friends over to Trick-or-Treat and take a Bag. You can craft your very own Trick-or-Treat Bags via the Stand. From the Trick-or-Treat Stand menu, click on the “Make” button to open the Recipe menu. You can choose from three different Recipes:
  • Jack-o-Lantern Bag: The required Ingredients are Wool and Black Crowberries (Black Crowberries is a limited edition Crop that you can purchase for Coins from the General Store). You will receive a total of one Ticket per friend that takes your Trick-or-Treat Bag.
  Trick-or-Treat Stand - FarmVille 2
  • Bat Bag: The required Ingredients are Apples and Wax Vampire Lips. You will receive a total of two Tickets per friend that takes your Trick-or-Treat Bags.
Trick-or-Treat Stand - FarmVille 2
  • Spider Bag: The required Ingredients are Pumpkins and Toy Rubber Spider. You will receive a total of three Tickets per friend that takes your Trick-or-Treat Bags.
Trick-or-Treat Stand - FarmVille 2
Once you have filled your six Trick-or-Treat Bag slots, the “Make 1” button on the Recipe Card will grey out and you will be unable to craft more until friends have taken what you have already crafted.
  Trick-or-Treat Stand - FarmVille 2
Collecting Tickets:
To get Tickets, you will need to enlist the help of your friends. From the Trick-or-Treat Stand menu, click on the “Invite” button to send requests to your friends. Some other friends will visit your farm from time to time to Trick-or-Treat and take a Trick-or-Treat Bag too!
Note: If you do not wish to wait, you can purchase these visitors and/or individual Tickets for Farm Bucks from the Trick-or-Treat Stand menu.
When Tickets appear on your farm after a friend has taken a Trick-or-Treat Bag, click on them and you will see the following pop-up:
Trick-or-Treat Stand - FarmVille 2
Click on the “Share Tickets” button to post a feed to your wall. Your friends will be able click on this feed to claim some free Tickets for themselves too. Once you have clicked on the Ticket, it will be automatically added to your Trick-or-Treat Stand. 
Note: You can share Tickets with friends every 18 hours. Simply click on the “Share Tickets” button at the bottom of the message.       
Redeeming Tickets for Prizes:
Once you have collected enough Tickets, they can be redeemed for some spooky prizes. Click on your Trick-or-Treat Stand to open up your progress menu. 

You can redeem the following five prizes with Tickets:
  • Spooky Lantern (20 Tickets)
  • Ghostly Fence (40 Tickets)
  • Goodie Bag! (60 Tickets) – Note: You have a chance of earning any of the following items: Fertilizer, Instagrow, Unwither, Water, Power, and Coins!
  • Cobweb Arch (100 Tickets)
  • Baby Harlequin Rabbit (110 Tickets)
Note: Redeeming Tickets for any of the Trick-or-Treat Stand prizes will not deduct from your Ticket count total (your Ticket count will not decrease).
These prizes can be redeemed multiple times in a row, as long as you have enough Tickets. Once you have collected enough Tickets to reach the end of the meter (220 Tickets), you will earn the cute baby Harlequin Rabbit!
Trick-or-Treat Stand - FarmVille 2
The baby Harlequin Rabbit can be redeemed with Tickets or Farm Bucks more than once. You can purchase additional baby Harlequin Rabbits for Farm Bucks after you have earned the first one for Tickets. After you have redeemed the baby Harlequin Rabbit the first time, your Ticket meter will reset, and you will be able to earn all of the prizes additional times.
Additional Information:
  • You have 21 days to collect the prizes. If you do not collect them all, the prizes will disappear and you will be unable to claim them.
  • If you want to see how much time you have left to claim the Trick-or-Treat Stand prizes, click your Trick-or-Treat Stand, and then you can view the timer above the Ticket meter.
  • You can earn additional items for making Trick-or-Treat Bags by visiting other Neighbors’ Trick-or-Treat Stands during Neighbor Visits.
  • You are limited to one Trick-or-Treat Stand per farm.
  • The Trick-or-Treat Stand is unmovable.

Heirloom Trees!

15 October 2013 FarmMaster 0

Note: This is a complex feature that touches many elements of the game. We are slowing rolling this out to all players over the upcoming months, so please be aware that you may not have this feature right away. We are very excited to get this out to all of our players as soon as possible, and we appreciate your patience. 


Are you interested in earning twice the amount of Coins and XP for crafted goods? If so, then Heirloom Trees are for you! Prune your Trees to make them Heirloom, and then harvest them for Heirloom Fruit, which you can use in high Coin and XP crafting Recipes! If that wasn’t enough, Heirloom Trees need less Water!
  Heirloom Trees - FarmVille 2
If you are level 14 or higher, you will see the following pop-up. Click on the “Place Garden Shed” button to get started.
  Heirloom Trees - FarmVille 2
Garden Shed:
Before you can start to Prune your Trees, you’ll need a Garden Shed to store your Shears. Click on your Garden Shed to open the main menu.
  
Heirloom Trees - FarmVille 2
This menu shows how many Pruning Shears you have collected.
A – The total amount of Pruning Shears you have. As you Prune Trees, this number decreases.
B – The button to use when you want to collect Pruning Shears from Friends.
C – The button to use when you want to use Pruning Shears on Trees.
D – The number of Farm Bucks required to purchase Pruning Shears.
Using the Pruning Shears:
You can Prune Trees individually (inside or outside of a Grove), or an entire Grove. To use the Pruning Shears, click the “Use” button from the Garden Shed menu (see C. above) or hover over a watered Tree and/or Grove, and then click the Pruning Shears icon (see image below).
Note: To Prune an individual Tree inside of a Grove, highlight the Tree that you would like to Prune.
Heirloom Trees - FarmVille 2
Note: You can use Pruning Shears on any Tree that is not already Pruned.
If you do not have enough Shears to Prune an entire Grove, you will only Prune as many Trees as possible with the number of Shears you have in you Shed. If you want to Prune a particular Tree inside of a Grove, simply remove it from the Grove.
Harvesting Pruned Trees:
Before you can craft Heirloom Recipes, you will need Heirloom Fruit. Heirloom Trees will take the same amount of time as before they were Pruned to mature.
Once you harvest your first Pruned Tree, you’ll receive the following message:
  Heirloom Trees - FarmVille 2
Click on the “Post for more Shears” button to ask your Friends for more Shears and also share some Pruning Shears with Friends!

Crafting with Heirloom Fruit:
As you harvest Pruned Trees, you will receive Heirloom Fruit, which you can then use in high Coin and XP Recipes! To craft Heirloom Recipes, click on your Crafting Kitchen, and then click on the “Heirloom” tab.
Heirloom Trees - FarmVille 2
Earning Coins!
Once you’re finished Crafting, it’s time to earn some money! Your Finished Products can be sold in your Market Stand for Coins. The more difficult the Recipe, the higher the Coin yield will be.
Elder Trees:
As you Prune your Trees, they’ll mature and eventually become “Elder.” The great thing about an Elder Tree is that you can store it in your Inventory or sell it for a free Pruning Shear!
Note: You can only store up to 18 Elder Trees total at any given time.
If you want to see how many harvests you have left until an Heirloom Tree becomes Elder, hover over your cursor over it (see image below).
Heirloom Trees - FarmVille 2
Once your Tree becomes an Elder, you will receive the following messaging. Click on the “Store Elder Tree” button to store it in your Inventory or click on the “Sell for Shear” button to get a Pruning Shear for free.
  Heirloom Trees - FarmVille 2
Additional Information:
  • You are limited to one Garden Shed at any given time.
  • If you want to see how many harvests you have left until an Heirloom Tree becomes Elder, hover over your cursor over it.
  • You can only craft Heirloom Recipes using Heirloom Fruit.

The Rabbit Nursery!

9 October 2013 FarmMaster 0

The Rabbit Nursery Feature is broken up into three consecutive development stages (quest sets) that you can complete at your own pace. 

The Rabbit Nursery is here! Use this building to train your baby Rabbits to develop their personality and train them to produce extra resources!
If you are level 12 or higher, you will see the following pop up. Clicking on the “Place Rabbit Nursery” button will give you the ability to place the Nursery Frame on your Farm.
Rabbit Nursery - FarmVille 2
Building the Rabbit Nursery:
Before you can start raising your baby Rabbits, you will need to build your Nursery. Your first step is collecting Building Materials. You will need the following items to start building your Rabbit Nursery:
  • Chalkboards
  • Bunny Litter Boxes
  • Rabbit Pellets
To Collect Chalkboards, click on the “post” button to post to your Facebook wall; you will get the parts when your friends click on it, or when you click on a similar newsfeed post.
Click on the “Ask” button to send requests for Bunny Litter Boxes and Rabbit Pellets to your Neighbors. If you do not wish to wait for your friends, you can skip any of these tasks for Farm Bucks.
Rabbit Nursery - FarmVille 2
Once you have collected the required items, click on the “Start Building” button at the bottom of the construction menu.
Rabbit Nursery - FarmVille 2
Now that the Nursery is almost complete, you will need a little help from your Neighbors to finish the job. The Rabbit Nursery requires four additional helpers, so click on the “Ask Friends” button to send some crew requests to your Friends. When they accept, you will see the spots in the Build Menu begin to fill. If you do not wish to wait for your friends, click on the “Hire One” button to purchase helpers with Farm Bucks.
Rabbit Nursery - FarmVille 2
Using your Rabbit Nursery (Development Quests):
Raising a baby Rabbit requires love, affection, and special attention. That’s why the Rabbit Nursery is here to help you! The Nursery is broken up into three development stages (quest sets): Choose an Ability, Choose a Personality, and Name Your Rabbit. Each development stage (quest set) has three tasks that have to be completed. As you complete each development stage, you will unlock the next stage.
Once your Nursery is up, you will need to place one baby Rabbit inside. Note: You can train any baby Rabbit on your farm or from the General Store in the Nursery, including the ones available for Coins. Click on the Rabbit Nursery to open the Quest Menu.
Development Quests – Ability:
The first step is to pick an Ability for your baby Rabbit. You can choose between a Fertilizer Bonus, a Wool Bonus (you will receive one extra Fertilizer or Wool every time you feed the Adult Rabbit) and an Appetite Bonus (your Adult Rabbit will be hungry in half the amount of time guaranteed). Note: You can only choose one Ability per baby Rabbit. In addition, the quests will differentiate depending on what Ability and/or Personality you choose.
Rabbit Nursery - FarmVille 2
Once you have selected an Ability, click on the green “Confirm” button to turn the page to the next set of development quests. Click on the “Make It” button for the Recipe you wish to Craft and you will be sent to your Kitchen and/or Workshop.

  Rabbit Nursery - FarmVille 2
Development Quests – Choose a Personality:
The next step is to pick a Personality for your baby Rabbit. You can choose between Mischievous, Affectionate, and Tumbler. The Personality you pick will determine how your baby Rabbit will behave once it is an adult (e.g. animate). Note: You can only choose one Personality per baby Rabbit.
Rabbit Nursery - FarmVille 2
Once you have selected a Personality, click on the green “Confirm” button to turn the page to the next set of development quests. Click on the “Make it” button for the Recipe you wish to Craft and you will be sent to your Kitchen and/or Workshop. Once you have performed all three of the tasks, click on the turquoise “Complete & Share” button.
  Rabbit Nursery - FarmVille 2
Development Quests – Name:
The final step is to name your baby Rabbit. You can use up to 14 characters (with spaces). Note: You can only name your Rabbit while in regular Screen mode (e.g. not in Full Screen mode).
  Rabbit Nursery - FarmVille 2
Once you have chosen a name, click on the green “Confirm” button to turn the page to the final set of development quests. Click on the “Make it” button for the Recipe you wish to Craft and you will be sent to your Kitchen and/or Workshop. Once you have performed all three of the tasks, click on the turquoise “Complete & Share” button.
  Rabbit Nursery - FarmVille 2
Congratulations! You have trained your baby Rabbit into an Adult that will produce an extra Fertilizer, Wool, or Appetite bonus! Click your Rabbit to move and place it on your farm:
Rabbit Nursery - FarmVille 2
Crop Packets:
For a limited time only, you can earn special Celery Crop Packets! In order to earn these Packets, you must train three baby Rabbits, regardless of their Ability and/or Personality. As you train each baby Rabbit, a green check mark will appear on the cards to indicate what parts of the mini quest have been completed.
  Rabbit Nursery - FarmVille 2
Once you have trained all three of the baby Rabbits (regardless of their Ability and/or Personality), you will unlock the Celery Packet! You will be able to use this Crop for 14 days. Click on the turquoise “Share and Go to Market” button to share some rewards with Friends and purchase your Crop for Coins!
Rabbit Nursery - FarmVille 2
Note: You have limited time to earn the Celery Crop Packet. If you do not train all three of the baby Rabbits within the allotted time, the Crop Packet will disappear and you will be unable to claim it.
Additional Information:
  • You can only use baby Rabbits with the Nursery.
  • You can re-use the Nursery to train as many Rabbits as you’d like.
  • If you do not wish to use the Rabbit Nursery feature, it can be sold (frame only) or stored in your Inventory.
  • You are limited to six Rabbit Nurseries per Farm. You can get up to two more Rabbit Nurseries for free, and up to four more Rabbit Nurseries for Farm Bucks from the General Store.