“The Goat Nursery” Guide!

26 June 2013 FarmMaster 0

The Goat Nursery

The Goat Nursery Feature is broken up into three consecutive development stages (quest sets) that you can complete at your own pace.

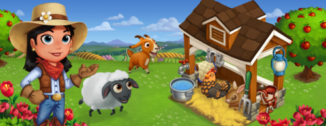
The Goat Nursery is here! Use this building to raise your baby goats to develop their personality and train them to produce extra resources!
If you are level 12 or higher, you will see the following pop up. Clicking on “Place Building” will give you the ability to place the Nursery Frame on your Farm.
Goat Nursery - FarmVille 2
Before you can start raising your baby goats, you will need to build your Nursery. Your first step is collecting Building Materials. You will need the following items to start building your Goat Nursery:
  • Toy Goats
  • Goat Bedding
  • Yellow Paints
To Collect Toy Goats, click on the “post” button to post to your Facebook wall; you will get the parts when your friends click on it, or when you click on a similar newsfeed post.
Click on the “Ask” button to send requests for Goat Bedding and Yellow Paints to your Neighbors. If you do not wish to wait for your friends, you can skip any of these tasks for Farm Bucks.
  Goat Nursery - FarmVille 2
Once you have collected the required items, click on the “start building” button at the bottom of the construction menu.
  Goat Nursery - FarmVille 2
Now that the Nursery is almost complete, you will need a little help from your Neighbors to finish the job. The Goat Nursery requires four additional helpers, so click on the “Ask Friends” button to send some crew requests to your Friends. When they accept, you will see the spots in the Build Menu begin to fill. If you do not wish to wait for your friends, click the “Hire One” button to purchase helpers with Farm Bucks.
  Goat Nursery - FarmVille 2
Using your Goat Nursery (Development Quests)
Raising a baby goat requires love, affection, and special attention. That’s why the Goat Nursery is here to help you! The Nursery is broken up into three development stages (quest sets): Name Your Goat, Choose a Specialty, and Choose a Personality. Each development stage (quest set) has three tasks that have to be completed. As you complete each development stage, you will unlock the next stage.

Once your Nursery is up, you will need to place one baby goat inside. Click on the Goat Nursery to open the Quest Menu.
Goat Nursery - FarmVille 2
Development Quests – Name Your Goat
The first step is to name your baby goat. You can use up to 14 characters (with spaces):
Goat Nursery - FarmVille 2
Once you have typed in a name, click the green “Confirm” button, then the page will turn, and the next page will be your first set of development quests. Click on the “Make it” button for the recipe you wish to Craft and you will be sent to your Kitchen and/or Workshop.
As you finish parts of your quest, a blue “Feed,” “Play,” or “Groom” button will appear to indicate what parts of the quest you have collected. The first development stage is as follows:
Goat Nursery - FarmVille 2
Once you have collected the required items, click on the blue “Feed,” “Play,” and “Groom” buttons to watch your avatar train your baby goat! A green check mark will appear for each task you have completed.  Once you have performed all three of the tasks, click the turquoise “Complete & Share” button.
Goat Nursery - FarmVille 2
Development Quests – Choose a Specialty
The next step is to pick a Specialty for your baby goat. You can choose between a Fertilizer Bonus and a Milk Bonus (you will receive one extra Fertilizer or Milk every time you feed the Adult goat). Note: You can only choose one Specialty per baby goat.
Goat Nursery - FarmVille 2
Once you have selected a Specialty, click the green “Confirm” button to turn the page to the next set of development quests. Click on the “Make it” button for the recipe you wish to Craft and you will be sent to your Kitchen and/or Workshop.
The second development stage is as follows:
  Goat Nursery - FarmVille 2
As you have collected the required items, click on the blue “Feed,” “Play,” and “Groom” buttons to watch your avatar train your baby goat! Once you have performed all three of the tasks, click the turquoise “Complete & Share” button.
Goat Nursery - FarmVille 2
Development Quests – Choose a Personality
The final step is to pick a Personality for your baby goat. You can choose between Grumpy, Sleepy, and Playful. The Personality you pick will determine how your baby goat will behave once it is an adult (e.g. animate). Note: You can only choose one Personality per baby goat.
Goat Nursery - FarmVille 2
Once you have selected a Personality, click the green “Confirm” button to turn the page to the final set of development quests. Click on the “Make it” button for the recipe you wish to Craft and you will be sent to your Kitchen and/or Workshop.
The third and final development stage is as follows:
Goat Nursery - FarmVille 2
As you have collected the required items, click on the blue “Feed,” “Play,” and “Groom” buttons to watch your avatar train your baby goat! Once you have performed all three of the tasks, click the turquoise “Complete & Share” button.
Goat Nursery - FarmVille 2
Congratulations! You have raised your baby goat into an Adult that will produce an extra resource! Click your goat to move and place it on your farm:
Goat Nursery - FarmVille 2
Once you have moved your Adult Goat to the farm, a cooldown timer will indicate how much time remains until you can raise another baby goat. If you wish to see how much time you have left, simply hover over the Nursery.
Crop Packets
For a limited time only, you can earn special Orange Sherbet Carnation Crop Packets! In order to earn these Packets, you must raise all three types of Goat Personalities (Grumpy, Sleepy, and Playful). As you raise each type of Personality, a green check mark will appear on the cards to indicate what parts of the mini quest have been completed.
  Goat Nursery - FarmVille 2
Once you have raised all three types of Personalities, you will unlock the Orange Sherbet Carnation Crop Packet! You will be able to use this Crop for 14 days. Click the turquoise “Share Carnations” button to share some rewards with friends!
Goat Nursery - FarmVille 2
Note: You have limited time to earn the Orange Sherbet Carnation Crop Packet. If you do not raise all three types of the Goat Personalities within the allotted time, the Crop Packet will disappear and you will be unable to claim it.
Additional Information:
  • You can only use baby goats with the Nursery.
  • You can re-use the Nursery to raise as many goats as you’d like.
  • If you do not wish to use the Goat Nursery feature, it can be sold (frame only) or stored in your Inventory.
  • You are limited to three Goat Nurseries per Farm. You can purchase up to two more Goat Nurseries from the General Store for Coins and Farm Bucks.

The Horseshoe Press Guide!

21 June 2013 FarmMaster 0
Introducing, the Horseshoe Press! Marie is completing a special horseshoe collection on her farm and she needs your help. Assist Marie with her collection by recycling old Horseshoes to earn the exclusive Blue Roan Horse!
  Horseshoe Press - FarmVille 2
If you are level 10 or higher, you will see the following pop-up. Click on “Place your Horseshoe Press” to get started.
  Horseshoe Press - FarmVille 2
Building the Horseshoe Press

Your first step is collecting construction parts. You will need the following items to start building your Horseshoe Press:

  • Brass Armbars
  • Granite Bricks
  • Cast Iron Pots
To collect Brass Armbars, click on the “Post” button to post to your Facebook wall – you will get the parts when your friends click on it, or when you click on a similar newsfeed post.
Click on the “Ask” button to send requests for Granite Bricks and Cast Iron Pots to your Neighbors. If you do not wish to wait for your friends, you can skip any of these tasks for Farm Bucks.
You can also purchase any of these items above for Farm Bucks if you do not wish to wait for your friends to respond to your requests or newsfeed posts.
Horseshoe Press - FarmVille 2
 
Note: You can post and send requests for materials to your Friends every 18 hours. 

Once you have collected the required items, click on the “Start Building!” button at the bottom of the construction Menu. 

Horseshoe Press - FarmVille 2
Now that the Horseshoe Press is almost complete, you will need some assistance from your Neighbors to finish the job. The Horseshoe Press requires four additional helpers, so click on the “Ask Friends” button to send some crew requests to your Friends. When they accept, you will see the spots in the Build Menu begin to fill. If you do not wish to wait for your friends, click the “Hire One” button to purchase crew members with Farm Bucks.

Once you have successfully filled all four spots, click on the “Finish & Share” button.
  Horseshoe Press - FarmVille 2
Using the Horseshoe Press
You must have at least five Adult Horses on your farm that are not Prized for the Press to be functional. When you feed your Horses, they will drop Horseshoes, which can be found in the “Ingredients” section of your Inventory.
Tip: Limited Edition Horses produce more Horseshoes when fed!
To see your Horseshoe count, click on the Horseshoe Press to open the main menu. Your Horseshoe total is located on the left-hand side of this screen. The number at the bottom of the Horseshoe indicates how many you currently have in your Inventory.
Horseshoe Press - FarmVille 2
Once you have collected at least five Horseshoes, you will be able to recycle them by clicking on the blue “Recycle” button from the Horseshoe Press menu.
Special Horseshoes
To earn the Blue Roan Horse, you will need to collect special types of Special Horseshoes. To get these Special Horseshoes, all you need to do is keep recycling old Horseshoes!
There are three types of Special Horseshoes you can receive:
  1. Copper (collection requires 6)
  2. Aluminum (collection requires 4)
  3. Titanium (collection requires 2)
These Horseshoes are not used for Crafting like Sheets of Metal. Instead, they are automatically added to your Horseshoe Collection. To earn the Blue Roan Horse, you will need to have 6 Copper, 4 Aluminum, and 2 Titanium (12 total) Horseshoes in your Collection. Once you have collected these, you can trade them in for the Blue Roan Horse!
The more Adult Horses you have on your Farm, the better your chances are of receiving Special Horseshoes!
  Horseshoe Press - FarmVille 2
If you do not want to wait to collect the Special Horseshoes, you can use Farm Bucks to skip these steps and get the new baby Blue Roan Horse right away!
  Horseshoe Press - FarmVille 2
Your new Blue Roan Horse needs baby bottles to reach adulthood, just like your other animals. Once it has matured, it will produce Horseshoes.
Additional Information:
  • Minimum of Five Adult Horses (non Prized) on any given farm is required to use the Horseshoe Press.
  • If you do not wish to use the Horseshoe Press feature, it can be sold (frame only) or stored in your Inventory.
  • The timer at the top of your Horseshoe Press Menu indicates how long you have to collect the baby Blue Roan Horse. If you do not collect it, the prize will disappear and you will be unable to claim it.
  • You can collect the baby Blue Roan Horse as many times as you wish during this time.
  • If you want to see how much time you have left to claim the baby Blue Roan Horse, hover your cursor over the Press.
  • Limited to one Horseshoe Press per farm.
  • If you lack any requirements (such as not having enough Horses), the game will tell you what you are missing.
  • Rotate the Press to view a different angle!
No Image

The Trials of Horse Training Guide, Stage 2

21 June 2013 FarmMaster 0
The Trials of Horse Training Feature is broken up into four consecutive stages that unlock over time. Click the links below to find out more information about each stage.

Stage 1 GuideView
Stage 2 GuideView
Stage 3 GuideComing Soon!
Stage 4 GuideComing Soon!

Marie is having difficulties training one of her Horses, and she needs your help. The Horse in question is rare and beautiful, but very hard to please. That’s where you come in! Assist Marie with her tasks and you can earn great prizes and more importantly, the trust of the finicky Horse. Complete all four stages and get the exclusive Akhal-Teke horse!
FarmVille 2

Completing your Training Stall (Stage 2 Decoration Quests)
Once your Stall is up, you may notice that it looks a little bare. In order to earn some beautiful new decorations, you will need to complete the Decoration Quests. Currently, only the first and second set of quests are available. The other two stages of this feature will unlock in the coming weeks. Click on the Training Stall to open the Quest Menu.
FarmVille 2
Each Decoration Quest has 4 parts that have to be completed. As you complete a part of a quest line, you will earn a decoration for your Stall. If you complete all 4 parts of a Decoration Quest, you will win an exclusive prize for your farm!

FarmVille 2

Decoration Quests – Week 2
Click on any of the Saddles in the Training Stall menu to start working on your second set of Decoration Quests. As you finish parts of your quest, a green check mark will appear to indicate what parts of the quest have been completed. The four quests for the Week 2 are as follows:
FarmVille 2
FarmVille 2
Helpful Tip: You can get Fur from feeding American Brown Buffaloes or Deer. You can purchase the Buffalo in the General Store for Coins or Farm Bucks. Currently, we do not have a Deer available for purchase.
FarmVille 2
FarmVille 2
Additional Information:
  • A new Decoration Quest will unlock each week.
  • You can purchase additional prizes for Farm Bucks once you’ve redeemed them from the Training Stall menu.
  • If you do not wish to use the Trials of Horse Training feature, it can be sold (frame only) or stored in your Inventory.
  • You are limited to one Training Stall per Farm. 
No Image

The Trials of Horse Training Guide!

12 June 2013 FarmMaster 0
The Trials of Horse Training Feature is broken up into four consecutive stages that unlock over time. Click the links below to find out more information about each stage.

Stage 1 Guide: View
Stage 2 GuideComing Soon!
Stage 3 GuideComing Soon!
Stage 4 GuideComing Soon!

Marie is having difficulties training one of her Horses, and she needs your help. The Horse in question is rare and beautiful, but very hard to please. That’s where you come in! Assist Marie with her tasks and you can earn great prizes and more importantly, the trust of the finicky Horse.
If you are level 11 or higher, you’ll see the following pop up. Clicking on “Place the Training Stall” will give you the ability to place the Stall Frame on your Farm. If you do not wish to use the Stall or would like the ability to save it for later, click the “Cancel” button and the frame will automatically be sent to your inventory.
Horse Training MOTD

Before you can start training the Horse, you will need to build your Stall. Your first step is collecting Building Materials. You will need the following items to start building your Training Stall:
  • Wood Railings
  • Wood Varnish
  • Stackable Stones
To Collect Wood Railings, click on the “post” button to post to your Facebook wall; you will get the parts when your friends click on it, or when you click on a similar newsfeed post.
Click on the “Ask” button to send requests for Wood Varnish and Stackable Stones to your Neighbors. If you do not wish to wait for your friends, you can skip any of these tasks for Farm Bucks.
Once you have collected the required items, click on the “start building” button at the bottom of the construction menu.
Horse Training Building 1
Now that the Stall is almost complete, you will need a little help from your Neighbors to finish the job. The Training Stall requires 4 additional builders, so click on the “Ask Friends” button to send some crew requests to your Friends. When they accept, you will see the spots in the Build Menu begin to fill. If you do not wish to wait for your friends, click the “Hire One” button to purchase crew members with Farm Bucks.
Horse Training Building 2
Completing your Training Stall (Decoration Quests)
Once your Stall is up, you may notice that it looks a little bare. In order to earn some beautiful new decorations, you will need to complete the Decoration Quests. Currently, only the first set of quests is available. The other three stages of this feature will unlock in the coming weeks. Click on the Training Stall to open the Quest Menu.
Horse Training Menu
Each Decoration Quest has 4 parts that have to be completed. As you complete a part of a quest line, you will earn a decoration for your Stall. If you complete all 4 parts of a Decoration Quest, you will win an exclusive prize for your farm!
Horse Training Menu 2
Decoration Quests – Week 1
Click on any of the Saddles in the Training Stall menu to start working on your first set of Decoration Quests.  As you finish parts of your quest, a green check mark will appear to indicate what parts of the quest have been completed. The four quests for the Week 1 are as follows:
Horse Training Week 1 Quest 1
Horse Training Week 1 Quest 2
Horse Training Week 1 Quest 3
Horse Training Week 1 Quest 4
Additional Information:
  • A new Decoration Quest will unlock each week.
  • You can purchase additional prizes for Farm Bucks once you’ve redeemed them from the Training Stall menu.
  • If you do not wish to use the Trials of Horse Training feature, it can be sold (frame only) or stored in your Inventory.
  • You are limited to one Stall Shed per Farm. 

The Cow Barn Guide!

6 June 2013 FarmMaster 0

Greetings,
Farmers!

The FarmVille
2 Studio and the Real California Milk association have teamed up together to
bring you the storage building that you have been so eager to get. Introducing,
the Cow Barn! Store your Prized Cows
in this home and feed them all with a single click. If that isn’t enough,
Prized Cows in the Barn will also require less Feed and give +25 Feed Capacity!


Note: The Real California Milk stamp will be visible during the length of
the promotion. Once the promo has ended, this stamp will disappear. To learn
more about the Real California Milk association, click
HERE.


Cow Barn - FarmVille 2
 

If you are level
10 or higher, you will see the following pop-up. Click the green “Place on Farm”
button to get started.

 
Cow Barn - FarmVille 2

Once you have placed the Cow Barn onto your farm, Cornelius will stop by
with an exclusive baby Real CA Cow!

Cow Barn - FarmVille 2

Your new Real CA Cow needs baby bottles to reach adulthood,
just like your other Animals. Once it has matured, it will produce Milk, which can be used in Crafting Kitchen
Recipes.

Note: Your first
Real CA Cow will not count towards your Animal Maximum Capacity.
Additional Real CA Cows can be purchased in the General Store; each additional
Cow will count towards the Animal max cap.

Building
the Cow Barn
:


Your next step is
collecting construction parts. You will need the following items to start
building your Cow Barn:

  • Wrought
    Iron Hinges
  • Dairy
    Fence Pipes
  • Roof
    Shingles

To collect Wrought
Iron Hinges, click on the “Post” button to post to your Facebook wall – you
will get the parts when your friends click on it, or when you click on a
similar newsfeed post.

Click on the “Ask” button to send requests for Dairy
Fence Pipes and Roof Shingles to your Neighbors. If you do not wish to wait for
your friends, you can skip any of these tasks for Farm Bucks.

 
Cow Barn - FarmVille 2

Note: You can send a request for materials
to your Friends every 18 hours.


Once you have collected
the required items, click on the “Start Building!” button at the bottom of the
construction Menu. 

 
Cow Barn - FarmVille 2

Now that the Cow
Barn is almost complete, you will need a little help from your Neighbors to
finish the job. The Cow Barn requires four additional mechanics, so click on
the “Ask Friends” button to send some crew requests to your Friends. When they
accept, you will see the spots in the Build Menu begin to fill. If you do not
wish to wait for your friends, click the “Hire One” button to purchase crew
members with Farm Bucks.

 
Cow Barn - FarmVille 2

Using
the Cow Barn
:

Click on the Cow Barn to open the main menu. 

 
Cow Barn - FarmVille 2

Inside the Cow
Barn, you will see placements that you can fill with Prized Cows. Prized Cows
will take up one spot in your Barn regardless of breed (see below: Prized
Highland Cow).

Cow Barn - FarmVille 2

Adding & Removing Cows:

To add Prized Cows in the Barn, check the “Auto Fill” box
and click on the green “Add Prized Cows” button. All of your Prized Cows will
automatically walk into the Barn!

To remove a Prized Cow from the Barn, open the main menu and
click on the red ““ (minus symbol)
box on the bottom left hand corner of the placement slot (see below: A).


The Cows cards have symbols on them to indicate different
things:


Cow Barn - FarmVille 2


A. Minus Symbol: Remove Cow

B. Feed: How much Feed the Cow will consume.


C. Swiss Cheese: How much the Cow will produce (see below: Feeding)

Feeding:

Prized Cows stored in the Barn will eat less Feed
they normally do: 4 Feed for each
Cow, regardless of what type. For example, a Cow that eats 13 Feed outside of the Barn will eat 4 Feed when
inside the Barn.   

Swiss Cheese:

Each time you harvest the Cow Barn you will get Swiss Cheese,
which can be used in Crafting Kitchen Recipes. Fill your Cow Barn all the way
to get the most Swiss Cheese when you harvest!

Note: The Swiss
Cheese will automatically go into your Inventory.

 
Cow Barn - FarmVille 2

Additional
Information
:

  • The timer for your Cow Barn will pause when
    placed in Storage, and then resume once placed back on your farm.
  • If you do not wish to use
    the Cow Barn feature, it can be sold (frame only) or stored in your
    Inventory.
  • If you want to see how
    much time you have left to harvest, hover your cursor over the Barn.
  • You are limited to one Cow
    Barn per farm.
  • Rotate the Barn to view a
    different angle!


Experience the Tuscan Sun!

5 June 2013 FarmMaster 0
Greetings, Farmers!
Experience the beauty of Tuscany with new Limited Edition items. Check below for details on our latest release and be sure to share what your favorite new addition is by commenting below this post!
New Limited Edition Items:
  • Still Life Fresco Wall – 5 Farm Bucks
  • Tuscany Landscape Fresco Wall – 5 Farm Bucks
  • Italian Wall – 8,500 Coins
  • Muse Garden Statue – 8 Farm Bucks
  • Goddess of Youth Statue – 75,000 Coins
  • Tuscany Garden Shed – 21 Farm Bucks
  • Tuscan Villa – 50 Farm Bucks
  • Stone Arch Pillar – 3 Farm Bucks
New Limited Edition Trees:
  • Bay Laurel Tree – 12 Farm Bucks, produces 4 Feed, used in Recipes
  • Femminello Lemon Tree – 12 Farm Bucks, produces 5 Feed, used in Recipes
  • Italian Cyprus Tree – 12 Farm Bucks, produces Wood, used in Recipes
New Limited Edition Animals:
  • Black Dexter Cow  – (Baby 34) Adult 60 Farm Bucks (reissue!)
  • Chianina Cow – (Baby 33) Adult 46 Farm Bucks (reissue!)
  • Maremmana Cow – (Baby 30) Adult 43 Farm Bucks
  • Maremmano Horse – (Baby 30) Adult 43 Farm Bucks
  • Massese Sheep – (Baby 21) Adult 34 Farm Bucks
  • Isola Bella Peacock – (Baby 27) Adult 40 Farm Bucks
New Limited Edition Crop:
  • Oregano – 32 Coins, matures in 4 hours, produces 5 Feed, used in recipes
Crafting Kitchen Recipes:
  • Bay Leaf Cookies – sells for 4,170 Coins
  • Lemon Italian Soda – sells for 2,530 Coins
  • Herb Tuscan Bread – sells for 3,760 Coins
Crafting Workshop Recipes:
  • Bay Laurel Wreath – sells for 4,430 Coins
  • Bay Laurel Garland – sells for 3,830 Coins
  • Pizza Board – sells for 3,200 Coins


Chili Stand Guide!

22 May 2013 FarmMaster 0

Hey Farmers!

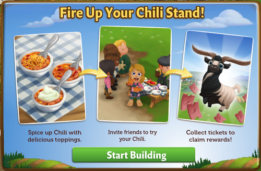
The time has come to host Chili Cook-offs. Crafting Chili in the Stand will earn you Tickets, which you can redeem for Decorations, a Baby Dutch Landrace Goat, and a Chef’s Outfit for your avatar!

If you are level 10 or higher, you will see the following pop-up. Click on the green “Start Building” button to place the Stand frame on your farm. 
Before you can host a Chili Cook-off, you will need to build your Chili Stand. Your first step is collecting Building Materials. You will need the following items to start building your Chili Stand.
  • Bags of Coal
  • Chili Bowls
  • Chili Pots
To collect Bags of Coal, click on the “Post” button to post to your Facebook wall; you will get the parts when your friends click on it, or when you click on a similar newsfeed post.
Click on the “Ask” button to send requests for Chili Bowls and Chili Pots to your Neighbors. If you do not wish to wait for your friends, you can skip any of these tasks for Farm Bucks.
  Chili Stand - FarmVille 2
Note: You can send requests for materials to your Friends every 18 hours.
Once you have collected the required items, click on the “Start Building” button at the bottom of the construction Menu. 
Chili Stand - FarmVille 2
Now that your Stand is almost complete, you will need some help from your Neighbors to finish the job. The Chili Stand requires four Builders, so click on the “Ask Friends” button to send some crew requests to your Friends. When they accept, you will see the spots in the Building Menu begin to fill. If you do not wish to wait for your friends, click the “Hire One” button to purchase crew members with Farm Bucks. Once you have successfully filled all four spots, click on the “Finish Building” button.
  Chili Stand - FarmVille 2
Using the Chili Stand:
Click on the Chili Stand to open the main menu. 
Chili Stand - FarmVille 2
This menu shows how many Tickets you have collected and what prizes you are currently eligible to redeem. 

A – The total amount of Tickets you have. You earn Tickets by feeding Chili to your Friends. This number keeps counting up, even as you redeem prizes.
B – The button to use when you want to redeem a prize. Once you have enough Tickets, this button will turn turquoise. Redeeming a prize does not decrease the number of tickets you have.
C – The number of Farm Bucks required to purchase a Decoration.
D – The button to use when you want to Craft Chili and feed to your Friends (earn Tickets).
E – The amount of Tickets you will receive once a Friend has eaten that particular bowl of Chili.
F – The total amount of that particular Chili that is ready to serve to your friends.
G – If you want to invite your Friends over to taste your Chili, click this button and a request will post to your feed and let you send a request to friends. 

Crafting Chili: 
In order to earn Tickets, you must craft the Chili Recipes and invite your Friends over to taste them. You can craft your very own Chili via the Stand. From the Chili Stand menu, click on the “Make” button to open the Recipe menu. You can choose from three different Recipes:
  • Sour Cream Chili: The required Ingredients are Onions and Milk. You will receive a total of one Ticket per Friend that tastes your Chili.
 Chili Stand - FarmVille 2
  • Pinto Bean Chili: The required Ingredients are Salt and Pinto Beans (Pinto Beans is a limited edition Crop that you can find for Coins in the General Store). You will receive a total of two Tickets per Friend that tastes your Chili.
Chili Stand - FarmVille 2
  • Hot Cheesy Chili: The required Ingredients are Cheese and Chili Powder. You will receive a total of three Tickets per Friend that tastes your Chili.
Chili Stand - FarmVille 2
Once you have filled your Chili Pot full, the “Make 1” button on the Recipe Card will grey out and you will be unable to craft more until Friends have tasted what you have already crafted.
Chili Stand - FarmVille 2
Note: The spicier the Chili, the more Tickets you will receive when a Friend tastes it.
Collecting Tickets: 
To get Tickets, you will need to enlist the help of your Friends. From the Chili Stand menu, click on the turquoise “Invite” button to send requests to your friends. Some other friends will visit your farm from time to time to taste your Chili too! If you do not wish to wait, you can purchase either of these ingredients for Farm Bucks.
Individual Tickets can also be purchased with Farm Bucks from the Chili Stand menu.
When Tickets appears on your farm after hosting a Chili Cook-off, click on them and you will see the following pop-up:
Chili Stand - FarmVille 2
Click on the turquoise “Share Ticket” button to post a feed to your wall. Your friends will be able click on this feed to claim some free Tickets for themselves too. Once you have clicked on the Ticket, it will be automatically added to your Chili Stand. 
Note: You can share Tickets every 18 hours.
Redeeming Ticket for Prizes:
Once you have collected enough Tickets, they can be redeemed for some great prizes. Click on your Chili Stand to open up your progress menu. 
You can redeem the following six prizes with Tickets:
  • Red Brick Paver (15 Tickets)
  • Chili Balloon (35 Tickets)
  • Hot Spice Caddy (60 Tickets)
  • Chili Picnic Tent (105 Tickets)
  • Baby Dutch Landrace Goat (175 Tickets)
  • Bonus: Chili Cook-off Chef Outfit (175 Tickets) – When you earn the goat for the first time, you will get this outfit for free! Note: You can only earn the Chili Cook-off Chef Outfit once.
These prizes can be redeemed multiple times in a row, as long as you have enough Tickets. Once you have collected enough Tickets to reach the end of the meter (175 Tickets), you will earn the cute Baby Dutch Landrace Goat! You can also show off your Chili expertise with the Bonus Chef Outfit!
The Baby Dutch Landrace Goat can be redeemed with Tickets or Farm Bucks more than once. You can purchase additional Baby Dutch Landrace Goats for Farm Bucks after you have earned the first one for Tickets. After you have redeemed the Baby Dutch Landrace Goat the first time, your ticket meter will reset, and you will be able to earn all of the prizes additional times.
Additional Information:

  • You have 21 days to collect the prizes. If you do not collect them all, the prizes will disappear and you will be unable to claim them.
  • If you want to see how much time you have left to claim the Chili Stand prizes, hover your cursor over the Chili Stand.
  • You can earn additional items for making Chili by visiting other Neighbors’ Chili Stands during Neighbor Visits.
  • You are limited to one Chili Stand per farm.
  • The Chili Stand is unmovable.


Wild West Items!

21 May 2013 FarmMaster 0


Greetings, Farmers!
New “Wild West” items are available in the General Store for a limited time. Are you in need of leveling up faster? Our Rustic Saloon Table and Stools gives a generous 150 XP boost! Check below for details on our latest release and be sure to share what your favorite new addition is by commenting below this post!
New Limited Edition Items:
  • Rustic Saloon Table and Stools – 45,000 Coins, 150 XP
  • Boot Planter (Colors: Gold, Magenta, & Teal) – 3 Farm Bucks, 19 XP
  • Saloon Garden Shed – 23 Farm Bucks, 89 XP
  • Saloon Door Gate – 8 Farm Bucks, 36 XP
  • Trickle Fence – 14 Farm Bucks, 57 XP
New Limited Edition Trees:
  • Mesquite Tree – Level 7, 12 Farm Bucks, produces 5 Feed, used in Recipes
  • Ponderosa Tree – Level 7, 12 Farm Bucks, produces 10 Pieces of Wood, used in Recipes
New Limited Edition Animals:
  • Brown Painted Mustang Horse – (Baby 30), Adult 43 Farm Bucks
  • Chocolate LaMancha Goat – (Baby 24), Adult 45 Farm Bucks
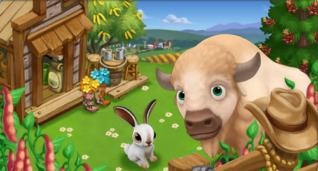
  • White American Buffalo – (Baby 30), Adult 43 Farm Bucks
  • White and Black Longhorn Cow – (Baby 32) Adult 45 Farm Bucks
  • White-tailed Jackrabbit – (Baby 27) Adult 41 Farm Bucks
New Limited Edition Crop:
  • Pinto Bean – Level 7, matures in 4 Hours, produces 6 Feed, used in Recipes

Marie’s Herding Buffaloes!

15 May 2013 FarmMaster 0

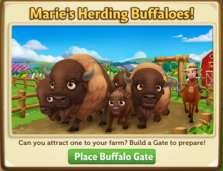
 Marie is herding Buffaloes! How exciting! It looks like one of them really likes you. Everybody knows that Buffaloes are large and require special gates. Will you build her a Buffalo Gate to make your farm her home? 

If you are level 9 or higher, you will see the following pop-up. Click on the green “Place Buffalo Gate” button to get started.
After clicking, you will see the American Brown Buffalo Quest Menu. It shows you all of the tasks you have to complete to get the baby American Brown Buffalo.
FarmVille 2
Note: If you close this menu and need to access it later to see your progress, just click on the baby American Brown Buffalo wandering around your farm.
The American Brown Buffalo Quests
The American Brown Buffalo quests tasks require you to place and build a Buffalo Gate, collect Buffalo Treats by completing three Quests for Gus, and craft Plain Soaps to clean your new friend. Click on the “Build It!” button to get started.
Building the Buffalo Gate
To set up your Buffalo Gate, you will need to collect the following items:
  • Buffalo Gate Posts
  • Heavy Gate Bars
  • Gate Hinges
To collect Buffalo Gate Posts, click on the “Post” button to post to your Facebook wall – you will get the parts when your friends click on it, or when you click on a similar newsfeed post.
Click on the “Ask” button to send requests for Heavy Gate Bars and Gate Hinges to your Neighbors. If you do not wish to wait for your friends, you can skip any of these tasks for Farm Bucks.
FarmVille 2
Note: You can send requests for materials to your Friends every 18 hours.
Once you have collected the required items, click on the “Start Building!” button at the bottom of the construction Menu. 
FarmVille 2
Once you have built your Buffalo Gate, you will need to hire Friends to help you finish the job! The Buffalo Gate requires four crewmembers, so click on the “Ask Friends” button to send some crew requests to your Friends. When they accept, you will see the spots in the Builder Menu begin to fill. If you do not want to wait for your friends, click the “Hire One” button to purchase crew members with Farm Bucks. Once you have successfully filled all four spots, click on the “Finish Building” button.
FarmVille 2
The next step in this quest is to collect Buffalo Treats by completing three Quests for Gus! Click on the blue “Go To Quest” button to complete the first three of Gus’s ‘Get Buffaloed!’ Quests (Don’t Buffalo Me, A Nickel For Your Thoughts, and There’s the Rub). If you do not wish to complete any of these quests, you can skip this step for Farm Bucks.
  FarmVille 2
  FarmVille 2
FarmVille 2
  FarmVille 2
Click on the turquoise “Share” button to share some of your rewards with Friends!  
FarmVille 2 
The final step in the quest is to craft Plain Soaps to clean your new friend! To craft Plain Soaps, you will need the following Ingredients: Lye (Pieces of Wood & Water) and Olive Oil (Olives & Flasks). Click on the blue “Make It!” button to head into the Crafting Workshop to get started.
FarmVille 2

Note: If you do not wish to complete these tasks, you can skip this step for Farm Bucks.
After completing all of the requirements in the American Brown Buffalo Quests, you will see the following pop-up:
FarmVille 2
It looks like the baby American Brown Buffalo has warmed up to you! Click on the “Share” button to post a reward feed for your friends. Make sure to feed your little buffalo Baby Bottles so it will grow into an adult American Brown Buffalo that you can harvest for Fur
Note: Fur is an Ingredient used in exclusive Crafting Workshop Recipes.
Additional Information:
  • You have 14 days to complete the American Brown Buffalo Tasks. If you do not complete them, the buffalo will disappear and you will be unable to claim it!
  • If you want to see how much time you have left to claim the American Brown Buffalo, hover your cursor over her.
  • You can only rescue the American Brown Buffalo once.
  • You do need to complete the first three of Gus’s ‘Get Buffaloed!’ Quests (Don’t Buffalo Me, A Nickel For Your Thoughts, and There’s the Rub). 
  • Once you have rescued the baby American Brown Buffalo, the Gate can be moved, stored in Inventory, or sold.
  • Additional Buffalo Gates and Fences can be purchased in the General Store.
FarmVille 2

Nesting Tree Guide!

8 May 2013 FarmMaster 0

The new Nesting Tree is here, which will allow you to raise
baby birds and win awesome prizes! Crafting in the Kitchen or harvesting your
Crops will earn you Bird Seed, which you can redeem for Decorations and a Pied
India Blue Peacock!

If you are level 9 or higher, you will see the following
pop-up. Click on the green “Place your Nesting Tree” button to place the tree
on your farm.

 
Nesting Tree MOTD

It’s nesting season for the Cardinals, and Gus wants your
help to build nests so they can raise their babies.

Your first step is building your Nesting Tree. You will need the following items to start construction:

  • Small Birdhouses
  • Step Ladders
  • Thin Ropes

To collect
Birdhouses, click on the “Post” button to post to your Facebook wall; you will
get the parts when your friends click on it, or when you click on a similar
newsfeed post.

Click on the “Ask”
button to send requests for Step Ladders and Thin Ropes to your Neighbors. If
you do not wish to wait for your friends, you can skip any of these tasks for
Farm Bucks.

Nesting Tree Building Stage 1

Once you have collected the required items, click on the “Start
Building” button at the bottom of the construction menu.

Now that your Tree is almost complete, you will need some
help from your Neighbors to finish the job.

Nesting Tree Builders 1

The Nesting Tree requires four Builders, so click on the “Ask
Friends” button to send some crew requests to your Friends. When they accept,
you will see the spots in the Building Menu begin to fill. If you do not wish
to wait for your friends, click the “Hire One” button to purchase crew members
with Farm Bucks. Once you have successfully filled all four spots, click on the
“Finish Nesting Tree” button.

Nesting Tree Builders 2

Using the Nesting Tree

Click on the Nesting Tree to open the main menu.

Nesting Tree Menu 2

This menu shows how
much Bird Seed you have collected and what prizes you are currently eligible to
redeem.

A – The total amount of Bird Seed you have. As you redeem
prizes, this number decreases.
B – The button to use when you want to redeem a prize. Once
you have enough Bird Seed, this button will turn turquoise.

C – The button to
use when you want to collect Bird Seed by crafting in the Kitchen.
D – The number of Farm Bucks required to purchase Bird
Seed.

E – If you want to
ask your friends for Bird Seed, press this button and a feed will be
automatically posted to your wall.

Collecting Bird Seed

Harvesting Crops: You can find Bird Seed by harvesting your
Crops. If you find some, they will appear on your farm in a similar fashion to
Prized Crops.

Bird Seed Doober

When Bird Seed appears on your farm after harvesting, click
on it and you will see the following pop-up:

Bird Seed Share

Click on the turquoise “Share Bird Seed” button to post a
feed to your wall. Your friends will be able click on this feed to claim some
free Bird Seed for themselves too. Once you have clicked on the Seed, it will
automatically be added to your Nesting Tree.

Crafting

You can craft your very own Bird Seed via the Crafting
Kitchen. From the Nesting Tree menu, click on the “Craft” button to open the
Kitchen.

Bird Seed Kitchen

To craft Bird Seed, you will need Seed Sprouts and Upland
Rice.
Upland Rice is a limited edition Crop that you can find for Coins in the
General Store.

Upland Rice

To get Seed Sprouts, you will need to enlist the help of your
Neighbors. From the Bird Seed recipe, click on the turquoise “ask” button to
send requests to your friends for Sprouts. If you do not wish to wait, you can
purchase either of these ingredients for Farm Bucks.

Individual Bird Seeds can also be purchased with Farm Bucks
from the Nesting Tree menu.

Redeeming Bird Seed for Prizes

Once you have
collected enough Bird Seed, it can be redeemed for some lovely prizes. Click on
your Nesting Tree to open up your progress menu.

At the bottom of this menu, there are a total of 4 prizes
that can be redeemed for Bird Seed:

  • Birdcage Planter (20 Bird Seed)
  • Bird Gate (40 Bird Seed)
  • Cassia Moschata Tree (70 Bird Seed)
  • Bird Bath Fountain (130 Bird Seed)

All 4 of these
prizes can be redeemed as many times as you like, as long as you have enough Bird
Seed (260 Bird Seed total). Once you have collected all 4 of the above
prizes, you will earn the adorable Pied India Blue Peacock!

 
Pied Peacock

The
Baby Peacock can be redeemed for Bird Seed or Farm Bucks more than once.

Additional Information:

  • If you do not wish to use the Nesting
    Tree feature, it can be deleted or stored in your Inventory.
  • You can only get Bird Seed when
    harvesting trees on your own farm. You will not get Bird Seed from
    Neighbor visits.
  • You have 21 days to collect the Bird
    Seed prizes. If you do not collect them all, the prizes will disappear and you
    will be unable to claim them.
  • If you want to see how much time you
    have left to claim the Nesting Tree prizes, hover your cursor over the tree.
  • You are limited to one Nesting Tree
    per farm.


Thailand Limited Edition Items!

6 May 2013 FarmMaster 0

Greetings, Farmers!
New “Oh My! Have You Tried Thai!” Limited items are available in the General Store. Stilt Houses, Teak Trees, Rice Recipes + more! Check below for details on our latest release and be sure to share what your favorite new addition is by commenting below this post!
New Limited Edition Items:
  • Thai Farm House – Level 3, 43 Farm Bucks
  • Twig Fence – Level 3, 3 Farm Bucks
  • Twig Arch – Level 3, 5,000 Coins
  • Flowering Thai Twig Arch – Level 3, 6 Farm Bucks 
  • Thai Elephant Garden Statue – Level 3, 8 Farm Bucks
  • Hill Tribes Scarecrow – Level 3, 14 Farm Bucks
New Limited Edition Trees:
  • Teak Tree – Level 7, 12 FB, 4 Feed, Used in Recipes
  • Dragon Fruit Tree – Level 7, 14 FB, 3 Feed, Used in Recipes
New Limited Edition Animals:
  • Banteng Cow – Level 6, (Baby 42) Adult 56 Farm Bucks
  • Silkie Chicken – Level 6, (Baby 20) Adult 37 Farm Bucks
  • White Pot Belly Pig – Level 6, (Baby 20) Adult 37 Farm Bucks

New Limited Edition Crop:
  • Upland Rice – Level 7, matures in 4 Hours, Used in Recipes
Crafting Kitchen Recipes:
  • Sticky Rice – Level 7, Upland Rice + Brown Sugar, 3,060 Coins
  • Dragon Fruit Smoothie – Level 7, Lemon Water + Dragonfruit, 4,050 Coins
  • Dragon Fruit Salad – Level 7, Dragonfruit + Sugar, 3,530 Coins

Rabbit Burrows Guide!

2 May 2013 FarmMaster 0

Introducing, Rabbit Burrows! Feed
Rabbits to help them dig underground tunnels from the Rabbit Warren and pop out
of Burrows on your Farm. Get all four Burrows to unlock an exclusive Purple Dragon Carrot Crop Packet!

Note:
We are gradually rolling the Rabbit Burrows feature out to all players
over the next week, so please be aware that you may not have this
feature right away. We are very excited to get this out to all of our
players as soon as possible, and we appreciate your patience. 


If you are level 11 or higher, you will see the following
pop-up. Click on “Feed & Win” to get started.


What is that cute
Rabbit doing? Click the Burrow below the arrow (left side of the hay bales) to
see what is inside:

Rabbit Burrow - FarmVille 2

Using the Rabbit Burrow

The Rabbit Burrow
feature has four stages. Each stage requires a certain amount of Rabbit
Feedings. When you feed your Rabbits, they will fill your Rabbit tunnel. Once
your tunnel is full, you can harvest the Rabbit Burrow to the left of
the hay bales for a new Burrow.

To see your tunnel, click on the Rabbit Burrow to open the
main menu. Your tunnel is located on the bottom of this screen. The number at
the bottom of the Tray indicates how many Rabbit Feedings you need and your
current progress towards this goal.

Rabbit Burrow - FarmVille 2

Below
are the four Rabit tunnel stages and the Rabbit Feeding requirements (180
total):

Stage 1: 30 Rabbit Feedings

Stage 2: 40 Rabbit Feedings

Stage 3: 50 Rabbit Feedings

Stage 4: 60 Rabbit Feedings

Once you have fed
enough Rabbits, you will be able to harvest your Burrow by clicking on it.

Rabbit Burrow - FarmVille 2

The more Rabbits you have on the farm and the more
Speed-Feed you use to feed them, the faster you fill your tunnel! In addition,
feeding Prized Rabbits counts twice!

If you do not want to wait to fill the Rabbit tunnel, you
can use Farm Bucks to skip these steps and get the next Burrow right away! 

Each of the four Rabbit Burrows is moveable. Use the edit
tool to get started:

Rabbit Burrow - FarmVille 2

Note: The
Rabbit Burrow on the left side of the hay bales is not movable (see image
below). This Burrow will disappear once the Rabbit Burrow timer has expired.

Rabbit Burrow - FarmVille 2

Purple Dragon Carrot Crop Packet

Once you have earned
all four of your Rabbit Burrows, you can claim your Purple Dragon Carrot Crop
Packet! The Purple Dragon Carrot is used in high value recipes in the
Crafting Kitchen, and Prized Purple Dragon Carrots are worth more points at the
County Fair.

Click the “Share and
Go to Market” to purchase your first Packet for Coins.

Rabbit Burrow - FarmVille 2

Additional Information:

  • You have 9
    days to earn the four Rabbit Burrows.
  • If you want to see how much time
    you have left to claim your Burrows, hover your cursor over the Burrow to the
    left of the hay bales.
  • You are limited to four Rabbit
    Burrows per farm.
  • Feeding Horses, Cows,
    Sheep, Goats, and Chickens
    does not count towards the Rabbit Burrow.
    Only feeding Rabbits will count.

Rabbit Warren Guide!

1 May 2013 FarmMaster 0

Hey Farmers,

The Rabbit Warren has arrived in FarmVille 2!
You can store your Prized Rabbits in this home and feed them all with a single click! If that was not enough, Prized Rabbits in the Warren will only require half the amount of Feed & Speed-Feed, and will produce Golden Fleece.  
If you are level 11 or higher, you will see the following pop-up. Click on “Place Rabbit Warren” to get started.
Building the Rabbit Warren:

Your first step is collecting construction parts. You will need the following items to start building your Rabbit Warren: 

  • Blue Paint
  • Rabbit Bedding
  • Rabbit Trough
To collect Blue Paint, click on the “Post” button to post to your Facebook wall – you will get the parts when your friends click on it, or when you click on a similar newsfeed post. 
Click on the “Ask” button to send requests for Rabbit Bedding and Rabbit Troughs to your Neighbors. If you do not wish to wait for your friends, you can skip any of these tasks for Farm Bucks.
   County Fair - FarmVille 2
Note: You can send a request for materials to your Friends every 18 hours.

Once you have collected the required items, click on the “Start Building!” button at the bottom of the construction Menu. 

  Rabbit Warren - FarmVille 2
Now that the Rabbit Warren is almost complete, you will need a little help from your Neighbors to finish the job. The Rabbit Warren requires four additional mechanics, so click on the “Ask Friends” button to send some crew requests to your Friends. When they accept, you will see the spots in the Build Menu begin to fill. If you do not wish to wait for your friends, click the “Hire One” button to purchase crew members with Farm Bucks.
  Rabbit Warren - FarmVille 2
Using the Rabbit Warren:
Your Prized Rabbits will enter the Warren through a tree stump, but live underground. Click on the Rabbit Warren to open the main menu.  
Rabbit Warren - FarmVille 2
Inside the Rabbit Warren, you will see placements that you can fill with Prized Rabbits. Prized Rabbits will take up one spot in your Warren regardless of breed (see below: Cottontail Rabbits).
Rabbit Warren - FarmVille 2
Adding & Removing Rabbits:
To add Prized Rabbits in the Warren, check the “Auto Fill” box and click on the green “Add Prized Rabbits” button. All of your Prized Rabbits will automatically hop into the Warren!
To remove a Prized Rabbit from the Warren, open the main menu and click on the red “–“ (minus symbol) box on the bottom left hand corner of the placement slot (see below: A).
The Rabbits cards have symbols on them to indicate different things:
Rabbit Warren - FarmVille 2 
A. Minus Symbol: Remove Rabbits
B. Feed: How much Feed the Rabbits will consume
C. Fine Rabbit Wool: How much the Rabbits will produce (see below: Feeding).
Feeding:
Prized Rabbits stored in the Warren will eat half of the amount of Feed they normally do. For example, a Rabbit that eats 8 Feed outside of the Warren will eat 4 Feed when inside the Warren. Note: Any Prized Rabbit that would normally eat an odd amount of feed outside of the Rabbit Warren will be rounded up by one. For example, a Rabbit that would normally eat 9 Feed will only need 5 Feed when stored in the Rabbit Warren. Prized Rabbits in the Warren also only require one Speed-Feed for every two Prized Rabbits.  
Golden Fleece:
Each time you harvest the Rabbit Warren you will find a Golden Fleece, which can be used in exclusive Crafting Workshop Recipes. Golden Fleece will linger on your farm similar to Prized Crops, so be on the lookout for them after feeding. Note: Fill your Rabbit Warren all the way to get the most Golden Fleece when you harvest!
Note: Clicking on the Golden Fleece will automatically add it to your Inventory.
Rabbit Warren - FarmVille 2
Additional Information:
  • The timer for your Rabbit Warren will pause when placed in Storage, and then resume once placed back on your farm.
  • If you do not wish to use the Rabbit Warren feature, it can be sold (frame only) or stored in your Inventory.
  • If you want to see how much time you have left to harvest, hover your cursor over the Warren.
  • You are limited to one Rabbit Warren per farm.
  • Rotate the Warren to view a different angle!

Spring Bake Sale Guide!

24 April 2013 FarmMaster 0

Greetings, Farmers!

The time has come to celebrate the abundance of spring. Host
a Bake Sale, invite Friends to barter for your baked goods, and receive great
gifts after each Sale. Complete all five of the Bake Sales and earn a Customizable Farm Sign!


If you are level 10 or higher, you will see the following pop-up. Click
on the green “Place Bake Sale Table” button to place the Table frame on your
farm. 


Before you can host a Bake Sale, you will need to build your
Bake Sale Table. Your first step is collecting Building Materials. You will
need the following items to start building your Bake Sale Table.

  • Chalk
  • Chalkboard
    Paint
  • Doilies

To collect Chalk, click on the “Post” button to post to your
Facebook wall; you will get the parts when your friends click on it, or when
you click on a similar newsfeed post.

Click on the “Ask” button to send requests for Chalkboard
Paint and Doilies to your Neighbors. If you do not wish to wait for your
friends, you can skip any of these tasks for Farm Bucks.

Spring Bake Sale - FarmVille 2

Once you have collected the required items, click on the
“Start Building” button at the bottom of the construction Menu. 

Spring Bake Sale - FarmVille 2


Now that your Table is almost complete, you will need some help from
your Neighbors to finish the job. The Bake Sale Table requires four Builders,
so click on the “Ask Friends” button to send some crew requests to your
Friends. When they accept, you will see the spots in the Building Menu begin to
fill. If you do not wish to wait for your friends, click the “Hire One” button
to purchase crew members with Farm Bucks. Once you have successfully filled all
four spots, click on the “Finish Building” button.

Spring Bake Sale - FarmVille 2

Bake Sales

The Customizable Farm Sign can be earned after a total of
five stages. In order to earn it, you will need to host five Bake Sales with
Friends. To prepare for a Bake Sale, click on your Bake Sale Table.

 
Spring Bake Sale - FarmVille 2

No Bake Sale is complete without all the fixings, so it is
time to start whipping up delicious snacks, goods, and supplies for your Bake
Sale! From the Quest menu, click on the “Craft” button for the recipe you wish
to Craft and you will be sent to your Kitchen and/or Workshop. If you would
like a quick tutorial on how to Craft, please visit our Official Guides: Crafting Kitchen and Crafting Workshop.

 
Spring Bake Sale - FarmVille 2

The Table requires four guests to be present before your Bake
Sale can begin, so click on the “Ask Friends” button to send some requests to
your Friends. When they accept, you will see the spots in the Guest Menu begin
to fill. If you do not wish to wait for your friends, click the “Hire One”
button to purchase guests with Farm Bucks. Once you have successfully filled
all four spots, click on the “Start Spring Bake Sale” button to begin the
festivities!

Spring Bake Sale - FarmVille 2

Once your Bake Sale is complete, your guests will run off
and you will see the following pop-up. Click on “Share Rewards” to post a feed
to your wall that your Neighbors can click to collect rewards, too!

Spring Bake Sale - FarmVille 2


Earning Rewards with the Bake Sale Table

 You will earn rewards each time you host a Bake Sale. The
more Bake Sales you host, the more rewards you will receive at the end of each sale.
Below is a list of items you have a chance of earning:

  • Water
  • Power
  • Fertilizer
  • Speed-grow
  • Sugar
  • Flour
  • Broths
  • Pie
    Crusts
  • Baby
    Bottles
  • Strawberries
  • Horseshoes


Spring Bake Sale - FarmVille 2


The Bake Sale Bartering reward icons at the bottom of the Guest Menu
indicate how many Bake Sales you have hosted. As you host parties, you will see
the Bake Sale Bartering reward icons will be replaced by green check marks.

Spring Bake Sale - FarmVille 2

You can host up to a total of five Bake Sales per Table and
once you have finished your final Bake Sale, you will earn a Customizable Farm Sign! Click the
turquoise “Place and Share!” button to customize your new sign.

Spring Bake Sale - FarmVille 2

Additional Information:

  • You
    can have up to three Bake Sale Tables on your farm (including frames).
  • If
    you delete the first Bake Sale Table, you will only be able to have a
    total of two. The second and third Bake Sale Tables can be deleted or stored in
    your Inventory.
  • You
    can also buy up to five additional Super Bake Sale Tables, which offer even
    more rewards and come fully built (no need for Parts and Crew). These premium
    tables are available for Farm Bucks in the General Store.
  • Once
    the Bake Sale Table Frames are placed on your Farm, you have 14 days to finish them and host your Bake
    Sales.
  • Once
    you have hosted your Bake Sales, you will be unable to use and/or sell any of
    the goods.
  • Once
    you have finished hosting all of your Bake Sales, the Tables are yours to keep
    as decorations!

Do you prefer big Bake Sales? Play around with the arrangement
of your Tables to host even bigger Bake Sales!

Spring Bake Sale - FarmVille 2

Bee Box Guide!

19 April 2013 FarmMaster 0

Hey, Farmers!

Introducing, the Bee Box! Tend to Crops to fill your Box, then harvest for Honey and a chance at finding special Honeycombs. Collect all of the Honeycombs to earn up to five exclusive Bee Hives and one Beekeeper Suit!
If you are level 10 or higher, you will see the following pop-up. Click on “Place Bee Box” to get started.
Building the Bee Box

Your first step is collecting construction parts. You will need the following items to start building your Bee Box: 

  • Honeycomb Rack
  • Brown Paint
  • Nails
To collect Honeycomb Racks, click on the “Post” button to post to your Facebook wall – you will get the parts when your friends click on it, or when you click on a similar newsfeed post.
Click on the “Ask” button to send requests for Brown Paint and Nails to your Neighbors.
If you do not wish to wait for your friends to respond to your requests or newsfeed posts, you can purchase any of these items above for Farm Bucks
  Bee Box - FarmVille 2
Note: You can post and send requests for materials to your Friends every 18 hours. 

Once you have collected the required items, click on the “Start Building!” button at the bottom of the construction Menu. 

  Bee Box - FarmVille 2
Now that the Bee Box is almost complete, you will need a little help from your Neighbors to finish the job. The Bee Box requires four additional mechanics, so click on the “Ask Friends” button to send some crew requests to your Friends. When they accept, you will see the spots in the Build Menu begin to fill. If you do not wish to wait for your friends, click the “Hire One” button to purchase crewmembers with Farm Bucks.
Once you have successfully filled all four spots, click on the “Finish & Share” button. 
  Bee Box - FarmVille 2
Using the Bee Box
When you harvest your Crops, they will drop Pollen, which is a new type of resource that can only be used with this feature.
Note: Once you place and harvest your Bee Box for the first time, you will have 30 days to claim all five Beehives and one Beekeeper Suit. After 30 days, you can purchase up to five Beehives from the General Store and one Beekeeper Suit from the Avatar Customizer. Keep in mind that you can onlyhave up to five Beehives and one Beekeeper Suit total on any given farm. 
Collected Pollen will be automatically added to your Pollen Tray with the help of Bees! Once your Tray is full, you can harvest the Bee Box for Honey.
To see your Tray, click on the Bee Box to open the main menu. Your Tray is located on the left-hand side of this screen. The number at the bottom of the Tray indicates how much Pollen you need to collect and your current progress towards this goal.
  Bee Box - FarmVille 2
Additionally, you can also see your progress by hovering your mouse over the Box to display the green progress bar.
Bee Box - FarmVille 2
Once you have collected the necessary amount of Pollen, you will be able to harvest your Box by clicking on it. When you harvest your Box, you will always produce Honey. Honey can be used to fill Beehives for Fertilizing Bees, as well as for Crafting.
Note: Any Honey you produce will be automatically added to the “All” section of your Inventory.
Honeycombs & Rewards
To earn the Beehives, you will need to collect special types of Honeycombs. To find these Special Honeycombs, all you need to do is keep harvesting your Crops! In addition to the Honey you earn every time you harvest the Box, you also have a chance of earning Special Honeycombs (referred to as “Honeycombs” in game).
There are three types of Special Honeycombs you can receive:
  1. Amber (requires 2)
  2. Orange (requires 2)
  3. Golden (requires 1)
These Honeycombs are not used for Crafting. Instead, they are automatically added to your Honeycomb Collection. To earn all five Beehives, you will need to have five sets of 2 Amber, 2 Orange, and 1 Golden in your Honeycomb Collection (25 Honeycombs total). Once you have collected these, you can trade them in for up to five Beehives!
To earn the Beekeeper Suit, you will need to collect the full set of five Beehives. You will receive the Suit after you redeem the fifth Beehive.
Special Honeycombs linger on your farm similar to Prized Crops. Just click on the Honeycomb and it will be added to your Collection.
Bee Box - FarmVille 2
The more Crops you have on your Farm, the better your chances are of receiving Honeycombs!
Helpful Tip: Crop Packets produce more Pollen. For example, Red Hibiscus and Honeysuckles will produce Pollen roughly twice as often as other crops. See the “Crop Packets” section below for more details.
In addition to Honeycombs, harvesting the Box will give you additional XP points to help you level!
  Bee Box - FarmVille 2
If you do not want to wait to collect the Honeycombs, you can use Farm Bucks to skip these steps and get the Beehive right away!  You can also purchase Pollen directly.
Bee Box - FarmVille 2
Honey & Beehives
Bee Box - FarmVille 2
You can earn up to five Beehives total for each Honeycomb Collection you complete. In order to use the Beehive, fill the Hive with Honey (collected from the Bee Box), then you will be able to Fertilizer four of your Crops with Fertilizing Bees. See below on how to get started.
Fill the Beehive, mouse over and click to feed with Honey:
  Bee Box - FarmVille 2
After you feed the Beehive with Honey, mouse over and click to use:
  Bee Box - FarmVille 2
Four Bees will fly out of the Beehive. Use the pointer finger to select the four Crops you wish to Fertilizer (similar to using Farmhands). You can place bees only on watered crops that have not yet been fertilized.
  Bee Box - FarmVille 2
If you want to see how much time you have remaining until you can use the Beehive again, hover your cursor over the Hive:
Bee Box - FarmVille 2
Note: You can place each Beehive on top of your Crops (see image below).
Bee Box - FarmVille 2
Beekeeper Suit
Once you have earned all five Beehives, you can claim your Beekeeper Suit! Walter will drop off your fifth Beehive, then he will remind you to try on your Suit.
Bee Box - FarmVille 2
Click the green “Will do” button to try on your new Suit using the Avatar Customizer. Once you have selected your new Suit, click the green “Save and Share” button and share this news with Friends!
  Bee Box - FarmVille 2
Crop Packets
Fill your Bee Box Pollen Tray even faster using Crop Packets! Get more Pollen from Hibiscus and Honeysuckle Crop Packets. Purchasing the packet will unlock the crops for you to plant for 14 days. Available in the General Store on the “Seeds” tab:
Bee Box - FarmVille 2
Additional Information:
  • You have 30 days to earn the five Beehives and one Beekeeper Suit. After the timer has stopped, you can purchase additional Beehives in the General Store and the Beekeeper Suit from the “Avatar Customizer” for Farm Bucks. Note: The Bee Box Timer will start counting down the first time your harvest the Bee Box. Additionally, once the Timer has stopped, you can only harvest the Bee Box for Honey.
  • Limited to one Bee Box, five Beehives, and one Beekeeper Suit per farm.
  • If you do not wish to use the Bee Box feature, it can be sold (frame only) or stored in your Inventory.
  • If you want to see how much Pollen is required to harvest, hover your cursor over the Box.
  • Tending to Trees does not count towards the Bee Box. Only tending to Crops will earn you Pollen.
  • Rotate the Box to view a different angle!


The Nesting Baby Deer!

9 April 2013 FarmMaster 0

Oh
no, a baby deer was separated from her mother! Nobody wants a
frightened little deer without a home. Will you build a nest to keep her
safe?


Wandering Deer - FarmVille 2

If you are level 9 or higher, you will see the following pop-up. Click on the green “Sure!” button to get started.

Wandering Deer - FarmVille 2

After
clicking, you will see the White-Tailed Deer Quest Menu. It shows you
all of the tasks you have to complete to get the baby White-Tailed Deer.

Wandering Deer - FarmVille 2

Note:
If you close this menu and need to access it later to see your
progress, just click on the baby White-Tailed Deer wandering around your
farm.

The White-Tailed Deer Quests

The
White-Tailed Deer quests tasks require you to place and build a Deer
Nest, collect Wildflower Seeds by completing four Quests for Marie, and
craft Strawberry Ice Creams to celebrate your new friend. Click on the
“Build It!” button to get started.

Building the Deer Nest

To set up your Deer Nest, you will need to collect the following items:

  • Salt Lick
  • Crate of Rocks
  • Deer Bedding

To
collect Salt Licks, click on the “Post” button to post to your Facebook
wall – you will get the parts when your friends click on it, or when
you click on a similar newsfeed post.

Click
on the “Ask” button to send requests for Crate of Rocks and Deer
Bedding to your Neighbors. If you do not wish to wait for your friends,
you can skip any of these tasks for Farm Bucks.

 
Wandering Deer - FarmVille 2

 Note: You can send requests for materials to your Friends every 18 hours.

Once you have collected the required items, click on the “Start Building!” button at the bottom of the construction Menu. 

Wandering Deer - Start Build

Once
you have built your Deer Nest, you will need to hire Friends to help
you finish the job! The Deer Nest requires four crewmembers, so click on
the “Ask Friends” button to send some crew requests to your Friends.
When they accept, you will see the spots in the Builder Menu begin to
fill. If you do not want to wait for your friends, click the “Hire One”
button to purchase crew members with Farm Bucks. Once you have
successfully filled all four spots, click on the “Finish Building”
button.


Wandering Deer - FarmVille 2

The
next step in this quest is to collect Wildflower Seeds by completing
four Quests for Marie! Click on the blue “Go To Quest” button to
complete the first four of Marie’s ‘
Deer Friends‘ Quests (A special Deer, Deer Me, The Waiting Game, and Does on Film). If you do not wish to complete any of these quests, you can skip this step for Farm Bucks.

Wandering Deer - FarmVille 2

Wandering Deer - FarmVille 2

Click on the turquoise “Share” button to share some of your rewards with Friends!  

Wandering Deer - FarmVille 2

The
final step in the quest is to Strawberry Ice Creams to celebrate your
new friend! To craft Strawberry Ice Creams, you will need the following
Ingredients: StrawberriesHalf & Half, and Sugar. Click on the blue “Make It!” button to head into the Crafting Kitchen to get started.

Note: If you do not wish to complete these tasks, you can skip this step for Farm Bucks.

After completing all of the requirements in the White-Tailed Deer Quests, you will see the following pop-up:

It
looks like the baby White-Tailed Deer has warmed up to you! Click on
the “Share” button to post a reward feed for your friends. Make sure to
feed your little deer Baby Bottles so it will grow into an adult
White-Tailed Deer that you can harvest for Fur! 

Note: Fur is an Ingredient used in exclusive Crafting Workshop Recipes.

Additional Information:

  • You
    have 14 days to complete the White-Tailed Deer Tasks. If you do not
    complete them, the deer will disappear and you will be unable to claim
    it!
  • If you want to see how much time you have left to claim the White-Tailed Deer, hover your cursor over her.
  • You can only rescue the White-Tailed Deer once.
  • You do need to complete the first four of Marie’s ‘Deer Friends‘ Quests (A special Deer, Deer Me, The Waiting Game, and Does on Film).