Butterfly House Guide!

3 April 2013 FarmMaster 0

Oh
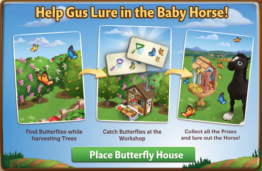
dear! A Baby Black Clydesdale has gotten lost in the trees. Now, everybody
knows horses are attracted to Butterflies, so help Gus catch butterflies to lure
him back to safety. Craft nets or Harvest
your trees for a chance to find Butterflies, which you can redeem for all kinds
of beautiful prizes, including the Baby Black Clydesdale!

If
you are level 10 or higher, you will see the following pop-up. Click on the
green “Place Butterfly House” button to get started.

Getting
Started

While
you are building the Butterfly House, get a head start in collecting Small
& Large Butterfly Nets to catch Butterflies. In addition, harvest your
Trees for a chance at finding them too!

Note: Butterflies will not be stored
in your Inventory, but any Butterfly net crafted and/or Butterfly found when
harvesting Trees will be counted towards the Butterfly House. You will see them
once the Tree is completed!

Building
the Butterfly House


Your first step is collecting construction parts. You will need the following
items to start building your Butterfly House:

  • Flower Saplings
  • Bronze Hinges
  • Coral Paint

To
collect Flower Sapling, click on the “Post” button to post to your Facebook
wall; you will get the parts when your friends click on it, or when you click
on a similar newsfeed post.

Click
on the “Ask” button to send requests for Bronze Hinges and Coral Paint to your
Neighbors. If you do not wish to wait for your friends, you can skip any of
these tasks for Farm Bucks.

Butterfly House - FarmVille 2

Note: You can send a request for
materials to your Friends every 18 hours.

Once
you have collected the required items, click on the “Start Building!” button at
the bottom of the construction Menu. 

Butterfly Hourse - Start Build


Now that the Butterfly
House is almost complete, you will need help from your Neighbors to finish the
job. The Butterfly House requires 4 additional builders, so click on the “Ask
Friends” button to send some crew requests to your Friends. When they accept,
you will see the spots in the Build Menu begin to fill. If you do not wish to wait
for your friends, click the “Hire One” button to purchase crew members with
Farm Bucks. Once you have successfully filled all 4 spots, click on the “Finish
& Share” button.

Butterfly House - FarmVille 2

Using
the Butterfly House

Click
on the Butterfly House to open the main menu. 

Butterfly House - FarmVille 2

This
menu shows how many Butterflies you have collected and what prizes you are
currently eligible to redeem. 


A – The total amount of Butterflies you have. As you redeem prizes, this
number decreases.


B – The button to use when you want to redeem a prize. Once you have
enough Butterflies, this button will turn turquoise.

C
– The buttons to use when you want to collect Butterflies crafting Ingredients
from Friends. 


D – The number of Farm Bucks required to purchase Butterflies.

Collecting
Butterflies

Harvesting
Trees
: You can
find Butterflies by harvesting your Trees. If you find some, they will appear
in a similar fashion to prized crops. 

Butterfly House - FarmVille 2

When
a Butterfly appears on your farm after harvesting, click on it and you will see
the following pop-up:

 
Butterfly House - FarmVille 2

Click
on the turquoise “Share Butterflies” button to post a feed to your wall. Your
friends will be able click on this feed to claim some free Butterflies for
themselves too. Once you have clicked on the Butterfly, it will automatically
be added to your Butterfly House. 

Crafting

You
can craft your very own Butterfly Nets via the Crafting Workshop.

Click
on the “Ask” button to send requests for Small Butterfly Nets to your
Neighbors. If you do not wish to wait for your friends, you can skip any of
these tasks for Farm Bucks.

To
collect Large Butterfly Nets, click on the “Post” button to post to your
Facebook wall – you will get the parts when your friends click on it, or when
you click on a similar newsfeed post.

 
Butterfly House - FarmVille 2

Individual
Butterflies can also be purchased with Farm Bucks from the Butterfly House
menu. 


Redeeming Butterflies for Prizes


Once you have collected enough Butterflies, they can be redeemed for
some lovely prizes. Click on your Butterfly House to open up your progress
menu. 


At the bottom of this menu, there are a total of 4 prizes that can be
redeemed for Butterflies:

  • Butterfly Flowerpot (13 Butterflies)
  • Butterfly Chair (28 Butterflies)
  • Purple Lilac Tree (53 Butterflies)
  • Butterfly Terrarium (94 Butterflies)

All
4 of these prizes can be redeemed as many times as you like, as long as you
have enough Butterflies (
188 Butterflies total). Once you have collected
all 4 of the above prizes, you will earn the adorable
Baby Black Clydesdale!


Note: You will need to redeem each
of the above items at least once before you get credit towards the Baby Black
Clydesdale.

 
Butterfly House - FarmVille 2

Once
you have redeemed each of the four prizes, watch the Butterflies lure in your
cute new friend!

 
Butterfly House - FarmVille 2


The Baby Black Clydesdale can be redeemed for Butterflies more than once. To
claim all additional Baby Black Clydesdales, click the turquoise “Get it!”
button from the Butterfly House main menu.

Butterfly House - FarmVille 2

If
you don’t feel like collecting Butterflies, all of the above prizes can also be
purchased in unlimited quantities for Farm Bucks. 

Additional
Information
:

  • If you do not wish to use the Butterfly House feature,
    it can be deleted or stored in your Inventory.
  • You can only get Butterflies when harvesting trees on
    your own farm. You will not get Butterflies from Neighbor
    visits.
  • You have 21 days to collect the Butterflies prizes. If
    you do not collect them all, the prizes will disappear and you will be
    unable to claim them.
  • If you want to see how much time you have left to claim
    the Butterflies prizes, hover your cursor over the tree.
  • You are limited to one Butterfly House per farm.

Build a bigger Mud Wallow!

1 April 2013 FarmMaster 0

Hey
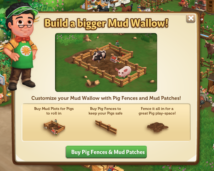
Farmers! Did you know that you can customize your Mud Wallow with
special Pig Fences and Mud Patches? They are available now in the
“Decorations” section of the General Store. 

Here is a look at one of the many ways you can build out your Mud Wallow:

Mud Wallow - FarmVille 2

 Our little Black Spotted Ossabaw Pig is having a ball rolling around in that mud!

Shroom Shed Guide, Stage 4

27 March 2013 FarmMaster 0

The
Shroom Shed Feature is broken up into four consecutive stages that
unlock over time. Click the links below to find out more information
about each stage.


Stage 1 Guide: View
Stage 2 Guide: View
Stage 3 Guide: View
Stage 4 Guide: Below

Pigs have been spotted in FarmVille 2!
Now,
Gus knows a thing or two about pig taming and he needs your help. Once
you have put up your Shroom Shed, you can earn beautiful decorations and
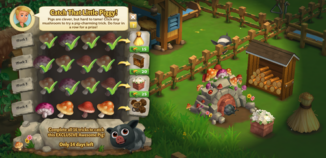
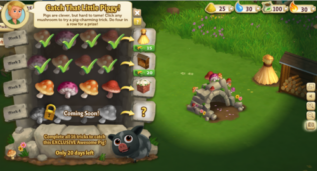
exclusive prizes by assisting Gus with his tasks. Complete all of the
Shroom Shed tasks to unlock an exclusive Wild Piggy!

Completing your Shroom Shed (Stage 4 Decoration Quests)
Once
your Shroom Shed is up, you may notice that it looks a little bare. In
order to earn some beautiful new decorations, you will need to complete
the Stage 4 Decoration Quests. Click on the Shroom Shed to open the
Quest Menu.

Each
Decoration Quest has 4 parts that have to be completed. As you complete
a part of a quest line, you will earn a decoration for your Shed. If
you complete all 4 parts of a Decoration Quest, you will win an
exclusive prize for your farm!


Shroom Shed - FarmVille 2

Click ANY gift
in the Shroom Shed Menu to start working on your Stage 4 Decoration
Quest. As you finish parts of your quest, a green check mark will appear
to indicate what parts of the quest have been completed. The Shed
decorations you earn will be automatically added to your Shroom Shed. 

Shroom Shed - FarmVille 2

As
mentioned earlier in the guide, once you complete the entire Stage 4
Decoration Quest, you will win a special reward! To redeem your special
prize, simply click the turquoise “Redeem” button.

Shroom Shed - FarmVille 2

Note: Additional decorations (prizes) are available for purchase with Farm Bucks once you’ve redeemed the reward.


Shroom Shed - FarmVille 2

Additional Information:

  • If you do not wish to use the Shroom Shed feature, it can be sold (frame only) or stored in your Inventory.
  • You are limited to one Shroom Shed per Farm. 

Mud Wallow Guide!

27 March 2013 FarmMaster 0

Greetings, Farmers,

Introducing, the Mud Wallow! Feed
Adult Pigs to fill your Wallow, then harvest for Clay and a chance at finding special
Antique Coins. Collect all of the Antique Coins to earn the exclusive Spotted Hog!

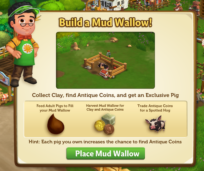
If you are level 10 or higher, you will see the following
pop-up. Click on “Place Mud Wallow” to get started.


Building the Mud Wallow


Your first step is collecting construction parts. You will need the
following items to start building your Mud Wallow:

  • Faucet Piping
  • Red Balls
  • Pig Fence Posts

To collect Faucet Piping, click on the “Post” button to post
to your Facebook wall – you will get the parts when your friends click on it,
or when you click on a similar newsfeed post.

Click on the “Ask” button to send requests for Red Balls and
Pig Fence Posts to your Neighbors. If you do not wish to wait for your friends,
you can skip any of these tasks for Farm Bucks.

You can also purchase any of these items above for Farm
Bucks if you do not wish to wait for your friends to respond to your requests
or newsfeed posts.

Mud Wallow - FarmVille 2

Note: You can post and send requests for materials to
your Friends every 18 hours. 


Once you have collected the required items, click on the “Start
Building!” button at the bottom of the construction Menu. 

 
Mud Wallow - FarmVille 2

Now that the Mud Wallow is almost complete, you will need a
little help from your Neighbors to finish the job. The Mud Wallow requires 4
additional mechanics, so click on the “Ask Friends” button to send some crew
requests to your Friends. When they accept, you will see the spots in the Build
Menu begin to fill. If you do not wish to wait for your friends, click the
“Hire One” button to purchase crew members with Farm Bucks.

Once you have successfully filled all 4 spots, click on the
“Finish & Share” button.

 
Mud Wallow - FarmVille 2

Using the Mud Wallow

You must have at
least four Adult Pigs on your farm that are not Prized for the Wallow to
be functional. When you feed your Pigs, they will drop Mud, which is a new type
of Mud that can only be used with this feature.

Collected Mud will
be automatically added to your Mud Wallow Meter. Once your Meter is full, you
can harvest the Wallow for Clay.

To see your Meter, click on the Mud Wallow to open the main
menu. Your Meter is located on the left-hand side of this screen. The number at
the bottom of the Meter indicates how much Mud you need to collect and your
current progress towards this goal.

 
Mud Wallow - FarmVille 2

Additionally, you can also see your progress by hovering
your mouse over the Wallow to display the green progress bar.

 
Mud Wallow - FarmVille 2

Once you have
collected the necessary amount of Mud, you will be able to harvest your Wallow
by clicking on it. When you harvest your Wallow, you will always produce Clay,
which can be used in exclusive Crafting Kiln Recipes.

Note: Any Clay
you produce will be automatically added to the “All” section of your Inventory.

Antique Coins

To earn the Spotted Hog, you will need to collect special
types of Antique Coins. To find these Special Coins, all you need to do is keep
harvesting your Mud Wallow! In addition to the Clay you earn every time you
harvest the Wallow, you also have a chance of earning Special Coins (referred to as “Antique Coins” in game).

There are three
types of Special Coins you can receive:

  1. Copper
    (requires 6)
  2. Silver
    (requires 4)
  3. Gold
    (requires 2)

These Coins are not used for Crafting like the Clay.
Instead, they are automatically added to your Coin Collection. To earn the Spotted Hog, you will need to have 6 Copper,
4 Silver and 2 Gold (12 total) Coins in your Collection. Once you have collected these, you can trade them in for the Spotted
Hog
!

Special Coins linger on your farm similar to Prized Crops.
Just click on the Coin and it will be added to your Collection.

Mud Wallow - FarmVille 2

Antique Coin Probability

Inside
of the Mud Wallow, there is a Pig Chart that tracks your probability of
finding Coins (see image below). Use this chart to view your current
total and keep in mind that the more Adult Pigs you have on your Farm,
the better your
chances are of receiving Antique Coins! 


Mud Wallow - FarmVille 2

Helpful Tip: Animals that give
more Mud fill the station more quickly. For example, a Pig that produces 5 Mud contributes
5 Mud to the Mud Meter, where as a Pig that produces 1 Mud only contributes 1 Mud.

In addition to Coins, harvesting the Wallow will give you
additional XP points to help you level!

Mud Wallow - FarmVille 2

If you do not want to wait to collect the Antique Coins, you
can use Farm Bucks to skip these steps and get the new baby Spotted Hog right
away!

 
Mud Wallow - FarmVille 2

Your new Spotted Hog needs baby bottles to reach adulthood,
just like your other animals. Once it has matured, it will produce Shale Mud, which can be used in
exclusive Crafting Kiln Recipes.

Additional Information:

  • Minimum of four Adult Pigs on any given farm is
    required to use the Mud Wallow.
  • If you do not wish to use
    the Mud Wallow feature, it can be sold (frame only) or stored in your
    Inventory.
  • If you want to see how much
    Mud is needed to harvest, hover your cursor over the Wallow.
  • Limited to one Mud Wallow
    per farm.
  • Feeding Cows, Goats,
    Sheep, and Horses does not count towards the Mud Wallow. Only
    feeding Adult Pigs will earn you Mud (non-Prized).
  • If you lack any requirements (such as not having enough Pigs, or
    needing to wait a bit longer before harvesting), the game will tell you
    what you are missing.
  • Rotate the Wallow to view
    a different angle!
  • Customize your Mud Wallow with special Mud Fences (available in the
    General Store on the “Decorations” tab).

Shroom Shed Guide, Stage 3!

21 March 2013 FarmMaster 0

The
Shroom Shed Feature is broken up into four consecutive stages that
unlock over time. Click the links below to find out more information
about each stage.

ن

Stage 1 Guide: View
Stage 2 Guide: View
Stage 3 Guide: Below
Stage 4 Guide: Coming Soon!

Pigs have been spotted in FarmVille 2!
Now,
Gus knows a thing or two about pig taming and he needs your help. Once
you have put up your Shroom Shed, you can earn beautiful decorations and
exclusive prizes by assisting Gus with his tasks. Complete all of the
Shroom Shed tasks to unlock an exclusive Wild Piggy!


Completing your Shroom Shed (Stage 3 Decoration Quests)
Once
your Shroom Shed is up, you may notice that it looks a little bare. In
order to earn some beautiful new decorations, you will need to complete
the Stage 3 Decoration Quests. Currently, only the first, second and
third sets of quests are available. The other stage of this feature will
unlock in the coming weeks. Click on the Shroom Shed to open the Quest
Menu.

Shroom Shed - FarmVille 2

Each
Decoration Quest has 4 parts that have to be completed. As you complete
a part of a quest line, you will earn a decoration for your Shed. If
you complete all 4 parts of a Decoration Quest, you will win an
exclusive prize for your farm!


Shroom Shed - FarmVille 2

Click ANY gift
in the Shroom Shed Menu to start working on your Stage 3 Decoration
Quest. As you finish parts of your quest, a green check mark will appear
to indicate what parts of the quest have been completed. The Shed
decorations you earn will be automatically added to your Shroom Shed. 

Note: You may see the Wild Piggy again!

Shroom Shed - FarmVille 2

As
mentioned earlier in the guide, once you complete the entire Stage 3
Decoration Quest, you will win a special reward! To redeem your special
prize, simply click the turquoise “Redeem” button.

Shroom Shed - FarmVille 2

Note: Additional decorations (prizes) are available for purchase with Farm Bucks once you’ve redeemed the reward.

Additional Information:

  • If you do not wish to use the Shroom Shed feature, it can be sold (frame only) or stored in your Inventory.
  • You are limited to one Shroom Shed per Farm. 

Crafting Kiln Guide!

20 March 2013 FarmMaster 0

Hey Farmers!


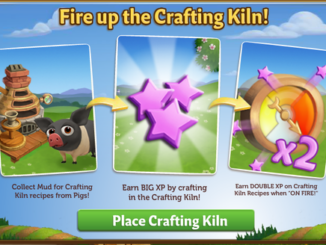
Introducing the Crafting Kiln! Use Mud and other new
Ingredients to craft Recipes to earn BIG
XP
and sell your goods for Coins! Upon
entering FarmVille 2, you will see the following pop up. Click on the green “Place
Crafting Kiln” button to get started. 

Building the Crafting Kiln


Your first step is collecting construction
parts. You will need the following items to start building your Crafting Kiln:

  • Wheel Sections
  • Bag of Clay Powders
  • Cut Stones

To collect Wheel Sections, click on the “Post” button to
post to your Facebook wall – you will get the parts when your friends click on
it, or when you click on a similar newsfeed post.

Click on the “Ask” button to send requests for Bag of Clay
Powders and Cut Stones to your Neighbors. If you do not wish to wait for your
friends, you can skip any of these tasks for Farm Bucks.

Kiln - FarmVille 2

Note: You can send a request for materials to
your Friends every 18 hours.

Once you have collected the required items, click on the
“Start Building!” button at the bottom of the construction Menu. 

Kiln - FarmVille 2

Now that the Crafting Kiln is almost completed, you will need
some help from your Neighbors to finish the job. The Crafting Kiln requires 4
additional crewmembers, so click on the “Ask Friends” button to send some crew
requests to your Friends. When they accept, you will see the spots in the Build
Menu begin to fill. If you do not wish to wait for your friends, click the
“Hire One” button to purchase crew members with Farm Bucks. Once you have
successfully filled all 4 spots, click on the “Finish & Share” button.

Kiln - FarmVille 2

Inside the Crafting Kiln

Once you have finished building your Crafting Kiln, you can
begin crafting items, which will earn you Coins and XP.
In addition to this, as you craft Recipes, you will fill the Kiln Meter
with points – fill it to On Fire mode and earn double XP! (See below for “Kiln
Meter & Reward” section). After you open the Crafting Kiln, you will see which items
you are able to craft. The items available to you depend on a couple of things: 


  • What level you are: Recipes in the Crafting Kiln have level requirements.
    This means you have to keep leveling up to unlock new Crafting items. The
    more advanced you are in the game, the more complicated your Recipes will
    be — but they will sell for more coins, too!
  • What Ingredients you have available:
    As you harvest Crops & Trees, and collect from your Animals, you can
    use these items to craft items.

Crafting

Crafting Kiln Recipes require new Resources and Ingredients.
Here’s what they are and how to get them:


Ingredients: Raw ingredients come from your farm or
Neighbors. Get them by harvesting Crops and Trees, feeding your Animals and
visiting your Neighbors. Some Ingredients can only be obtained from your
friends, so be sure to ask nicely!


  • Crops: Produce Ingredients like Blueberries, etc.
  • Trees: Produce tree fruit like Lemons, etc.
  • Animals: Produce Ingredients like Mud, Horseshoes and Wool
    after you feed them.
  • Glass: This is an Ingredient you will need to get from your
    Neighbors.

Are you in a hurry to craft, but don’t have the Ingredients
you need? You can purchase Ingredients with Farm Bucks from the Recipe Card
(see below).

Kiln - FarmVille 2

Crafted
Goods
:
These are Recipes that you make in your Crafting Kiln from raw Ingredients. Use
them to complete Final Recipes (see description below), which can then be sold
in your Market Stand.

Finished
Products (Final Recipes)
: These are Recipes that you can sell for coins in your
Market Stand. These Recipes require Crafted Goods to complete. They are marked
with a star symbol.


The Crafting Kiln Menu displays all of the Recipes you currently have
available. To access this menu, simply click on the Kiln. 

Kiln - FarmVille 2

The
Recipe thumbnails have symbols on them to indicate different things:

Star:

These are Recipes that you can sell for coins in your Market Stand.
These Recipes require Crafted Goods to complete.

Kiln - FarmVille 2

Padlock:

This symbol is used to indicate a Recipe that has a Level Requirement higher
than your current level. To find out which level you need to be on to unlock a
certain recipe, simply hover over the Recipe Card. 

Kiln - FarmVille 2

Recipe
Card Organization
:

Recipe
card thumbnails are arranged in a column. These columns are referred to as
Recipe Chains. Recipe Chains are designed to show you the natural progression
of a Final Recipe, so you are able to create the Finished Product easier. For
example:

Metal
Frame
:
Requires Horseshoes to complete

Terracotta:
Requires 3 Muds and 4 Wools to complete

Floral
Trivet
:
Requires 1 Metal Frame and 1 Terracotta to complete

The
Floral Trivet is the Final Recipe in this Chain. It requires the first two
Crafted Goods (Metal Frame + Terracotta) in this Chain to complete.


Kiln - FarmVille 2

Note: Clicking the
green “Go Home” button in the corner of a recipe card will take you back to the
Recipe thumbnail screen in your Kiln.

Some Recipes require a Crafted Goods instead of Ingredients.
If you come across a Recipe like this, you may feel a bit confused. But no need
to worry, making the required Crafted Good is simple! Just click on the “Craft”
button located under the Good you need to make. This will open up the
applicable Recipe Card. 

Kiln - FarmVille 2

Once you have all the ingredients that you need to finish
your Recipe, click the “Make 1” button on the Recipe Card. It should turn green
to let you know that you’re ready to go.


After you click “Make It,” your recipe should craft instantly. Once it’s made,
it will pop out of the station and dance merrily around your Kiln before
placing itself into your Inventory. Do not worry if you are not able to mouse
over and scoop it up fast enough —it will go there automatically!

Powering Your Kiln

Creating all of those great products isn’t easy. To stay in
business, the Crafting Kiln requires Power (Crafting Energy). Every time you use your Kiln to make a Recipe, it
will deduct from your power reserves. The amount of power you have left can be
found at the bottom of the Crafting Menu.

Note: The Crafting Kiln, Crafting Workshop and the Crafting
Kitchen all use Power.

Out of Power? There are a few different ways to get more:

  • Harvest your Furnace. Click here for more
    info on the Furnace Guide.
  • Purchase Power Packs for Farm Bucks
  • Give it some time — Power for your Crafting
    Kiln gradually replenishes itself after 1 hour.
  • Ask your friends to send you Power. Mouse
    over your Power bar and click on the turquoise “Ask” button to post to your
    Facebook wall – you will get Power when your friends click on it, or when you
    click on a similar newsfeed post.

Kiln - FarmVille 2

Kiln Meter & Earning Rewards!

As you craft Recipes, you’ll collect points to fill the Kiln
Meter. There are three different modes inside the Meter that you can reach with
these crafting points, which also earn you special rewards. Your points will
increase as you craft Recipes and will only
decrease after the On Fire countdown timer has expired. 

Note: The Crafting Kiln is designed to play
overtime, so do not feel that you have to rush to fill up the Meter in one game
session. Instead, play at your own pace and enjoy crafting Kiln Recipes!

Low (yellow): You will earn additional XP, Power, and
Glass when crafting in the Kiln. These Ingredients are used to craft Kiln
Recipes.

In order to reach Low mode, you will need 100 XP. Once you
reach this target, you will receive XP, Power, and Glass (see image below).

 
Kiln - FarmVille 2

Medium (orange): You will earn additional XP, Power,
Glass, and Pigment when crafting in the Kiln.

In order to reach Medium mode, you will need 1,000 XP. Once
you reach this target, you will receive more XP, Power, Glass, and Pigment (see
image below).

 
Kiln - FarmVille 2

On Fire (red): You will earn Double XP + Power, Glass, and Pigment when crafting in the Kiln! These
Ingredients are used to craft Kiln Recipes.

You will need 3,000 XP in order to reach On Fire mode. Once you
reach this target, Crafting Kiln Recipes are worth Double XP until the timer runs out (see image below).

 
Kiln - FarmVille 2

Earning Coins!

Once you’re finished Crafting, it’s time to earn some money!
Your Finished Products can be sold in your Market Stand for Coin. The more
difficult the Recipe, the higher the Coin yield will be.

Additional Information:

  • Limited to one Crafting Kiln per farm.
  • Rotate the Kiln to view a different angle!
  • A message, “About to Level Up!” will popup in the upper
    right hand corner of the game screen to notify you when you are close to
    leveling up. We don’t want you to miss your level up bonus!

Kiln - FarmVille 2

Spring Into Country Living!

18 March 2013 FarmMaster 0


Hey Farmers,


Spring into Country Living
with new Limited Edition items! The Pink Landrace Pig is known for it’s
adorable floppy ears and elongated body, but did you know that it’s also
available in the General Store for COINS?
Check out the information below for more details about our latest release and
be sure to let us know which addition is your favorite!


New Limited Edition
items
:


Spring Cabana – 26 Farm
Bucks


Spring Hanging Plant Post
– 12 Farm Bucks


White Wood Gate – 6 Farm
Bucks


Post Capped Picket Fence –
3 Farm Bucks


White Wood Bridge – 6,300
Coins


New Limited Edition
Trees
:


Flavorosa Pluot Tree – 12
Farm Bucks


Empress Tree – 12 Farm
Bucks


New Limited Edition
Animals
:


Baby Doll Sheep – 34 (Baby
21) Farm Bucks


Nigerian Dwarf Goat – 40
(Baby 23) Farm Bucks


Thorold’s Deer – 40 (Baby
27) Farm Bucks


Dales Pony – 63 (Baby 35)
Farm Bucks (reissue!)


Spotted Appaloosa horse –
43 (Baby 33) Farm Bucks (reissue!)


Pink Landrace Pig – (Baby
12,000 Coins) 27 Farm Bucks (permanent addition!)


New Limited Edition
Crops
:


Swiss Chard – 30 Coins,
matures in 1 hour


New Crafting Kitchen
Recipes (level 7)
:


Flavorosa Crumble Bar


Pluot Lemonade


Tart Swiss Chard


New Crafting Workshop
Recipes (level 7)
:


Empress Flower Bouquet


Scented Empress Floral Bag


Pluot Wreath


Shroom Shed Guide, Stage 2

13 March 2013 FarmMaster 0

The
Shroom Shed Feature is broken up into four consecutive stages that
unlock over time. Click the links below to find out more information
about each stage.


Stage 1 Guide: View
Stage 2 Guide: View
Stage 3 Guide: Coming Soon!
Stage 4 Guide: Coming Soon!

Pigs have been spotted in FarmVille 2!
Now,
Gus knows a thing or two about pig taming and he needs your help. Once
you have put up your Shroom Shed, you can earn beautiful decorations and
exclusive prizes by assisting Gus with his tasks. Complete all of the
Shroom Shed tasks to unlock an exclusive Wild Piggy!

Completing your Shroom Shed (Stage 2 Decoration Quests)
Once
your Shroom Shed is up, you may notice that it looks a little bare. In
order to earn some beautiful new decorations, you will need to complete
the Stage 2 Decoration Quests. Currently, only the first and second sets
of quests are available. The other two stages of this feature will
unlock in the coming weeks. Click on the Shroom Shed to open the Quest
Menu.

Each
Decoration Quest has 4 parts that have to be completed. As you complete
a part of a quest line, you will earn a decoration for your Shed. If
you complete all 4 parts of a Decoration Quest, you will win an
exclusive prize for your farm!


Shroom Shed - Stage 2 - FarmVille 2

Click ANY gift
in the Shroom Shed Menu to start working on your Stage 2 Decoration
Quest. As you finish parts of your quest, a green check mark will appear
to indicate what parts of the quest have been completed. The Shed
decorations you earn will be automatically added to your Shroom Shed. 

Note: You may see the Wild Piggy again!

Shroom Shed - Stage 2 - FarmVille 2

As
mentioned earlier in the guide, once you complete the entire Stage 2
Decoration Quest, you will win a special reward! To redeem your special
prize, simply click the turquoise “Redeem” button.

Shroom Shed - Stage 2 - FarmVille 2

Note: Additional decorations (prizes) are available for purchase with Farm Bucks once you’ve redeemed the reward.

Additional Information:

  • If you do not wish to use the Shroom Shed feature, it can be sold (frame only) or stored in your Inventory.
  • You are limited to one Shroom Shed per Farm. 

The Little Startled Piglet!

13 March 2013 FarmMaster 0

Hey Farmers,

Marie
wants to give you a cute baby piglet, but her Wheelbarrow to carry him
has broken! Can you help her fix the Wheelbarrow so she can bring this
little piggy to your Farm?


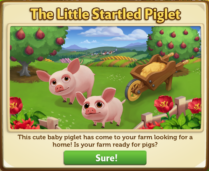
If you are level 8 or higher, you will see the following pop-up. Click on the green “Sure!” button to get started.

After
clicking, you will see the Yorkshire Pig Quest Menu. It shows you all
of the tasks you have to complete to get the baby Yorkshire Pig.

Yorkshire Pig - FarmVille 2

Note:
If you close this menu and need to access it later to see your
progress, just click on the baby Yorkshire Pig wandering around your
farm or the Wheelbarrow.

The Yorkshire Pig Quests

The
Yorkshire Pig tasks require you to place and build a Wheelbarrow,
collect Pig Treats by completing 3 Quests for Barbara, and craft Apple
Scones for a welcome basket. Click on the “Build It!” button to get
started.

Building the Wheelbarrow

To set up your Wheelbarrow, you’ll need to collect the following items:

  • Wheel Axles
  • Lug Nuts
  • Wood Planks

To
collect Wheel Axles, click on the “Post” button to post to your
Facebook wall – you will get the parts when your friends click on it, or
when you click on a similar newsfeed post.

Click
on the “Ask” button to send requests for Lug Nuts and Wood Planks to your
Neighbors. If you do not wish to wait for your friends, you can skip any of
these tasks for Farm Bucks.

 
Yorkshire Pig - FarmVille 2

 Note: You can send requests for materials to your Friends every 18 hours.

Once you have collected the required items, click on the “Start Building!” button at the bottom of the construction Menu. 

Yorkshire Pig - FarmVille 2

Once
you have built your Wheelbarrow, you will need to hire Friends to help
you finish the job! The Wheelbarrow requires four crewmembers, so click
on the “Ask Friends” button to send some crew requests to your Friends.
When they accept, you will see the spots in the Builder Menu begin to
fill. If you do not want to wait for your friends, click the “Hire One”
button to purchase crew members with Farm Bucks. Once you have
successfully filled all 4 spots, click on the “Finish Building” button.

Yorkshire Pig - FarmVille 2

The
next step in this quest is to collect Pig Treats by completing 3 Quests
for Barbara! Click on the blue “Go To Quest” button to complete the
first three of Barbara’s ‘This Little Piggy‘ Quests (Childhood Friend, Pig in the City and Wooly Situation). If you do not wish to complete any of these quests, you can skip this step for Farm Bucks.

Yorkshire Pig - Pig Treats - FarmVille 2

Click on the turquoise “Share” button to share some of your rewards with Friends!

Yorkshire Pig - FarmVille 2

The
final step in the quest is to craft Apple Scones as a welcome basket
for Marie! To craft Apple Scones, you will need the following
Ingredients: Apples, Wheat and Eggs. Click on the blue “Make It!” button to head into the Crafting Kitchen to get started.

Yorkshire Pig - FarmVille 2

Note: If you do not wish to complete these tasks, you can skip this step for Farm Bucks.

After completing all of the requirements in the Yorkshire Pig Quests, you will see the following pop-up.

Yorkshire Pig - FarmVille 2

It
looks like the baby Yorkshire Pig has warmed up to you! Click on the
“Share” button to post a reward feed for your friends. Make sure to feed
your little piglet Baby Bottles so it will grow into an adult Yorkshire
Pig that you can harvest for Mud!

Additional Information:

  • You
    have 18 days to complete the Yorkshire Pig Tasks. If you do not
    complete them, the Pig will disappear and you will be unable to claim
    it!
  • If you want to see how much time you have left to claim the Yorkshire Pig, hover your cursor over him.
  • You can only rescue the Yorkshire Pig once.
  • Yodo need to complete the first three of Barbara’s ‘This Little Piggy‘ Quests (Childhood Friend, Pig in the City and Wooly Situation).

Shroom Shed Guide, Stage 1

7 March 2013 FarmMaster 0

Shroom Shed Guide, Stage 1

The Shroom Shed
Feature is broken up into four consecutive stages that unlock over time. Click
the links below to find out more information about each stage.

Stage 1 Guide: Below

Stage 2 Guide: Coming Soon!

Stage 3 Guide: Coming Soon!

Stage 4 Guide: Coming Soon!

Pigs
have been spotted in FarmVille 2!

Now,
Gus
knows a thing or two about pig taming and he needs your help. Once you
have put up your Shroom Shed, you can
earn beautiful decorations and exclusive prizes by assisting Gus with
his tasks. Complete all of the Shroom Shed tasks to unlock an exclusive
Wild Piggy!

If
you’re level 10 or higher, you’ll see the following pop up. Clicking on “Place Shroom
Shed” will give you the ability to place the Shroom Shed Frame on your Farm. If
you do not wish to use the Shroom Shed or would like to save it for later,
simply click the “Cancel” button and the frame will automatically be sent to
your inventory. 

Building

To
set up your Shroom Shed, you’ll need to collect the following
items:

  • Spore Bags
  • Natural Stones
  • Shovels

To
collect Spore Bags, click on the “Post” button to post to your Facebook wall –
you will get the parts when your friends click on it, or when you click on a
similar newsfeed post.

Click
on the “Ask” button to send requests for Natural Stones and Shovels to your
Neighbors. If you do not wish to wait for your friends, you can skip any of
these tasks for Farm Bucks.

 
Shroom Shed - FarmVille 2
 

Note: You
can send a request for materials to your Friends every 18 hours.

Once you have collected the required items, click on the
“Start Building” button at the bottom of the construction Menu. 

Shroom Shed - FarmVille 2

Now
that the Shroom Shed is almost complete, you will need a little help from your
Neighbors to finish the job. The Sheep Shack requires 4 additional mechanics,
so click on the “Ask Friends” button to send some crew requests to your
Friends. When they accept, you will see the spots in the Build Menu begin to
fill. If you do not wish to wait for your friends, click the “Hire One” button
to purchase crew members with Farm Bucks.


Shroom Shed - FarmVille 2

Completing
your Shroom Shed (Decoration Quests)

Once
your Shroom Shed is up, you may notice that it looks a little bare. In order to
earn some beautiful new decorations, you will need to complete the Decoration
Quests. Currently, only the first set of quests are available. The other three stages of
this feature will unlock in the coming weeks. Click on the Shroom Shed to open
the Quest Menu.

Shroom Shed - FarmVille 2

Each
Decoration Quest has 4 parts that have to be completed. As you complete a part
of a quest line, you will earn a decoration for your Shed. If you complete all
4 parts of a Decoration Quest, you will win an exclusive prize for your farm!


Shroom Shed - FarmVille 2

Click
ANY gift in the Shroom Shed Menu to
start working on your Decoration Quest. As you finish parts of your quest, a
green check mark will appear to indicate what parts of the quest have been
completed. The Shed decorations you earn will be automatically added to your Shroom
Shed. 

Note: You may see the Wild Piggy again!

Shroom Shed - FarmVille 2

As
mentioned earlier in the guide, once you complete the entire Decoration Quest,
you will win a special reward! To redeem your special prize, simply click the
turquoise “Redeem” button.

Note: Additional
decorations (prizes) are available for purchase with Farm Bucks once you’ve
redeemed the reward.

Additional
Information
:

  • If you do
    not wish to use the Shroom Shed feature, it can be sold (frame only) or
    stored in your Inventory.
  • You are limited to one Shroom Shed per Farm. 

The Luck of the Irish!

5 March 2013 FarmMaster 0

Greetings, Farmers!

New
Limited Edition ‘The Luck of the Irish’ items are now available in the
General Store. Check out the information below for more details about
our latest release and be sure to let us know what your favorite new
addition is! It is hard to pick just one, but the Irish Cob Horse sure
is adorable!

New Limited Edition items:

  • Ivy Cottage – 43 Farm Bucks
  • Shamus Shillelagh – 14 Farm Bucks
  • Irish Bouquet – 8 Farm Bucks
  • Eternal Braid Floral Trellis – Farm Bucks
  • Celtic Cauldron – 2,250 Coins

New Limited Edition Trees:

  • Blackthorn Tree – 12 Farm Bucks
  • Irish Strawberry Tree – 12 Farm Bucks

New Limited Edition Animals:

  • Irish Cob Horse – 43 (Baby 30) Farm Bucks
  • Irish Moiled Cow – 43 (Baby 30) Farm Bucks

New Limited Edition Crops:

  • White Clover – 40 Coins, matures in 2 hours

New Crafting Kitchen Recipes:

  • White Clover Tea – Level 7
  • Irish Strawberry Shortcake – Level 7
  • Blackthorn Jam – Level 7

Grove Guide!

2 March 2013 FarmMaster 0

Got
Tree crowding? Save some Water and space on your Farm with Groves! Store up to
four Trees and water all at the same time with one single click.

If
you are level 10 or higher, you will see the following pop-up. Click on “Place Grove”
to get started.


Building
the Grove


Your first step
is collecting construction parts. You will need the following items to start
building your Grove:

  • Buckets of Paint
  • Bags of Grove Soil
  • Wood Planks

Click
on the “Ask” button to send Building Material requests to
your Neighbors. If you do not wish to wait for your friends, you can skip any
of these tasks for Farm Bucks.


Groves - Start

Note: You can send
a request for materials to your Friends every 18 hours.


Once you have
collected the required items, click on the “Start Building!” button at the
bottom of the construction Menu.


Groves - Start Build

Now
that the Grove is almost complete, you will need a little help from your
Neighbors to finish the job. The Grove requires 4 additional mechanics, so
click on the “Ask Friends” button to send some crew requests to your Friends.
When they accept, you will see the spots in the Build Menu begin to fill. If
you do not wish to wait for your friends, click the “Hire One” button to
purchase crew members with Farm Bucks.


Groves - Finish

Using
the Grove

In order to use the Grove, you will need a total of
four Trees. Click on the empty Grove to open the main menu. 


Groves - Fill

Inside
the empty Grove, click on the green “Add Trees” button to use the Move Tool and
place up to four Trees. Trees will take up
one spot in your Grove regardless of the type (see below: Pecan Tree).


Groves - Pecan

Adding
& Removing Trees


Once you have watered your Trees, you cannot remove
them from the Grove until they have matured. If you wish to remove them from
the Grove before this, you can use Speed-Grow to instantly mature your Trees so
they can be removed.

Note: Any watered Tree outside of the Grove will lose its Water once placed
inside the Grove.

To
add a Tree in the Grove, click on the Grove and then the green “Add Tree”
button. All of your available Trees will automatically highlight in blue.


Groves - Move

Tip: Because the
Grove timer is an average of all of the Trees inside, keep groups of Trees
together to reduce the time it takes to mature. Bonus: This will also maximize the Tree output!

To
remove a Tree from the Grove, open the Tools menu (tools icon) on the bottom right
hand corner of the game screen. Select the “Move Tool” to click on the Tree,
then drag and drop it into the Grove.


Groves - Remove Tree

Additional
Information
:

  • If you do not wish to use the Grove
    feature, the first Grove can be sold (frame only) or stored in your
    Inventory.
  • If you want to see how much time you
    have left to harvest, hover your cursor over the Grove.
  • You can can have as many Groves on your farm as you like! 
  • You can purchase additional Groves in
    the General Store for Coins and Farm Bucks.
  • Rotate the Grove to view a different
    angle! (
    Rectangular Grove only)

Sheep Shack Guide!

27 February 2013 FarmMaster 0

Hey
Farmers,

The
Sheep Shack has arrived in FarmVille 2!

Use this new building to store your Prized Sheep and feed
them all with a single click! If that wasn’t enough, Prized Sheep in the Shack
will only require half the Feed and you also gain an additional
+25 Feed Capacity.

If
you are level 9 or higher, you will see the following pop-up. Click on “Place Sheep
Shack” to get started.


Building
the Sheep Shack


Your first step is collecting construction parts. You will need the following
items to start building your Sheep Shack:

  • Sheep Railings
  • Crooks
  • Sod

To
collect Sheep Railings, click on the “Post” button to post to your Facebook
wall – you will get the parts when your friends click on it, or when you click
on a similar newsfeed post.

Click
on the “Ask” button to send requests for Crooks and Sod to
your Neighbors. If you do not wish to wait for your friends, you can skip any
of these tasks for Farm Bucks.

Sheep Shack - FarmVille 2

Note: You can send
a request for materials to your Friends every 18 hours.


Once you have collected the required items, click on the “Start
Building!” button at the bottom of the construction Menu. 

Sheep Shack - FarmVille 2

Now
that the Sheep Shack is almost complete, you will need a little help from your
Neighbors to finish the job. The Sheep Shack requires 4 additional mechanics,
so click on the “Ask Friends” button to send some crew requests to your
Friends. When they accept, you will see the spots in the Build Menu begin to
fill. If you do not wish to wait for your friends, click the “Hire One” button
to purchase crew members with Farm Bucks.

Sheep Shack - FarmVille 2

Using
the Sheep Shack

Click on the Sheep Shack to open the main
menu. 

Sheep Shack - FarmVille 2

Inside
the Sheep Shack you will see placements that you can fill with Prized Sheep. Prized
Sheep will take up one spot in your Shack regardless of breed (see below: White
Sheep).

 
Sheep Shack - FarmVille 2

Adding
& Removing Sheep

To
add Prized Sheep in the Shack, check the “Auto Fill” box and click on the green
“Add Prized Sheep” button. All of your Prized Sheep will automatically jump
into the Shack!

To
remove a Prized Sheep from the Shack, open the main menu and click on the red
“–“ (minus symbol) box on the bottom left hand corner of the placement slot
(see below: A).

The
Sheep cards have symbols on them to indicate different things:


Sheep Shack - FarmVille 2
 

A. Minus
Symbol
: Remove Sheep


B. Feed: How much Feed the Sheep will consume


C. Fleece: How much Sheep Cheese the Sheep will produce (see
below: Feeding).

Feeding

Prized
Sheep stored in the Shack will eat half of the amount of Feed they
normally do. For example, a Sheep that eats 8 Feed outside of the Shack will eat 4 Feed when inside the Shack. Note:
Any Prized Sheep that would normally eat an odd amount of feed outside of
the Sheep Shack will be rounded up by one. For example, a Sheep that would
normally eat 9 Feed will only need 5 Feed when stored in the Sheep Shack.

Golden Fleece

Each time you harvest the Sheep Shack you have a chance of
finding a Golden Fleece, which can be used in exclusive Crafting Workshop
Recipes. Golden Fleece will linger on your farm similar to Prized Crops, so be
on the lookout for them after feeding!

Note: Clicking on
the Golden Fleece will automatically add it to your Inventory.

Sheep Shack - FarmVille 2

Tip: Fill up your
Sheep Shack for a greater chance of finding more Golden Fleeces!

Additional
Information
:

  • Once your Sheep Shack is completed, you now have +25 Feed Capacity!
  • The timer for your Sheep Shack will pause when placed in Storage, and
    then resume once placed back on your farm.
  • If you do not wish to use the Sheep
    Shack feature, it can be sold (frame only) or stored in your Inventory.
  • If you want to see how much time you
    have left to harvest, hover your cursor over the Shack.
  • You are limited to one Sheep Shack per
    farm.
  • Rotate the Shack to view a different
    angle!

Land Expansions Guide!

26 February 2013 FarmMaster 0

Few Expansions are for coins and some of them are for Farm Bucks. When you reached in the higher level than you need to expand so here are writing all details about the expansion for your farm.
Expansion 1: Starting Land in the Game

Expansion 2:
 Feed Mill
  • 175 coins
Expansion 3: Family Well
  • Have 4 Eggs
  • 1,000 coins
Expansion 4: Crafting Kitchen
  • Reach Level 5
  • Have 5 Trees
  • Gather 6 Milk
  • 2,000 coins
Expansion 5: West Meadow, Cottontail Rabbits
  • Reach Level 8
  • Craft 2 Apple Scones
  • Gather 5 Garden Clippers from friends
  • 20,000 coins
Expansion 6: Milk Meadow, Longhorn Cows, Extra Water Trough
  • Reach Level 11
  • Have 11 Adult Animals
  • Gather 7 Iron Hoes
  • 50,000 coins
Expansion 7: Playground, Tire Swings
  • 100 Farm Bucks for Early Access
Expansion 8: East Woodlands, Pine Trees for Logs
  • 100 Farm Bucks for Early Access
Expansion 9: The Horse Wilds, Appaloosa Horse and Flags
  • 100 Farm Bucks for Early Access
Expansion 10: Waterpatch, Extra Well
  • 100 Farm Bucks for Early Access
Expansion 11: The Old Silo, More Feed Silo
  • Reach Level 15
  • Craft 3 Apple Pies
  • Gather 10 Pitch Forks
  • 125,000 coins
Expansion 12: Mango Gardens, Peach Trees, Ivy Trellis Arches
  • Reach Level 20
  • Have 1 Adult Black Arabian Horse
  • Gather 13 Chainsaws
  • 300,000 coins
Expansion 13: Golden Chicken Colony, Cochin Chickens, Concrete Birdbaths
  • Reach Level 24
  • Craft 5 Banana Cream Cakes
  • Gather 15 Produce Crates
  • 500,000 coins
Expansion 14: Apricot Acres, Apricot Trees, Dinner Bell
  • Reach Level 28
  • Have 8 Saddles
  • Gather 18 Garden Gloves
  • 750,000 coins
Expansion 15: Camarillo Country, Camarillo Horses, Hitching Posts
  • Reach Level 30
  • Craft 8 Apricot Trifles
  • Gather 20 Garden Clippers
  • 1 million coins

New Fertilizer Bin Guide!

20 February 2013 FarmMaster 0

Hey Farmers,

Do you need more Fertilizer? If so, the new Fertilizer Bin
is for you! Feed your animals to fill the Bin and then harvest it to earn free
Fertilizer for your crops. If that wasn’t enough, you also have a chance of
earning Speed-Grow when you collect from your Fertilizer Bin, so head on over
to FarmVille 2 and start building today!

If you are level 8 or higher, you will see the following
pop-up. Click on “Place Fertilizer Bin” to get started.


Building the Fertilizer Bin


Your first step is collecting construction parts. You will need the
following items to start building your Fertilizer Bin:

  • Green Paint
  • Grass Clippings
  • Wood Plank

For the Green Paint, click on the “Post” button to post to
your Facebook wall – you will get the parts when your friends click on it, or
when you click on a similar newsfeed post.

To collect Grass Clippings and Wood Planks, click on the
“Ask” button to send requests for the items to your Neighbors.

You can also purchase any of these items above for Farm Bucks
if you do not wish to wait for your friends to respond to your requests or newsfeed
posts.

Fertilizer Bin - FarmVille 2

Note: You can post a request for Green Paint to your
newsfeed every 16 hours and send requests for Grass Clippings and Wood Planks to
your Friends every 18 hours.


Once you have collected the required items, click on the “Start Building!”
button at the bottom of the construction Menu. 

Fertilizer Bin - FarmVille 2

Now that the Fertilizer Bin is almost complete, you will
need a little help from your Neighbors to finish the job. The Fertilizer Bin
requires 4 additional mechanics, so click on the “Ask Friends” button to send
some crew requests to your Friends. When they accept, you will see the spots in
the Build Menu begin to fill. If you do not wish to wait for your friends,
click the “Hire One” button to purchase crew members with Farm Bucks.

Once you have successfully filled all 4 spots, click on the
“Finish & Share” button.

 
Fertilizer Bin - FarmVille 2

Using the Fertilizer Bin

You must have at
least one Adult Animal on your farm that is
not Prized for the Bin to be
functional. When you feed your Animals, they will fill your Fertilizer Bin
Meter with compost, which is a new type of material
that can only be
used with this feature.

Collected
compost
will be automatically added to your Fertilizer Bin Meter. Once your
Meter is full, you can harvest the Bin with a Fertilizer Rake
(see below) for extra Fertilizer.

To see your Meter, click on the Fertilizer Bin to open the
main menu. Your Meter is located on the left-hand side of this screen. The
number at the bottom of the Meter indicates how much compost you need to
collect and your current progress towards this goal.

Fertilizer Bin - FarmVille 2

Additionally, you can also see your progress by hovering
your mouse over the Bin to display the green progress bar.

Fertilizer Bin - FarmVille 2

Fertilizer Rakes & Harvesting your Bin

Once you have
collected the necessary amount of compost, you will need one Fertilizer Rake to
harvest your bin. You can craft your Rake in the Workshop with two Pieces of
Wood. Click on the turquoise “Craft” button to head on into the Crafting
Workshop.

Fertilizer bin - FarmVille 2

Once you are inside
the Crafting Workshop, you will need two “Piece of Wood” to craft the Rake.

Fertilizer bin - FarmVille 2

Note: If you do
not want to craft a Fertilizer Rake, you can use Farm Bucks to skip these steps
and get it right away.

A cute butterfly
flying over the Bin will indicate it is full. Once you have crafted your
Fertilizer Rake, harvest your Bin by clicking on it. When you harvest your Bin,
you will always produce extra Fertilizer, which can be used on Crops &
Trees.

Fertilizer bin - FarmVille 2

Note: Any extra
Fertilizer you produce will be automatically added to the Fertilizer total at
the top of the game screen.

Fertilizer bin - FarmVille 2

In addition to Fertilizer, you have a chance of earning
Speed-Grow when you harvest your Bin!

Additional Information:

  • Minimum of one Adult Animal (non-Prized) on any
    given farm is required to use the Fertilizer Bin.
  • Rotate the Bin to view a different angle!
  • If you do not wish to use
    the Fertilizer Bin feature, it can be sold (frame only) or stored in your
    Inventory.
  • If you want to see how much
    compost is needed to harvest, hover your cursor over the Bin.
  • Limited to one Fertilizer
    Bin per farm.
  • You can only have a total
    of 5 Fertilizer Rakes in your Inventory at one time. Note: You can purchase additional Rakes (more than 5) with Farm Bucks.

Build Fertilizer Tank!

15 February 2013 FarmMaster 0

FarmVille 2 Fertilizer Tank has arrived now you can build it and you
will be able to make and store fertilizer there to get the double output
from your crops.
As we have just explained to you very soon we are going
to build a fertilizer tank that we will never miss fertilizer can
fertilize our crops and have every time you reap the vessel a chance to
get 1 + rapid Grow Obviously this new build comes with a series of 8 new
missions we will give you full details.


Success fertile 1 of 8 – A dirty secret
I discovered a secret any beast animals produce fertilizer. Fantastic!

  • Place a fertilizer tank to recover this valuable resource
  • Tomato crop plots to return land
  • Draws water in your well water for your crops

Success fertile 2 of 8 – In the tank up to the neck
Despite the smell, I know you do not rechigneras task.

  • Retrieves pairs of gloves for the compost to avoid get dirty
  • Harvesting trees for wood
  • Factory rake fertilizer use your fertilizer tank

Success fertile 3 of 8 – Ready to collection
Use this fertilizer tank and double your production.

  • Completes the fertilizer tank
  • Feed your adult hens to begin filling the tank fertilizer
  • Uses the tank when it is full fertilizer

Success fertile 4 of 8 – The right tools
You’ll have to use special tools for fertilizer. Especially, clean them after each use.

  • Retrieves shovels compost for fertilizer
  • Feed your adult goats to fill your tank with fertilizer
  • Manufactures rakes fertilizer for fertilizer tank

Success fertile 5 of 8 – favorite beans
These beans will not stay here long, but fertilizer can double the production of each crop.

  • Fertilize 20 plots of beans to understand my advice
  • Harvest 20 plots of beans to get double resources
  • Prepares sauces appetizer bean

Success fertile 6 of 8 – On the application!
Do not release the pressure. The fertilizer requires compliance cycle. Feed your animals and their excrement recovers .

  • Own wood to make the rakes
  • Manufactures fertilizer rakes for spreading best
  • Uses the fertilizer tank and gets great rewards fragrant

Success fertile 7 of 8 – It’s your choice
The fertilizer suitable for all crops. If only we could double production animals easily.

  • Retrieves compost buckets for all the fertilizer
  • Fertilizes the crops of your choice
  • Feed your adult hens to fill your tank with fertilizer

Success fertile 8 of 8 – Again!